 Last week we finally managed to play my ‘Massena’s Counter-Attack at Wagram’ scenario. We had originally planned to play this scenario at Christmas, but had to cancel due to sickness. This will probably have been our last game for a while, due to the current round of Plague, so it’s a good job that it was a good ‘un…
As usual, the rules are Napoleon’s Battles 4th Edition, which is a ‘grand-tactical’ ruleset, where each unit represents a brigade or large regiment and each model gun represents a battery. the models are all 15mm figures from my own collection and are mostly AB Figures, though Massena’s Carriage is an old model by Old Glory. The Hessian, Badener and Bavarian infantry are all old models by Battle Honours (sculpted by Tony Barton from the days before he started AB Figures).
 Above: The opening situation at approximately 10am on 6th July 1809. Massena’s IV Corps has been pulled out of heavy fighting at Aderklaa with the aid of immense fire-support from a grand battery established by the Emperor. It has now been sent directly south with orders to re-take the old battlegrounds of Aspern & Essling and to drive back Klenau’s Austrian VI Korps, thereby eliminating the threat to the lines of communication across the Danube. The Emperor has reinforced IV Corps with St Sulpice’s Cuirassier Division from the Reserve Cavalry Corps, while Durutte’s Division of the Army of Italy and Wrede’s Bavarian Division stand by in reserve. Boudet’s French Division is a short distance south of the battlefield, where it has sheltered behind earthworks, having been repulsed by (and lost its artillery to) Vincent’s Austrians.
 Above: The battlefield as it appeared on our table. Looking from East toward the West: The French army is closest to the camera, marching in column toward the village of Essling, with their flank screened by Lasalle’s Light Cavalry Division. Note that this landscape was known as the Marchfeld and consisted of flat, largely featureless farmland on the flood-plain north of the Danube, dotted with villages and criss-crossed with roads and tracks. However, I only had sufficient roads available to portray the main highways and not the network of minor roads that crisscrosses the battlefield. This was quite a contrast to the ‘jungle warfare’ of our last 1809 game – the Battle of Neumarkt!
 Above: Another view of the battlefield, looking from the South toward the North: The villages of Aspern (on the left) and Essling (on the right) are nearest the camera. These villages had been the scene of bitter fighting over 21st-22nd May 1809, during Napoleon’s first attempt to establish a bridgehead north of the Danube. The area had been fortified by the Austrians following the French withdrawal to Lobau Island, but these fortifications proved worthless when Napoleon completely outflanked the fortified line on 5th July.
 Above: The most advanced outpost of Klenau’s VI Corps is Vécsey’s Brigade of Vincent’s Division, which is formed from the understrength 6th and 7th Grenze Infantry Regiments. They dig themselves into the battered ruins of Essling village, load and cock their muskets and wait for the French to come into range…
 Above: The rest of Vincent’s Division is clustered around the village of Aspern. Wallmoden’s Brigade (formed from the 6th & 7th Hussar Regiments), supported by a 6pdr cavalry battery, moves out to challenge Lasalle’s cavalry, while Mariassy’s Freikorps Brigade digs into the ruins of Aspern village.
 Above: On Vincent’s left and forming the centre of VI Korps is Vukassovich’s Division which is formed entirely of Hungarian infantry regiments. Splényi’s Brigade (the larger unit with the white flag) is formed of the 31st and 51st Regiments, while Hoffmeister’s Brigade is formed from the 39th and 60th Regiments (these have been split into two separate units). Klenau has also assigned the corps 12pdr position battery to Kottulinsky’s command.
 Above: On Klenau’s left is Hohenfeld’s Division. This weak division consists only of one brigade (Adler’s), but for game purposes has been split into the line infantry element (14th & 59th Regiments) and the Landwehr element. This line looks very thin…
 Above: Guarding Klenau’s left flank is St Julien’s Division of Kollowrat’s III Korps. Here on the right is part of Lilienberg’s Brigade (1st and 23rd Regiments), while the rest of Lilienberg’s Brigade (12th Regiment) forms the second line. On the left is Bieber’s Brigade (20th and 28th Regiments). The division has been reinforced by the 2nd Uhlans, a 6pdr cavalry battery, a 12pdr position battery and by Wratislaw’s Bohemian Landwehr Brigade, which is holding the village of Breitenlee.
 Above: Marshal Masséna had been wounded at Aspern-Essling and is still unable to ride a horse. So at Wagram he’s roaming the battlefield in a very conspicuous white phaeton, drawn by white horses! This is a very old model by Old Glory that originally included four horses and a driver, though these seem to have disappeared somewhere along the way. In game terms he moves at the rate of a supply wagon (18 inches, which is half the normal speed of a general at 36 inches) and needs to perform wheeling manoeuvres, whereas generals may normally move at will in any direction without having to wheel.
 Above: Screening IV Corps’ march is Lasalle’s Light Cavalry Division, which normally consists of two brigades (Piré’s and Bruyère’s), but on this occasion has been reinforced by the addition of Marulaz’s IV Corps Cavalry Brigade. Marulaz’s Brigade is an interesting mix of the French 23rd Chasseurs, Bavarian 1st Chevauxlegers, Hessen-Darmstadt Chevauxlegers and Baden Light Dragoons; here represented by the Baden Light Dragoons, resplendent in their sky-blue coats.
 Above: On the opposite side of the column is St Suplice’s Cuirassier Division, consisting of the Cuirassier brigades of Fiteau and Guiton, plus an 8pdr horse battery.
 Above: At the head of IV Corps is Legrand’s Division, consisting of Ledru’s French Brigade (some sources state that Friedrichs was in command of this brigade), the 1st and 2nd Baden Infantry Regiments, belonging to Neuenstein’s Brigade and French and Baden 6pdr horse artillery.
 Above: Another view of Legrand’s Division, better showing the Baden 1st Regiment (red facings, mostly-yellow flag), 2nd Regiment (yellow facings, crimson flag) and Baden artillery (grey gun and Bavarian-style uniforms).
 Above: As they close on Essling, Ledru’s Brigade, the 2nd Baden Regiment and the French artillery deploy for the assault as Vécsey’s Grenzer pepper them with long-range fire.
 Above: The rest of IV Corps turns to the right and advances on Breitenfeld. Nearest the camera is Molitor’s Division (Leguay’s & Viviez’s Brigades). In the centre is Schinner’s Hessen-Darmstadt Contingent (the Leibgarde Regiment and Leib Infantry Regiment) and on the left of the line is Carra St Cyr’s Division (Cosson’s and Dalesme’s Brigades). Molitor and St Cyr each have a 6pdr horse battery under command, while Molitor has been given the two corps reserve 12pdr batteries (one of which is just visible at the bottom of the picture).
All six of these brigades have already suffered casualties during the fighting at Aderklaa and this is determined by the roll of 1D4 for each brigade, equating to that many figures being removed at the start of the game: Leguay’s Brigade nearest the camera lost 2 (indicated by the marker), Viviez’s Brigade lost 4 (a whole base removed), the Leibgarde lost 1, the Leibregiment 4, Dalesme lost 3 and Cosson 4; a high rate of loss (18 of a possible maximum of 24) before the game even started.
 Above: At Aspern, Lasalle’s French Light Cavalry advance to threaten the Austrian right flank and cut Vécsey’s detachment off from any support. The challenge is met by Wallmoden’s hussars, who charge the nearest French cavalry brigade (Bruyère’s). However, Wallmoden soon finds that he has bitten off more than he can chew and his hussars are soon fleeing for the safety of Kottulinsky’s Hungarian infantry lines. It’s now Bruyère’s turn to lose control of his men, as they launch a ragged charge against the isolated cavalry battery front of Aspern. Canister fire shreds Bruyère’s Chasseurs, but they charge home and sabre the gunners. However, further losses are suffered to skirmisher fire from Aspern village and Bruyère is soon forced to order his men to flee for the safety of their own lines!

 Above: An overview of the initial clashes. In the foreground, St Julien’s 12pdr battery has started engaging the advancing enemy infantry, while in the distance the cavalry of both sides retire to lick their wounds. The French cavalry has suffered heavier losses, but they have more cavalry to lose, added to which the Austrians have lost one of their precious few artillery batteries.
 Above: Meanwhile at Essling, both sides have suffered losses from a desultory exchange of musketry, but the addition of a French battery tips the balance and the Grenzer are soon disordered from the close-range heavy fire. With the Grenzer suppressed by fire, Ledru’s Brigade and the 2nd Baden Regiment launch their assault on Essling. In a gruelling melee, the two sides are initially well-matched.
 Above: Bruyère’s battered Chasseurs finally rejoin the ranks of Lassalle’s Division. However, the Austrian 12pdrs have found the range and the Chasseurs are soon rendered hors de combat.
 Above: Attritional losses finally force Vécsey’s Grenzer to withdraw from Essling, which they do successfully, falling doggedly back along the causeway road toward Aspern. However, they have suffered heavy losses and the Badeners are hot on their heels! A combination of the Badeners and long-range artillery fire finally breaks the Grenzer.
 Above: Another overview of the battle. With the immediate threat coming from Lasalle’s and St Sulpice’s cavalry, Kottulinsky orders his Hungarians to form square. St Sulpice decides to look for easier pickings and wheels his division right, aiming to support the infantry attack on Breitenlee. However, as he passes the left flank of Massena’s line, his two brigades are arranged in column, one behind the other. Spotting this move, the commander of the 2nd Uhlans realises that he might never get a better chance to take on the Cuirassiers… His Uhlans are in line, while the Cuirassiers are in column… Breaking the first brigade will disorder the second brigade behind it… However, it all goes horribly wrong for the Uhlans and re-roll markers fail to rectify the situation as the brave Uhlans are routed…

 Above: With the Uhlans’ brazen charge routed, Guiton manages to retain control of his Cuirassiers and launches a charge at the nearest Austrian infantry unit (Bieber’s Brigade). Thankfully for the Austrians, Bieber is able to form square and the supporting 12pdr battery quickly slews its guns around to engage the approaching Cuirassiers. The Cuirassiers are beaten off with heavy casualties and fall back to lick their wounds…
 Above: Bieber’s jubilation is short-lived as the Hessian Leibgarde Regiment launches a charge on his squares. The Austrian whitecoats are unable to reform their lines in time and are quickly routed, taking the 12pdr gunners with them! St Julien can only watch in horror as his division starts to disintegrate.
 Above: The 12th Regiment wheels left to engage the Hessians, but on their left the rest of Lilienberg’s Brigade is routed by concentrated French 12pdr fire! Once again, the Austrian gunners are swept away with the fleeing Austrian infantry. St Julien and the 12th Regiment now find themselves fighting on alone against the massed guns and infantry of Molitor’s Frenchmen and Schinner’s Hessians. The Bohemian Landwehr holding Breitenlee look on nervously…

 Above: Behind Breitenlee, a panicked mass of fugitives is streaming back down the Vienna Road. Klenau himself gallops over to rally them. Thankfully, the 2nd Uhlans and Lilienberg’s Brigade react instantly to his entreaties, though Bieber’s Brigade stubbornly refuse to pick up their arms.
 Above: Back at Breitenlee, Molitor’s infantry make short work of the Austrian 12th Regiment and along with Schinner’s Hessians, they start to put pressure on the Bohemian Landwehr, who quickly crumble. In the distance, St Cyr’s Division is directed to engage Hohenfeld’s Division in the centre of the plain. Adler’s Brigade is quickly routed and Hohenfeld rides to steady the Landwehr, who are now lined up in St Cyr’s sights.

 Above: With Lilienberg, the Uhlans and the 12th Infantry Regiment rallied, St Julien leads his weary division forward again. However, Klenau is still trying to rally Bieber’s Brigade and they’ve now been joined by Adler’s Brigade from Hohenfeld’s Division. Adler however, quickly rallies.
 Above: St Julien’s counter-attack is too late for the Bohemian Landwehr, who are thrown from Breitnlee at bayonet-point by the Hessian Leibgarde and scattered to the winds.
 Above: In the centre, St Cyr’s Division comprehensively routs Hohenfeld’s Landwehr who flee to Hirchstatten. Tragically, Hohenfeld is mortally wounded in the melee. He is swept along to Hirchstatten by the routing Landwehr, but soon succumbs to his wounds. His second-in-command, Generalmajor Von Ersatz takes command of the division and rides to bring Adler’s Brigade back into the fight.
In the distance, General Legrand’s Division has been slow to exploit its success at Essling and is still some way from launching an assault on Aspern. This is largely due to Masséna concentrating his attention on the assault on Breitenlee. However, a strange lull now falls on the battlefield as Masséna turns his carriage around to go and find Durutte’s and Wrede’s reserve divisions, who are resolutely remaining stationary at Raasdorf. Unfortunately, the bulk of Masséna’s divisional commanders now take this opportunity to light up a Galloise and get the kettle on…

 Above: St Julien takes some small measure of comfort as the Hessian Leibregiment (already badly weakened by earlier combat at Aderklaa) is destroyed by his counter-attack. However, they take losses from the vengeful Leibgarde, which has established itself firmly behind the walls of Breitenlee.
 Above: In a desperate attempt to delay the French advance, the 2nd Uhlans launch themselves at Cosson’s Brigade of St Cyr’s Division. Sadly for the Austrian horsemen, the French infantry form square and repulse the unfortunate Uhlans once again.
 Above: Fiteau’s Cuirassiers extract supreme vengeance for the destruction of the Hessian Leibregiment as they smash into the Austrian 12th Infantry Regiment. The whitecoats fail to form square in time and are routed. Lilienberg’s Brigade finds itself disordered by their fleeing comrades and is milling in disorder as Fiteau’s Cuirassiers complete the destruction of St Julien’s hapless Division.
 Above: Guiton’s battered Cuirassier Brigade meanwhile, has a crack at Adler’s rallied Brigade, but this time the whitecoats manage to form square and Guiton retires in disorder.

 Above: Meanwhile at Aspern, Legrand’s Division finally throws itself at the walls of the village. However, over-confidence is Legrand’s undoing, as Mariassy’s Freikorps are made of stern stuff and easily repel the French and Baden infantry. Lasalle meanwhile, attempts to insert his division through the gap between Aspern and Kottulinsky’s Hungarian squares in an attempt to take on Wallmoden’s Hussars, though his horsemen are shot to pieces by flanking fire, resulting in Piré’s Brigade being routed and Marulaz becoming disordered. Kottulinsky’s 12pdr gunners meanwhile, finally manage to hit something as they silence the French horse batteries harassing the Hungarian squares.
 Above: With Guiton’s Cuirassiers disordered, the 2nd Uhlans launch yet another charge against them, yet with no more luck than the previous two attempts! The unlucky Uhlans are this time driven from the field, along with the rest of St Julien’s Division.
With his left wing completely collapsed and with two infantry divisions approaching from Raasdorf, Klenau decides that now is the time for his corps to break contact and save themselves to fight another day…
My thanks to Phil, Andy and Rhys at the Carmarthen Old Guard for a great game! Let’s hope that it’s not too long before we’re able to have another one…

 I’ve been side-tracked on other projects just lately and haven’t really progressed with my 15mm Cold War Cloggy army. However, I recently found some spare models cluttering up space in my locker, so decided to paint them up as 1980s Dutch vehicles. They don’t really fit with my battlegroup at the moment, but might at some point in the future if I decided to expand it.
 First is an M106A1 107mm Mortar Carrier. This vehicle was based on the ubiquitous M113 Armoured Personnel Carrier and was widely used by a number of NATO and other nations’ armies. However, the Royal Netherlands Army only used a small number of them, as their standard mortar was the French towed 120mm MO-120-RT, which was towed by the YPR-765 PRMR variant. M106A1 were only used by the Recce Battalions.
 There were three Squadrons per Recce Battalion. Squadrons had a headquarters consisting of 1x M113 C&V 25 recce vehicle, 1x M557 command vehicle and a pair of M113A1 APCs carrying ground-surveillance radar. The Squadron then had three Platoons, each with a headquarters of 1x M113 C&V 25, another 4x M113 C&V 25 divided into two sections of two vehicles, a tank section of 2x MBTs, an infantry section (armed with an 84mm Carl Gustav) mounted in 1x M113A1 and a mortar section with 1x M106A1. In total the Squadron therefore had 16x M113 C&V 25, 1x M577, 6x MBT, 5x M113A1 (two with GSR) and 3x M106A1.
 I do my games at a 1:2 or 1:3 ratio, so in game terms, my Recce Squadron (when complete) will have 7x M113 C&V 25, 2x M113A1 (one with GSR), 3x MBT, 3x infantry stands and 1x M106A1. I just need to paint another 5x M113 C&V 25. The models above are all by Team Yankee/Flames of War/Battlefront Miniatures.
 Next up is a quartet of Centurion Mk 5/2 tanks. These venerable old beasts of war were still being used in front-line service by the Royal Netherlands Army right up until 1987, thanks largely to the delays in delivery of the Leopard 1-V:
 These models are by QRF Models. I must however own up here and say that to be true Dutch Centurion Mk 5/2 NLs of the 1980s they should really have a Leopard 1-type IR searchlight box to the left of the main gun and they usually stowed a road-wheel or two on the glacis plate, so these are rather ‘clean’.
 Of all the articles on this blog, my article on the
  There are two teams per pack: four crew figures and two launchers and they are sculpted and cast to the same exceptionally high standard as the rest of this superb little range of models. As mentioned before, they use a very lightweight, hard metal (zinc?) alloy that is damn-near impossible to cut or trim with normal modelling tools, but there is thankfully no flash and no mould-slip to removed; just a few small air-vent runners that easily snap off.As can be seen, these are excellent models and fit in extremely well with Team Yankee models, both in terms of size and style.
 As ponderous as an Austrian army corps on campaign, this series is finally trudging to it’s destination and the loyal camp followers can finally… do whatever it is that camp followers do…

 Above: Grenadier Battalion ‘Bissingen’. This battalion was made up of grenadiers from Infantry Regiments #3 ‘Archduke Charles’ (sky blue facings), #50 ‘Stain (violet facings) and #58 ‘Beaulieu’ (black facings). As each of my units represents an entire brigade, I have chosen this battalion to represent Hammer’s Grenadier Brigade of D’Aspré’s Division.
 Above: Grenadier Battalion ‘Brzeczinsky’. This battalion represents Merville’s Grenadier Brigade of D’Aspré’s Division and was made up of contingents from Infantry Regiments #24 ‘Strauch’ (dark blue facings), #30 ‘De Ligne’ (light pike grey facings) and #41 ‘Kottulinsky’ (sulphur yellow facings).
 Above: Grenadier Battalion ‘Frisch’. This battalion represents Melgum’s Grenadier Brigade of Prochaszka’s Division. The battalion comprised contingents from Infantry Regiments #10 ‘Mittrowsky’ (parrot/poplar green facings), #11 ‘Rainer’ (rose pink facings) and #47 ‘Vogelsang’ (steel green facings).
 Above: Grenadier Battalion ‘Hahn’. This battalion represents Steyrer’s Grenadier Brigade from Prochaszka’s Division. The battalion was made up of grenadiers from Infantry Regiments #2 ‘Hiller’ (Emperor yellow facings), #33 ‘Sztarray’ (dark blue facings) and #39 ‘Duka’ (poppy red facings). These were all Hungarian regiments, so the troops are wearing their tight sky-blue Hungarian pantaloons, have pointed Hungarian cuffs and the battalion has a Hungarian-pattern Ordinärfahne, with the Arms of Hungary at the centre.
 Right that’s it for now! There will be more Austrians later this week, in my report from our weekend refight of Massena’s counter-Attack at Wagram. In the meantime, here’s another Hungarian general I painted yesterday; I had a sudden brainwave and used the AB Figures ‘Prussian Hussar ADC’ figure, as his panache-style feather plume looked just the job! I decided to paint him wearing the campaign-dress pike-grey pelisse and I have to say that I’m very pleased with how he came out (sorry for the poor lighting).
 Once in a while, a you find a blog post that gives you that ‘Eureka!’ moment and gives you a whole new perspective on the hobby…
 Above: Archduke Charles and friends. I actually painted these about 20 years ago, and got a few things wrong. Firstly, I painted Archduke Charles’ collar red, edged gold, like the cuffs. However, in the field Austrian generals seem to have worn a plainer tunic with a plain white collar, such as that worn in the portrait of Archduke Charles on the right.
 Above: A close-up of the two officers at the back. I do like the officer figure in the covered hat, as he’s very useful and in my collection has also been used as a British officer on Wellington’s staff. He could equally be a senior officer or general of almost any nation of the period.
 Above: Two Austrian corps commanders and a Hungarian divisional commander. The chap on the left, wearing the white cloak represents Nordmann, commander of the Avantgarde Korps in 1809, which was actually just a very strong division, so I’ve only given him one escorting figure, namely a trumpeter of Hussar Regiment #3 ‘Erzherzog Ferdinand’ (identified by the dark blue pelisse and grey shako).
 The general in the centre is escorted by the ubiquitous officer in covered hat and frock-coat and a ‘Staff Dragoon’. The Staff Dragoons provided commanders with escorts, scouts and gallopers and went through a number of uniform-changes throughout the French Revolutionary and Napoleonic Wars, from dark blue coats to bright blue, back to dark blue, to green and finally in 1809 to white coats. Mine is an 1809 army, so I’ve painted him in a white coat. However, I foolishly believed someone who told me that the facing colour was ‘Crab Red’ (a distinctly orange shade). I’ve since discovered that he’d confused Crab Red (Krebsrot) with Madder Red (Krapprot). Madder is a dark red shade. Ah well…
 Above: Another group of generals. In Napoleon’s Battles, a divisional commander is represented by a single figure on a 25mm square base. I’ll often use mounted colonels as well as general officer figures, just to vary things a bit, but here I’ve got some pukka generals, including that Archduke Charles figure again. The general in the centre is wearing campaign rig of overall trousers with a dark pike grey frock-coat, though still wears his cockerel-feather plume and tops it off with the red-white-red sash of the Order of Maria-Theresa.
 Above: I’ve got stacks of Austrian artillery, but this is the only photo. They all look much the same though, so it doesn’t really matter! These are Cavalry Artillery, so I’ve put three figures on each base – I put four on the base for Foot Artillery. It makes no difference in game terms, but does help to identify the different types, as the uniform for both Foot and Cavalry Artillery was identical. If you look closely, you will notice that the 6pdr guns have the leather padded ‘sausage’ (wurst) attached to the trail, which the gunners would ride.
 Those of you still awake and not having taken an impromptu holiday to northern Italy to get away from this blog will no doubt be overjoyed to see this, the 4th instalment of my Austrian army! 🙂
 Above: A battalion of the Lower Austrian Landwehr. The Austrian Landwehr were initially raised in 1808 as a conscript militia, to serve as a reserve for the regular army and as garrisons for towns and fortresses while the regular army was away on campaign. By early 1809 there were over 100,000 men serving in the Landwehr and later that year, with the French invading Austria, the Landwehr were called out to reinforce the army in the field. The Landwehr battalions serving with Archduke Charles’ main army came from Lower Austria, Bohemia and Moravia. However, their combat record was extremely poor and they suffered huge losses due to desertion.

 Above: A battalion of Moravian-Silesian Landwehr. Most Moravian Landwehr wore brown coats with red facings. However some units, especially from the Austrian Silesia, wore light blue facings, as shown here. The provincial cockade was red-within-white. The officer’s mid-blue breeches also seem to have been a popular item of dress.
 Above: A battalion of Bohemian Landwehr. The Bohemian Landwehr were remarkably well dressed. The coat was a brown jacket with red facings and red braid across the chest, worn with bright blue breeches (some with red Hungarian knots on the thighs) and tall leather boots, all topped off with a ’round-hat’ (what we might call a top-hat). The city and university Landwehr units from Prague were even more lavishly dressed, with plumed shakos!
 Above: A battalion of Hungarian Insurrection Infantry from ‘below’ (i.e. south of) the Danube.
 Above: A battalion of Insurrection Infantry from ‘above’ (i.e. north of) the Danube. In 1809 the regulation uniform for the Insurrection infantry consisted of a short blue tunic and breeches, decorated with brass buttons, light blue ‘hussar’ lace and Hungarian trefoil knots (see the period print at the top of this article). The exact shade of blue is debatable; Dave Hollins describes this uniform as ‘dark blue’, but then the accompanying plate shows an officer dressed in the same shade of sky-blue as the pantaloons of regular Hungarian or Grenze infantry. I’ve hedged my bets and opted for a ‘middle blue’, which seems to be what was depicted by Ottenfeld in 1895.

 Above: A Hungarian Insurrection Hussar Regiment from ‘Below’ the Danube. The regulation uniform for Insurrection Hussars was very similar to that of the infantry, though according to Dave Hollins the lace was white instead of light blue and instead of having provincial facing colours on the dolman jacket, the shakos were instead coloured by province. These colours were the same as for the infantry facings, though regiments from ‘above’ the Danube had black shakos instead of yellow. They were also issued with a blue pelisse, again decorated with white lace and edged with black fur. Shabraques and sabretaches were black, edged in red and bearing the Imperial ‘FI’ cypher in white. Belts were red leather and the shako had a black plume with a yellow base (apparently much more black than the regular army plume).

 Above: A regiment of Insurrection Hussars from ‘above’ the Theiss.
 Today’s riveting blog instalment is a
 Above: Some Jäger (literally ‘Hunter’ – skirmishers armed with rifled carbines). The uniform for all nine regular army Jäger battalions was the same – a simple ‘Pike Grey’ (Hechtgrau) uniform with ‘Steel Green’ (Stahlgrün) facings and black Corsican hat, with black leather belts. The regular Jäger battalions did not carry flags.
 Above: Grenze Infantry Regiment #9 (Peterwardeiner). This regiment had ‘Light Pike Grey’ facings and yellow metal buttons.
 Above: Grenze Infantry Regiment #12 (Deutsch-Banát). This regiment had ‘Light Blue’ facings and white metal buttons.
 Above: Some skirmishers from Grenze Infantry Regiment #13 (Wallach-Illyrian). This regiment had Light Pike Grey facings with white metal buttons. I’ve also got a formed version of this unit, which was painted some 25 years ago and is looking a bit battered…
 Above: The 1st Battalion of Vienna Volunteers. The Austrian Army of 1809 fielded a number of Freiwilligen (Volunteer) infantry units and these were usually used to beef up the light infantry element of each Army Corps. Most numerous among these were the battalions of the Archduke Charles Legion, followed by the Vienna Volunteers and the Moravian Volunteers. While the battalions of the Archduke Charles Legion and Moravian Volunteers were spread (like the Landwehr militia) across the entire field army, four battalions of the Vienna Volunteers were concentrated in VI Korps, hence this choice of unit.
 As mentioned
 Above: Kürassier Regiment #7 ‘Lothringen’. I had originally intended to paint Kürassier Regiment #6 ‘Moritz Liechtenstein’, but unfortunately mis-read the uniform facing colour table and painted the wrong regiment… KR #6 had black facings, not blue… But what the heck… In 1809 KR #7 was fighting alongside KR #5, with the VII Korps in Polish Galicia. Note that the Kürassiers displayed their facing colour on a patch either side of the collar, so from the rear the collar appears white; unlike the Dragoons and Chevauxlegers, who had fully-coloured collars.
 Above: Chevauxleger Regiment #3 ‘O’Reilly’. This regiment was one of the white-coated Chevauxleger regiments (Regiments #1, #2 & #4 wore green coats, while #3, #5 & #6 wore white) and the only way to tell them apart from an identically-uniformed Dragoon regiment was the horse’s bridles, which in the case of Chevauxlegers had straps crossed to form an ‘X’ over the horse’s forehead. The regiment had Poppy Red facings and yellow metal buttons. One mistake I made with these was that the sheepskin shabraques had by 1809 standardised on black wool, but I referred to an earlier image and did them with white sheepskins (with only the officer having black). At Aspern-Essling the regiment served with Provenchère’s Advance Guard Brigade for II Korps. At Wagram the regiment had been transferred to Wartensleben’s Light Cavalry Brigade, in Nostitz’s Division of the Reserve Korps.
 Above: Chevauxleger Regiment #5 ‘Klenau’. Again, this was one of the white-coated regiments and had light blue facings with yellow metal buttons. At Aspern-Essling this regiment served in Vécsey’s Brigade, as part of Fresnel’s Division of I Korps. At Wagram they were serving under Stutterheim, though still under the same division and corps.


 Above: Hussar Regiment #4 ‘Hessen-Homburg’. This uniform is probably one of my favourite Napoleonic uniforms, probably due to the contrast between the bright blue shakos and the yellow and black cockades. So good I photographed them three times. They looked even more garish in their full dress of carmine breeches (see the print on the right), but sadly these are in grey campaign overalls.
 Above: Hussar Regiment #10 ‘Stipsicz’. This regiment had another striking colour scheme, this time of a light blue pelisse with grass green shako and yellow metal buttons. Hussar Regiment #7 ‘Liechtenstein’ had an identical uniform, except they had white metal buttons and silver officers’ lace. At Aspern-Essling this regiment served under Frelich’s Brigade of Klenau’s Division of IV Korps. At Wagram they were still commanded by Frelich but had been assigned to Nordmann’s Avantgarde Korps.

 Above: Uhlan Regiment #2 ‘Schwarzenberg’. All four Austrian uhlan regiments wore the same uniform, which started out in the 1790s as ‘Grass Green’, then changing to ‘Steel Green’ and becoming ‘Dark Green’ by 1815. I’m not sure which stage they were at in 1809, so I’ve played it safe by going for the ‘middle period’ of Steel Green. Facings were Poppy Red with yellow metal buttons and a yellow & black girdle. Regiments were identified by differently-coloured tops to their czapka caps. Uhlan Regiment #2 had Grass Green as their distinguishing colour in the early period, but Dark Green later, so I’ve assumed that they matched the colour of the uniform (I’ve seen others do them with a bright grass green top, contrasting with a dark green uniform). Uhlan Regiments #1, #3 and #4 had Emperor Yellow, Poppy Red and White respectively. Note that some sources show the lance-pennants to have narrow opposing stripes of black and yellow in the centre (see the print on the right), but I went for the easy option of plain black over yellow, without the fiddly stripes.
 I was going to post up some more Cold War stuff this week, but Erik Salvador has been prodding me on Facebook to post my Austrian Napoleonics, so here they are, starting with the Infantry Regiments.


 Above: Infantry Regiment #1 ‘Kaiser Franz’. The facing colour for this regiment was Pompadour Red (‘Pompadour Rot’) and the button metal colour was white. At Wagram this regiment served in Lilienberg’s Brigade, as part of St Julien’s Division of III Korps. The regiment was not present at Aspern-Essling.
 Above: Infantry Regiment #7 ‘Karl Schröder’. The facing colour for this regiment was Dark Brown (‘Dunkebraun’) and the button metal colour was white. I used Humbrol 29 Dark Earth for the facing colour, but upon further reading it should probably be more of a dark red-brown, akin to the coats of Grenze infantry (Humbrol 160 German Camouflage Red Brown). At Wagram this regiment formed part of Grill’s Brigade, in Vukassovich’s Division of III Korps. The regiment was not present at Aspern-Essling.
 Above: Infantry Regiment #8 ‘Erzherzog Ludwig’. The facing colour for this regiment was Poppy Red (‘Ponceau’) with yellow metal buttons. At Aspern-Essling this regiment formed part of Grill’s Brigade of Neustädter’s Division of IV Korps. At Wagram the brigade was commanded by Swinburne and was part of Rohan’s Division of IV Korps.
 Above: Infantry Regiment #12 ‘Manfredini’. The facing colour for this regiment was Dark Brown (‘Dunkebraun’) and the button metal colour was yellow. Like IR #7 above, the brown could probably do with being a shade darker. At Wagram this regiment served with Grill’s Brigade of Vukassovich’s Division of III Korps. The regiment was not present at Aspern-Essling.
 Above: Infantry Regiment #22 ‘Koburg’. This regiment’s facing colour was Emperor Yellow (‘Kaisergelb’) and the button metal colour was white. This regiment was brigaded with IR #8 (above) at both Aspern-Essling and Wagram.
 Above: Infantry Regiment #38 ‘Herzog Ferdinand von Württemberg’. This regiment had Rose Pink (‘Rosenrot’) facings and yellow metal buttons. At Wagram this regiment formed part of Bieber’s Brigade of St Julien’s Division of III Korps. The regiment was not present at Aspern-Essling.
 Above: Infantry Regiment #46 ‘Chasteler’. This regiment had Dark Blue (‘Dunkelblau’) facings and yellow metal buttons. At Aspern-Essling this regiment formed part of Riese’s Brigade, of Reinhard’s Division of IV Korps. At Wagram it was still part of Riese’s Brigade, but that brigade was on temporary attachment to Nordmann’s Avantgarde Korps, which came under the command of IV Korps.
 Above: Infantry Regiment #50 ‘Stain’. This regiment had Violet (‘Violett’) facings and white metal buttons. To be honest, I’d have preferred a deeper, more purple shade of violet, but Humbrol don’t do a decent purple. I do have a stash of Vallejo acrylic purples for jobs like this, but I think I was being lazy on the day in question… The regiment was absent from Aspern-Essling, though at Wagram served as part of Weiss’ Brigade, in Radetzsky’s Division of IV Korps.
 Above: Infantry Regiment #56 ‘Wenzel Colloredo’. This regiment had Steel Green (‘Stählgrun’) facings and yellow metal buttons. This regiment was absent from Aspern-Essling, though at Wagram formed part of Grill’s Brigade of Vukassovich’s Division of III Korps.
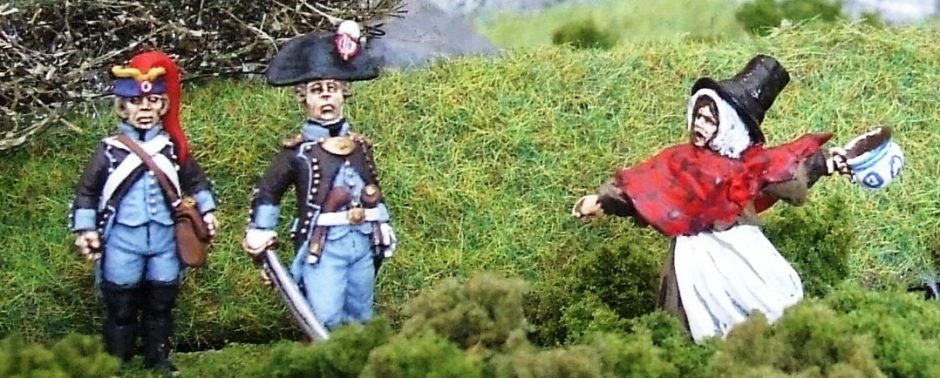
 Today marks the 223rd anniversary of the surrender on 24th February 1797 of the French Légion Noir (‘Black Legion’) to an outnumbered and rag-tag force of Welsh Yeomanry, Militia, Royal Navy, Volunteers and armed civilians on Goodwick Sands, near the port of Fishguard in Pembrokeshire, West Wales. Later immortalised as the only Battle Honour to be won by the British Army on British soil, the ‘Battle’ was in fact a relatively bloodless comic-opera…