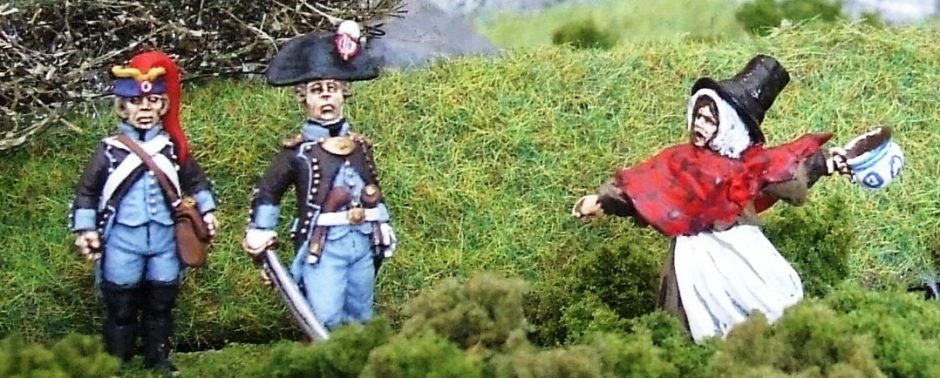

In early 2015 I was feeling ‘the urge’…
I had fallen out of love with Napoleonics some 12 years earlier, following my involvement in producing a series of Napoleonic mega-games, first for AB Figures’ Wargamers’ Weekends and then with the General de Brigade crowd at the National Army Museum. I was all Napoleonicked-out and hadn’t played a Napoleonic game or painted a single Napoleonic figure since 2002 (the gap being filled chiefly by 15mm WW2 and 28mm American War of Independence).
However, with the approaching bicentennial, the sap was rising and I decided that I was going to play Waterloo on the day of the anniversary! However, I still needed quite a few troops and a lot of terrain! I tentatively tried painting a unit of KGL Hussars from the mound of 2,000-odd unpainted AB Figures’ Napoleonics that had composting in a corner since 2001… Could I still paint them…?

The 1st KGL Hussars – my first 15mm Napoleonic unit in 12 years
The answer was YES, but the first thing I noticed was that my eyesight was a lot worse than it was when I last painted them! Nevertheless, found that I actually enjoyed it and despite the pile of unpainted lead, a massive order was soon winging its way to Fighting 15s for all the 1815 stuff that had been released in the intervening years (which was A LOT!) [edited to add that AB Figures are now sold in the UK by Eureka Minaitures UK]. Another order went to Tiger Terrain for their incredible series of ‘scale-adjusted’ Waterloo buildings.
At this time, my local town museum in Narberth, Pembrokeshire, were looking for some way of commemorating the bicentennial of Waterloo and highlighting the local men who were known to have fought there (including Sir Thomas Picton), so my offer of doing the anniversary game at the museum was eagerly snapped up by the curator.
In the meantime, polystyrene was bought and the ultra-messy process of carving polystyrene contours was soon underway with the help of my good friend Martin Small and my Minions Carwyn Savins, Oli Crees and Will Poole.
12 weeks later, we’d built and painted a 10×6-foot terrain board, three farm complexes and a pub, 250 infantry, 180 cavalry, 30 guns and 120 gun-crew, re-based around 500 figures, re-mortgaged, sold the kids and almost got divorced…

The Field of Waterloo ready to go at Narberth Museum, 18th June 2015. Martin Small, Paddy Green, Richard de Ferrars and Carwyn Savins in attendance.


Above: The Duke of Wellington and his staff observe French movements from the centre of the Allied line.

Above: The Allies are drawn up along a low ridge straddling the Charleroi-Brussels highway. Forward of the ridge are three fortified farm complexes, which will serve to obstruct any French assault on the Allied lines. In the west (foreground) is Hougoumont, in the centre is La Haie-Sainte and in the east (distance) is Papelotte-La Haie.

Above: Another view of Hougoumont, as seen from General Picton’s position on the ridge. The regimental colours of the British Foot Guards make a brave show. In the foreground, the Light Infantry of the King’s German Legion prepare to defend La Haie-Sainte.

Above: A view of the Allied centre. Nearest to the camera stands General Picton’s 5th Division, with Bijlandt’s Netherlands Brigade (from Perponcher’s 2nd Netherlands Division), in a somewhat exposed position in front of the line. On the other side of the crossroads is Alten’s 3rd Division, with the bulk of Lord Uxbridge’s Cavalry Reserve Corps.

Above: Our local hero, Lieutenant General Sir Thomas Picton stands resplendent in a distinctly non-regulation frock coat and top hat, while brandishing a brolly. A tough, extremely capable and proven commander, Picton was Wellington’s second-in-command at Waterloo though was suffering the effects of two ribs, broken by a French musket ball at Quatre Bras two days earlier. Historically he was shot through the head while leading a counter-attack, though he would survive our battle, despite the near-destruction of his division.

Above: On the Allied right, we again see Alten’s 3rd Division, with Clinton’s 2nd Division, Kruse’s Nassau Contingent and several British and German cavalry brigades in support. Mitchell’s Brigade (detached from the absent 4th Division) is stationed west of Hougoumont and Chassé’s 3rd Netherlands Division is on the extreme right flank.

Above: The time is now 11.30am and the ground has finally dried out sufficiently, following the night’s heavy rain, for the guns to open fire without burying themselves in mud. The Emperor Napoleon (just visible on his white horse, next to the inn of La Belle Alliance) watches as his Grand Battery opens a devastating cannonade on the Allied centre.

Above: The astonishing weight of fire from the French artillery quickly silences the Allied guns stationed along the eastern half of the ridge. Picton withdraws his division to the relative safety of the rear slope. Perponcher’s Netherlanders meanwhile, are quickly driven from Papelotte-La Haie. The French surge forward to attack the weakened Allied left.

Above: As the infantry of General d’Erlon’s 1st Corps advances through the corn, the armoured Cuirassiers of Milhaud’s 4th Cavalry Corps gallop forward. Galloping with them are several horse artillery batteries, who move forward to engage the Allies more closely. In the distance, the Emperor waits with his massive reserve (Lobau’s 6th Corps, Kellermann’s 3rd Cavalry Corps and the three infantry divisions of the Imperial Guard) to see what develops.

In the west, General Reille decides that Hougoumont, defended by the British Guards, is simply too tough a nut to crack and instead decides to isolate and by-pass that particular fortress. He orders Prince Jerome Napoleon (the Emperor’s brother) to mount a diversionary attack, along with Piré’s cavalry, around the western flank of the Allies.

Above: Chassé’s 1st Netherlands Division move forward from Braine-l’Alleud to support Mitchell’s beleaguered brigade near Hougoumont. The Netherlanders feel secure on their hill, though their confidence is soon shattered by Piré’s lancers, who break them with ease! This French attack succeeds in drawing Allied reserves right, when they would have been more useful on the left!

Above: As Picton withdraws from the crest of the ridge, Milhaud’s Cuirassiers surge forward! The Grand Battery also now turns its attention to the isolated German garrison of La Haye-Sainte.

Above: One of Picton’s brigades (Kempt’s) suffers terribly from the French artillery fire and starts to waver. Seeing an opportunity, Milhaud orders Wathier’s Cuirassiers to charge! In reply, Ponsonby’s ‘Union Brigade’ of Dragoons (represented here by the ‘Scots Greys’, which was one of the three regiments present in the brigade) launches a counter-charge. Regrettably, Ponsonby’s men suffered a storm of shot and shell from the keen-eyed French artillery and are sent reeling back to their own lines. The jubilant Cuirassiers scatter Kempt’s infantry and charge on, almost capturing Wellington himself! Their rampage is finally halted by Somerset’s Household Cavalry Brigade.

Above: Unrecorded by our camera, the French Guard Light Cavalry Division also had a field-day on the extreme eastern flank; they sabred and lanced their way through two brigades of Hanoverian militia, two British light cavalry brigades, three horse batteries and the entire Netherlands Cavalry Division before retiring back to Papelotte.

Above: Unperturbed by the collapse of their allies on either flank, Lambert’s British brigade stands like a rock in the midst of the unfolding disaster on the Allied left wing.

Above: The situation on the Allied left wing, as seen from the French side; In the foreground, Kellermann’s 3rd Cavalry Corps is moved forward to exploit the success on the French right. In the distance, the survivors of Picton’s 5th Division and Perponcher’s 2nd Netherlands Division rally near Mont St Jean, while the ‘Black Brunswickers’ move up to hold the line.

Above: As if things couldn’t get any worse for Wellington; a huge cheer erupts from the French as La Haie-Sainte falls! However, Napoleon has now received reports of Marshal Blücher’s Prussians marching to engage his right flank! However, they are still some three hours’ march distant and he is confident that he can break Wellington first!

Above: Despite the deteriorating situation on the Allied left (and still no sight of Blücher’s Prussians!), the Allied right remains 90% intact, with considerable reserves that could be moved to support the right. However, Napoleon anticipates the danger and orders Marshal Ney forward with 6th Corps to assault and pin the Allied right.

Above: In the foreground, Foy’s uncommitted French division continues to threaten the Guards in Hougoumont. the rest of Reille’s 2nd Corps meanwhile moves around either side of the farm to join Ney’s assault on the Allied right. The Imperial Guard meanwhile, polish their best uniforms in preparation for tomorrow’s victory parade in Brussels.

“On to Brussels!” “Vive l’Empereur!”
Above: The time is now 2pm. With his left in danger of collapse and with still no Prussians in sight, Wellington considers his options: With the bulk of the army still intact, he could mount an effective rearguard, allowing the army to withdraw on Brussels and then to evacuation at Antwerp, should that be necessary. The other option is to continue the defence, at ever-increasing cost, in the hope of relief by Marshal Blücher. If relief does not arrive, the army will surely be destroyed… What to do…?

‘Smug-Face’
Sadly, it was time for the museum to close and time for our re-fight of Waterloo had run out and we could only speculate what might happen next.
Would Blücher arrive to save the day? Possibly…
But for now, The Emperor Napoleon was master of the field of Waterloo!
I should add that during this game we were visited by BBC Radio Wales and I was forced at bayonet-point to do a radio interview… This was then picked up by BBC1 TV, who then rang the museum to invite us to come on the One Show (the BBC’s flagship daily magazine programme) that evening, to appear next to Dan Snow and describe the battle using our game! Sadly, it would have taken about an hour to dismantle the game, five hours to get to London and two hours to set it all up again and the programme was due to broadcast within four hours, so we had to decline!
But that’s not the end of the story, as the game was shipped down to W.A.S.P HQ for a ‘proper’ two-day re-fight over the following weekend, so there are more Waterloo Witterings to follow…
 As yesterday was the 203rd anniversary of the Battle of Quatre-Bras, I thought I might post up a report from a refight I did with the Minions back in March of this year. Napoleonics has always been my ‘first love’ when it comes to wargaming and this game was an attempt to ‘corrupt the young’, as they players were aged roughly 13-15. Some were less ‘corrupted’ than others, but we had a good game and most of them seemed to enjoy it, despite the constant distraction caused by their mates playing ‘Fortnite’ in the next room!
 Rules used were Napoleon’s Battles (4th Edition) by Partizan Press. At W.A.S.P. we’ve played the 1st Edition since they were published by Avalon Hill in the early ’90s, with various house modifications. We never even knew there was a 2nd and 3rd Edition, but saw an advert for the 4th Edition last year, just as my 1st Edition was starting to disintegrate into dust. We were pleased to find that ‘great minds think alike’, as they seemed to have independently included all of our house modifications!
 Above: The Prince of Orange takes control of the situation at Quatre-Bras.
 Above: Saxe-Weimar’s Brigade (the Orange-Nassau Regt in blue and 2nd Nassau-Usingen Regt in green) redeploys to a more concentrated location on the southern edge of Bossu Wood, overlooking Grand-Pierrepont Farm. In the distance, Bijlandt’s Militia can be seen massing near Quatre-Bras and the Prince of Orange.
 Above: With Marshal Ney out in front, Reille’s II Corps deploys into battle formation as it emerges from Frasnes. Nearest the camera, Bachelu’s division forms to the right of the road, with Piré’s cavalry covering the right flank.
 Above: Piré’s cavalry move swiftly past Pireaumont Farm, in an attempt to seize control of the bridge at Thyle.
 Above: However, Lord Uxbridge has arrived with Van Merlen’s 2nd Netherlands Light Cavalry Brigade, the Brunswick Cavalry Brigade and Van Pittius’ Horse (half-strength) Battery and also recognises the importance of seizing the river crossing. Neither side gains the upper hand and sit glowering at each other across the Materne Pond (or in our case, the Materne Bog, because I don’t have a model pond).
 Above: Bachelu’s Division, with the bulk of the French artillery in support, moves up to bombard Gemioncourt Farm, in preparation for an assault. In the distance, Foy boldly ignores the presence of Saxe-Weimar’s troops in Bossu Wood and makes a bee-line for Quatre-Bras.
 Above: Foy’s gamble may well have paid off, as Saxe-Weimar’s boys initially had a serious command & control problem. However, with the arrival of Wellington to take command of the army, the Prince of Orange now has the freedom to gallop over and personally take control of Saxe-Weimar. Galvanising the Naassauers into action, the Prince leads them against Foy’s exposed flank.
 Above: Back at Quatre-Bras, the Duke of Wellington is now in firm control of the situation and the previously-isolated Dutch Militia find themselves massively reinforced by Picton’s 5th Division (Pack’s Highland Brigade and Kempt’s Brigade, plus the 9pdrs of Sympher’s KGL Horse Battery).
 Above: Further Allied reinforcements arrive in the form of the Duke of Brunswick’s ‘Black Corps’. The Brunswickers are ordered to reinforce Bijleveld’s Battery, on the high ground to the left.
 Above: As Bachelu’s Division deploys in front of Gemioncourt, their supporting 12pdr artillery begins to whittle down Bijlandt’s defending infantry. However, Bijleveld’s Horse Battery is similarly causing much havoc among the packed ranks of Bachelu’s right-hand brigade (Campi’s Brigade). A French horse battery attempts to deal with Bijleveld, but does not have much luck.
 Above: Recognising the danger presented by Saxe-Weimar’s Brigade to the French left flank, Ney orders Jerome to immediately attack and drive off the Nassauers. However, Bauduin’s Brigade immediately runs into a hail of fire from the 2nd Nassau and is stopped in its tracks. Soye’s Brigade (consisting of two units – the 1st & 2nd Regts of the Line) hurries forward to support Bauduin.
 Above: The view from the Prince of Orange’s position with Saxe-Weimar’s Brigade. The Prince has lost his opportunity to drive in the French left flank, but has succeeded in drawing off the French reserves, thus giving time for the Allied centre to strengthen its position.
 Above: Back at Quatre-Bras, the Duke of Wellington, Duke of Brunswick and General Picton consolidate their grip on the crossroads.
 Above: Lord Uxbridge’s cavalry take up position near Thyle Bridge. Van Pittius’ Battery takes a few pot-shots at the French cavalry, but does no damage.
 Above: An overview of the battle at approximately 1600hrs. In the centre, the French artillery continues to batter Gemioncourt as Bachelu’s infantry wait for the order to assault. On the French left, Jerome is attempting to strike back at the Nassauers. while Foy attempts to continue the advance in the face of stiff fire from Picton’s division, which is rapidly forming a solid line between Gemioncourt and Bossu Wood. Nearest the camera, the opposing light cavalry have essentially cancelled each other, though the Brunswickers are moving forward and might be able to tip the balance on that flank. In the distance, the leading elements of Kellermann’s III Cavalry Corps (Guiton’s Cuirassier Brigade and a horse battery) have arrived, while the head of an Allied column has appeared on the Nivelles Road.
 Above: With the Allied left wing stiffening along stream and high ground east of Gemioncourt, Piré attempted to disrupt the Allied manoeuvres by launching a charge across the stream. However, Specht’s Brunswick Line Infantry Brigade (with the sky blue and yellow flags) was able to form squares and beat off Wathiez’s lancers, who quickly scurried back across the stream, to the safety of Piraumont Farm. To add further insult, Bijleveld’s Dutch Horse Battery then managed to knock out the opposing French horse battery and Heinemann’s Brunswick Horse Battery was also now inserted into the line to further discomfit Bachelu’s Division.
 Above: On the Allied right, Picton’s division had now formed a solid line flanking the Dutch Militia and now had further reinforcements in reserve, as well as forming in Bossu Wood on their right flank. However, Kempt’s Brigade was starting to suffer casualties to accurate French artillery fire coming straight up the road.
 Above: Cooke’s 1st Division (Byng’s and Maitland’s Guards Brigades, Kühlmann’s KGL Horse Battery and Beane’s Horse Battery) arrives at Quatre-Bras and is placed in reserve by Wellington. They are closely followed by Best’s Hanoverian Militia Brigade (from Cole’s 6th Division).
 Above: Jerome, now recovered from the initial clash and reinforced by a brigade from Foy’s Division, starts to turn the tables on Saxe-Weimar’s Nassauers.
 Above: Marshal Ney, frustrated at Jerome’s lack of progress, arrives to take control of the situation and leads the division across the stream. However, Ney is shocked by the tenacity of the Nassauers and comes VERY close to being beaten off. Nevertheless, after hard-fought fight, the Orange-Nassau Regiment is completely dispersed and the 2nd Nassau, accompanied by the Prince of Orange, flee for the safety of Von Alten’s Hanoverians.
 Above: With the left flank secured, Foy’s division resumes the advance, now accompanied by Guiton’s Cuirassiers. Piquet’s Dragoon Brigade and Lefèbvre-Desnoëttes’ Guard Light Cavalry Division have also now arrived. The massed French guns are now causing massive casualties in the Allied lines; mainly on Kempt’s Brigade and the Netherlanders defending Gemioncourt Farm.
 Above: With the walls of Gemioncourt being beaten down and the defenders demoralised, Bachelu finally throws Husson’s Brigade against the thick farm walls. Bijlandt’s men are swiftly ejected and the Allies can only look on in horror as the keystone of their line falls to the French! Nevertheless, the Dutch and Brunswick horse artillery continue to hammer Campi’s Brigade.
 Above: Battered first by French artillery and now by close-range fire from Husson’s French infantry in Gemioncourt Farm, Kempt’s Brigade is rapidly becoming combat-ineffective.
 Above: Guiton’s Cuirassiers move forward with the intention of taking advantage of the effective French artillery fire, but the mass of French horsemen immediately attracts the attention of Sympher’s 9pdrs and the Cuirassiers are quickly thrown back in disorder.
 Above: Alten’s 3rd Division moves past the Prince of Orange and the rallying 2nd Nassau and moves into the Bossu Wood to shore up the Allied right flank. Behind them, Best’s Hanoverian Militia form up, ready to support Alten’s advance.
 Above: It is now around 1700hrs and the remainder of the reserve cavalry have arrived. In particular, the Guard Chasseurs à Cheval insert themselves between Foy’s Division and Gemioncourt Farm, in preparation for a charge on Kempt’s disintegrating brigade.
 Above: anticipating the collapse of his centre, Wellington forms a second line with the two Guards Brigades and the Brunswick Cavalry Brigade. This is fortuitous, as at that moment, Kempt’s Brigade collapses and Sympher’s Battery is silenced by the superb French gunners!
 Above: Timing their charge perfectly and led by Lefèbvre-Desnoëttes himself, the Guard Chasseurs à Cheval smash into Bijlandt’s Dutch Militia! The Brunswick Cavalry Brigade counter-charges, but the Guard Chasseurs contemptuously brush them aside and then rout them with ease, along with the Dutch Militia and Sympher’s KGL gunners! Seeing a line of redcoats to their front, the Chasseurs charge on into Byng’s Foot Guards. In the ensuing pandemonium, General Picton finds himself in the path of the rampaging French horsemen! He and his staff succeed in cutting their way out of the maelstrom, but Picton is seriously wounded in the process and is carried from the field to have his wounds treated. This is a serious blow for Wellington, who considered the Welsh war-horse to be indestructible.
 Above: The situation at around 1830hrs: The battle pauses following the French cavalry charge, as the French infantry advances to contact on the left wing. Routed elements of Picton’s, Perponcher’s and Brunswick’s Divisions rally around the crossroads, while Kruse’s 1st Nassau Regiment arrives from Brussells.
 Above: Waiting for the Soviets are the men of the 161st Panzergrenadier Battalion (Mixed), part of the 16th Panzergrenadier Brigade, 6th Panzergrenadier Division. This consists of two Panzergrenadier companies mounted in Marder IFVs, a Panzer company and attached elements from divisional recce, anti-tank, air defence and artillery units. They are part of the Danish-German-US-British LANDJUT Command blocking the way to Hamburg and the Danish border.
 Above: The 6th Panzergrenadier Division is one of the last regular Bundeswehr formations fielding the Kampfpanzer M48A2GA2 medium tank (a West German upgrade of the venerable M48 Patton, fitted with a 105mm gun and modern fire-control) in lieu of the far more modern Leopard series. Nevertheless, these old beasts of war successfully ambush and destroy the Soviet recce element’s T-64B platoon as it noses its way out of town. The rest of the Soviet recce company dive off the road and luckily manage to spot the rest of the German panzer company, though don’t spot the dug-in panzergrenadiers lurking along the wooded ridge.
 Above: Hoping to lure the Soviets into an ambush, some of the panzers fire a few ineffectual shots and withdraw, covered by a section of Jaguar 1 tank destroyers, lobbing long-range HOT missiles into the mass of Soviet armour. In the meantime, there are some remarkably ineffectual calls for fire by attached FOOs on both sides! The German FAC has better luck however, and manages to call down a strike by Jaguar GR1s from 54 Squadron RAF (part of the UK Mobile Force reinforcement to Denmark). However, the Soviet regimental air defence troops aren’t napping and an SA-9 ‘Gaskin’ SAM section manages to luckily splash the first RAF Jaguar!
 Above: A second RAF Jaguar strike fares a little better and survives its run, though is ‘Disordered’ by the SA-9 and only manages to suppress a few AFVs before limping back to base.
 Above: As the Soviet commander wonders how he’s going to get his MTU-54 bridgelayer through the arch (!), the following tanks decide to avoid the traffic jam in town and hook right, past the burning recce T-64 platoon.
 Above: The lurking M48s managed to knock out the lead T-64 platoon as it attempts to cross the bridge; much to the annoyance of some German recce troops, who were lurking nearby with Panzerfaust 44s ready to deal with the first Russkis to cross the bridge. A BRDM-2 scout car is also knocked out as it attempts to recce the river valley.
 Above: The West Germans have the bridge well covered by fire from several M48s, as well as a Jaguar ATGM section, a Panzergrenadier platoon and a Recce platoon.
 Above: A Motor Rifle company arrives at the bridge. Troops dismount from their BMP-1 IFVs and prepare to storm the bridgehead on foot. The regimental artillery group has promised to support them, but as yet has not delivered much in the way of fire support (nor has the West German artillery, to be fair).
 Above: On the German right flank, the Soviet tanks, rashly pursuing the withdrawing panzers, have run straight into an ambush, courtesy of the dug-in 3rd Panzergrenadier Company. One T-64 was destroyed outright by panzergrenadiers as it attempted to overrun the position, while another was destroyed by a flank-shot from a MILAN team. A third T-64 got bogged down as it overran the position, was counter-attacked by panzergrenadiers and surrendered! However, the panzergrenadiers were mainly driven back, though with only light losses and were soon able to rally.
 Above: Not so lucky was the MILAN team, which pushed its luck and was soon overrun by vengeful Soviet recce dismounts. Nevertheless, fire from the remaining M48 within the wood managed to suppress the surviving T-64s and a lot of bad luck saw the Soviets scurrying back toward the safety of their comrades. This gave the Panzergrenadiers the time they needed to jump into their Marders and drive like hell for their fallback position at the factory. However, in the meantime they lost a further panzergrenadier section and the Panzer Company commander, who bravely attempted to launch a single-handed counter-attack on the flank of the Soviet tanks.
 Above: With the river crossings being strongly contested, traffic-jams start to build at the rear of the Soviet column.
 Above: As the 3rd Panzergrenadier Company falls back from its position on the forward-right flank, the 2nd Panzergrenadier Company in the town prepares to engage the Soviet pursuit. The 1st Panzer Company meanwhile, adjusts its position to face right, ready to engage the Soviets advancing on the right.


 Colonel Roy Stone’s ‘Bucktail’ Brigade was the 2nd brigade of Doubleday’s division and consisted of three Pennsylvania regiments, the 143rd, 149th and 150th. The brigade was raised by ‘absorbing’ the fame of the original 13th Pennsylvania Reserve Regiment (‘The Bucktails’), who had made a name for themselves as sharpshooters and being easily recognised by their habit of wearing a buck’s tail on their caps.


 I once even assembled a corps-sized 15mm Battle Honours/AB Figures Union Army, but realised that it would cost me a FORTUNE to build an army large enough to refight any of the notable battles and I foolishly disposed of it. However, the bug recently bit me again and I ordered a 10mm Union army from Pendraken Miniatures before I could talk myself out of it!
 As it happens, while purchasing my new collection, I discovered that a 2nd Edition of the rules, now called Brigade Fire & Fury (to distinguish it from Regimental Fire & Fury, which came out a few years back and which caters to those who like a more tactical-level battle) was released very recently, so I immediately bought a copy! As expected, the rules seem excellent, though do add quite a bit more detail, especially in terms of separating out various types of infantry and artillery armaments and unit fatigue levels.

 Above: The Royalist tactical headquarters sets up shop in a busy farmyard. Someone must have left a gate open, as there is livestock everywhere!
 Above: The Cadet Corps’ Foot Hussar Squadron and the BUF Storm-Wing approach the town, closely observed by Baroness de Loutson and her staff (on horseback). The red tin is a genuine 1930s Craven ‘A’ cigarette tin, generously donated by my late father-in-law, which we use to hold the random event cards used in the game.
 Above: On the opposite side of town, some Socialist militia, supported by sympathetic elements of the RAF (bloody Technical trades, no doubt…), move in to Support The Local People’s Struggle Against Fascism And Tyranny/Oppress The King’s Loyal Subjects (delete as applicable).
 Above: As their unit band plays the ‘Internationale’, the Socialists move quickly to occupy positions in and around the local garage (which happens to be one of the Royalist objectives).
 Above: On the Royalist right flank, Squire Bertie Greengage’s Royalist militia deploy from their trucks and move to assault the Socialist-held garage.
 Above: A reconnaissance aircraft passes overhead. Nobody seems sure as to which faction he belongs…
 Above: The local Morris side perpetrate Morris on an innocent and unsuspecting public. Both sides pre-register the site for artillery…
 Above: Supported by the Armoured Troop and a BUF anti-tank rifle team, Captain Gwynne-James-Davies’ Hussar Troop moves forward, intending to sweep through the open ground on the left flank.
 Above: The Foot Hussar Squadron and the BUF Storm-Wing move forward in the centre. Still no enemy sighted…
 Above: But what’s that…? The smell of mushy peas and whippets…?! That can only mean that a Socialist colliery militia has appeared on the edge of town.
 Above: As the Foot Hussar Squadron takes up defensive positions in and around the schoolhouse, a massive volume of supporting fire is put down by the Hussars’ Armoured Troop and Support Squadron and the first coal-miners are cut down, along with some unfortunate civilians, who happened to be in the Royalist line of fire (“The Greater Good…”)!
 Above: The miners respond with their ‘artillery’… A large catapult lobbing jam-jar bombs… The colliery fire-support commander is a Royal Artillery veteran who lives by the Royal Regiment’s motto of ‘Ubique’… Sure enough, jam-jars are soon exploding ‘Ubique’ (‘All Over The Place’), but all they succeed in doing is killing a few unfortunate cows. The Foot Hussars meanwhile put down effective fire across the hedgerows, eliminating some more miners.
 Above: More Socialists appear in front of the Hussars – this bunch look a lot more professional, seem to lack incurable lung-diseases/whippets and even have a tank, which proceeds to exchange ineffectual shots with the Hussars’ armoured car.
 Above: On the Royalists’ extreme left flank, Lt Col Keir’s Hussar Troop launches a charge on a troop of Socialist Mounted Infantry near the windmill – their first mounted action of the war (side-saddle, of course. They are ladies)!
 Above: Not to be outdone, Squire Bertie launches his own charge on the Socialists; using a pair of MG-armed light recce cars, supported by a truck-mounted HMG. However, a Socialist HMG firing from cover behind the garage stops them in their tracks.
 Above: As Squire Bertie launches his assault on the defended garage, his fire support elements go into action… Another bloody catapult…
 Above: Unlike the Socialist jam-jar-thrower, the Royalist equivalent lands smack on target, causing much consternation among the defenders, who are dug in around some fuel storage tanks…
 Above: In the middle of town, the BUF come under fire from the church tower (their objective) and take cover in a large brick house overlooking the town square. Just then, a large group of RAF troops march into view and are immediately fired upon by the BUF, who cut down several of the Brylcreem Boys.
 Above: The battle for the schoolhouse continues. Captain de Carnelle’s Foot Hussar Squadron gains the upper-hand over the miners, thanks in no small part to the effective supporting fire from the tankette and HMG section in the lane.
 Above: By some miracle and despite heavy casualties, the miners manage to cling on to their position! At long last they also manage to inflict casualties on the Foot Hussars.
 Above: The ineffectual clash of armour continues in the open country outside town. The Socialists do manage to score one small victory however, as their self-propelled HMG manages to knock out the BUF anti-tank rifle team. The Socialist jam-jar-thrower switches its attention to the armoured car, but only succeeds in killing another poor cow.
 Above: Despite occasional livestock casualties, rural life continues much as it always does, despite the war.
 Above: Meanwhile, at the windmill, the continuing cavalry melee is decisively tipped in the Royalists’ favour by the intervention of Captain Gwynne-James-Davies’ Hussar troop. As the last Socialist cavalryman surrenders, the Hussars look set to take to their objective (the brown barn).
 Above: The Socialist commanders look on in fury as their plan unravels in the face of Reactionary opposition. Comrade Arthur attempts to re-invigorate the men with Oliver Cromwell’s famous rallying cry, “Come on boys! One more push and we can cancel Christmas!”
 Above: With high explosive landing effectively on the enemy, Squire Bertie’s boys launch a massed assault on the garage.
 Above: The defenders steel themselves for the coming assault. Beyond the garage, one of the Royalist light recce cars lies overturned and burning in the street, while the church is now fully ablaze, thanks to a Royalist rocket. The Socialists make full propaganda use of the burning church and send photos to the Anglican League…
 Above: As they round up their prisoner, the mounted Hussars charge on… But haven’t spotted what’s lurking around the corner…
 Above: The Hussars rapidly discover that they have bitten off more than they can chew! The Socialist section LMG cuts down half of the first troop and the second troop fares little better! Rapidly passing below 50% strength, the Hussars beat a hasty retreat, leaving the objective firmly in Socialist hands.
 Above: The Socialists detain a suspicious civilian who was eyeing up the cows… They accuse her of being a ‘milk-snatcher’…
 Above: Having won their initial clash against the Brylcreem Boys, the BUF casualties rapidly mount as the RAF armoured car takes them to task. Captain de Carnelle’s Foot Hussar Squadron is also starting to suffer, thanks to the intervention of the Socialist self-propelled MG section. It seems that Baroness de Loutson’s forces have shot their bolt…
 Above: By contrast, Squire Bertie’s boys on the right flank have seized their objective at the garage and are in good spirits. However, two objectives remain in Socialist hands…
 Above: The aircraft continues to circle and observe the final stages of the battle. It’s still not clear who he belongs to… Perhaps another faction looking to take advantage of the weakened Socialists and Royalists…?
 Above: Baroness de Loutson’s Tactical HQ is in a state of near-panic as retreat orders are transmitted and orderlies pack the picnic hampers and champers back into the Crossley. If they’re quick, they can probably catch last orders…
 As discussed in the last article, I’ve been encouraged to resurrect my near-forgotten 28mm ‘Age of Arthur’ collection with the aid of ‘Saga’ Dark Age/Mediaeval wargame rules. I found the rules relatively easy to read and understand, but my sieve-like mind soon forgets such things and so I was grateful for the assistance of Mike, the Saga ‘Brettwalda’ in leading me through a couple of trial games.
 We decided on six army points per side, so as Dux Bellorum, I spent 1 point on a unit of 12 bow-armed Levies, 2 points on two units of 8 Warriors and 3 points on three units of 4 Hearthguards. The British Hearthguards have the option of being mounted, so I put two units on horseback. The British Warlord may have up to two Hearthguard ‘Companions’ attached to his element, so I took those from one of the mounted Hearthguard units and combined the remaining mounted Hearthguards into a single unit of 6 figures. Combining units means that their greater strength gives them more combat-power, but also mean that you lose a Saga Die from the dice pool.
 Brettwalda Mike meanwhile, spent 3 points on three 8-figure Warrior units and 3 points on three 4-figure Hearthguard units. He split one Hearthguard unit and used it to increase the strength of the two remaining Hearthguard units to 6 figures apiece.
 Note that in ‘Saga’, the Warlord’s retinue is normally represented by a single large base, featuring the warlord and associated hangers-on. I don’t have anything like that for my Saxons, so the Saxon Warlord here is shown by the small group of figures clustering around a suitable leader figure and the Wyvern banner. For the British, I have a diorama of a Romano-British warlord (on the white horse) being perpetually mugged by a couple of Saxons.
 Not knowing quite what to do, I started by placing Saga Dice in the top row of the Battle-Board, basically activating units for movement. I wasn’t quite ready to go for the more advanced stuff lower down the board just yet. With Saga Dice placed, I started activating units, starting with my Levy archers, who used one activation to move within range of the Saxons and a second activation to lob a few arrows in their direction, resulting in a satisfying First Blood for the battle!
 With my first turn completed, the wily old Brettwalda immediately spotted an opportunity to knock out my main striking unit of mounted Hearthguards and immediately started stacking the Saga Dice on suitable assault bonuses. Dice placed, his right-flanking Hearthguard unit charged out to meet my cavalry head-on, deploying several bonuses from the Battle-Board as he does so…
 The combat is hard-fought , though the Britons manage to beat off the assault and the sole surviving Saxon Hearthguard falls back. However, the British cavalry have suffered casualties and are now ripe for a second assault by the waiting Saxon Warrior unit…
 Outnumbered two-to-one and with another stack of Battle-Board bonuses deployed against them, the British Hearthguards are destroyed and I will now be rolling one less Saga Die per turn. However, the strength of the Saxon Warrior unit has fallen below four figures, so the Saxons also lose one Saga Die from their roll.
 However, having positioned himself on the battlefield to achieve maximum command and control effect. Dux Marcus Dangerus suddenly finds himself dangerously exposed…
 The wily Brettwalda is quick to take advantage of the Dux’s isolation and sends in a fresh unit of Saxon Warriors, loaded to the eyeballs with ‘Ferocious’ and ‘Sharp Blades’ bonuses…
 In a bitter combat, Marcus Dangerus manages to beat off the Saxon Warriors (only 2 Saxons survive, so the Saxons lose another Saga Die), but in turn suffers the loss of both Companions.
 “Rally to the Lord!”
 Things are now suddenly looking very bad for the Saxons. Their army is now only generating two Saga Dice – one for the sole surviving Hearthguard on the right flank and one for the last fresh unit of Warriors. The two other Warrior units, at two figures apiece, are too weak to generate Saga Dice. The Britons meanwhile, with four viable units still in play, are still rolling four Saga Dice per turn and have gained a distinct command & control advantage over the Saes.
 Having at long last rolled up the Saxon right flank (which was the original plan, after all…), the Britons move in to mop up the weak Saxon Warrior unit. The Levy archers meanwhile, take the reserve Warriors to task and launch an astonishingly accurate volley, cutting down three of the eight Saxon Warriors!
 With the runic writing firmly on the wall, the Britons close in on the last Saxon Warriors, but the archers complete the task for them, eliminating three more Saxons and removing the Saxon ability to roll any Saga Dice whatsoever. The battle is won!


 The core of the ‘Saga’ game system is the ‘Battle Board’ (more of which later). You can’t play a game of Saga without a Battle Board for each side and for that reason you have to buy a game supplement for your chosen period – in my case the ‘Aetius & Arthur’ supplement, which is supplied with Battle Boards for Late Romans, Romano-British, Saxons, Huns, Goths and Picts.

 Dice of the appropriate symbol are placed on the sections of the Battle Board to unlock those units or abilities. Normally, only one die is required on each section, though sections with a ‘+’ symbol require both of the dice shown (e.g. ‘Profanation’ requires an axe OR a horse, while ‘Death is Nothing’ requires an axe AND a horse). You can of course place several dice in one section, to allow multiple activations of the same section.


 The Baroness de Loutson and the Cadet Corps of Slebech Castle College For Young Ladies will this week be marching on Newark, to reinforce the Royalist forces in Pete Barfield’s ‘A Very British Civil War’ game at the ‘Partizan 2018′ show.
 Above: The Baroness herself in parade uniform and wielding a vicious-looking riding-crop.
 Above: The Baroness in close-up.
 Above: While the Baroness is Colonel of the Cadet Corps, the day-to-day running and tactical leadership of the Corps is exercised by Lieutenant Colonel, Lady Aisling Keir, here seen with some of her Headquarters Squadron.
 Above: Lieutenant Colonel Keir’s HQ group dismounted. Note that the Corps’ uniforms are recycled Imperial German Hussar uniforms, sourced from Baron de Loutson’s East Prussian cousin, the Freiherr von Lützen, former Commanding Officer of the German Husaren-Regiment ‘Von Lützen’.
 Above: Lance-armed Cadets of the Mounted Hussar Squadron.
 Above: Rifle-armed cadets of the Mounted Hussar Squadron.
 Above: The Officer Commanding the Mounted Hussar Squadron, Captain, Lady Irene Gwynne-James-Davies.
 Above: Cadets of the Foot Hussar Squadron and Support Squadron engage in street-fighting training.
 Above: The massed mounted elements of the Corps on parade, including the Mounted Hussar Squadron, Light Armoured Squadron and elements of the Tactical Headquarters Squadron.
 Above: The massed foot elements of the Corps, including the Foot Hussar Squadron, Support Squadron and elements of the Tactical Headquarters Squadron.
 Above: The whole Corps on parade.
 I almost forgot the Music Section…