
 As mentioned last time, we sadly had to bin our recent plans to put on the Battle of Warburg as a demo-game at the Tenby Games Festival. Nevertheless, that’s given me time to finish a few of the missing units and we’re going to run it at WASP as our Big Christmas Game. 🙂
So here’s the scenario, as designed for Tricorn rules (our 18th Century variant of Shako Napoleonic rules), though it should be easily convertible to other rulesets.
I include two maps; the ‘full-fat’ 6′ x 12′ version and the compressed-frontage 6′ x 8′ map we were going to use at Tenby, due to limited table-space. I’m not sure yet if the Big Christmas Game is going to be on the large map or the small map.
 Historical Background

Marshal de Broglie
At the end of June 1760, the French Grande Armée under Marshal de Broglie, invaded Hesse, quickly capturing the city of Marburg. Reeling from this blow, Prince Ferdinand of Brunswick’s Allied army attempted to stop Broglie from combining his army with the French Armée du Bas-Rhin at Corbach, but was defeated and was steadily out-manoeuvred by the huge French force, which now threatened to take Cassel, the capital city of the Allied power of Hessen-Cassel!
Attempting to regain the initiative, Prince Ferdinand ordered the Hanoverian Lieutenant General von Spörcken and the Hereditary Prince (Erbprinz) of Brunswick to establish a bridgehead west of the River Diemel; this they succeeded in doing on 29th July.

Prince Ferdinand of Brunswick
Observing the Allied move over the Diemel, Broglie decided to counter it, ordering Fischer’s light troops to seize the crossing-point on the Diemel at the town of Warburg. The Chevalier du Muy then led his corps over the river and establish his own bridgehead on a narrow ridge extending northwestward from the town.
The French crossing of the Diemel had not gone unnoticed, however. The Erbprinz had carefully reconnoitered du Muy’s position and although the French force slightly outnumbered the Allied forces on the west bank of the Diemel, the Erbprinz was confident that he could use a line of hills to mask his troops’ march as they outflanked de Muy to attack his rear. Prince Ferdinand broadly agreed with this plan, but insisted that the Erbprinz and Spörcken were not to begin their march until he could bring the rest of the army over the Diemel, thus bringing the full weight of the army to crush du Muy.

Chevalier du Muy
On 30th July, Prince Ferdinand’s army struck camp and set out on a night-march to join the attack. However, although the following dawn brought a thick mist to aid the concealment of the Allied march, Prince Ferdinand’s army was very slow in crossing the Diemel. With time and opportunity slipping away, the Erbprinz and Spörcken decided to go against their orders and started their march without Prince Ferdinand. Although Spörcken was the senior officer, this was the Erbprinz‘s plan and Spörcken graciously deferred command of the operation to the Erbprinz.
Far from being angry at his orders being disobeyed, Prince Ferdinand realised that his column was never going to make it in time and clearly appreciated the initiative shown by his officers. Consequently, he ordered the British Lieutenant General John Manners, Marquess of Granby, to take the massed British cavalry (24 squadrons) and make best speed to ride to the Erbprinz‘s aid. Alongside them galloped the talented artillerist Count William of Schaumburg-Lippe with two batteries of British artillery moving at ‘astonishing’ speed; the gunners desperately hanging on to guns, limbers and horse-teams as best they could!

Carl Wilhelm Ferdinand, Erbprinz of Brunswick
In the meantime, Major von Bülow’s Légion Britannique had been making a nuisance of themselves in front of the town of Warburg, making a feint to keep du Muy’s attention fixed in that area. As a consequence on the morning of 31st July, it was actually the French who made the first move, as the Marquis de Castries massed all the grenadier and chasseur companies from du Muy’s infantry battalions and with assistance from the Chasseurs de Fischer and some dragoons, drove back the Légion Britannique.
With French attention now fixed on their right flank and their reserves deployed to that sector, the Erbprinz now struck on the opposite flank! Preceded by the 87th and 88th Highlanders, the Allied columns appeared between the villages of Ossendorf and Menne. Most worryingly for the French, a pair of red-coated battalions was marching hard for the Hein-Berg. This conical hill, topped with a mediaeval watch-tower, was situated deep in the French rear. It dominated the main French crossing-point and therefore their line of retreat over the Diemel.


Marquis de Castries
The two red-coated battalions were Maxwell’s and Daulhat’s battalions of British Grenadiers and were being driven hard by Colonel John Beckwith, who had commanded the 20th Foot at Minden, but who now commanded the British Contingent’s Grenadiers and Highlanders. Spotting the immediate threat to his line of retreat, du Muy ordered the Bourbonnais Brigade to pull out of the line and capture the Hein-Berg before the British did; the race was on!
Seeing the French counter-move, Beckwith called ten grenadiers to him and they sprinted to the top of the top of the Hein-Berg! The gasping grenadiers then quickly established a tiny firing-line and delivered volleys into the first Bourbonnais battalion to climb the slope. They were soon joined by another twenty grenadiers led by the Erbprinz himself and shortly afterwards by the rest of Daulhat’s battalion. The initial French counter-attack was repulsed by this tiny force, but they soon rallied and attacked again! Dalhaut’s hard-pressed grenadiers were on the verge of breaking when Maxwell’s grenadier battalion arrived and threw the Bourbonnais Regiment back for a second time.

Von Spörcken
The battle for the Hein-Berg quickly escalated as the Erbprinz ordered the 87th Highlanders, 88th Highlanders and two of the Hanoverian grenadier battalions into the fight and even managed to establish some guns on the steep hill. Du Muys for his part, threw the La Couronne, d’Aumont, Rouergue and Rohan-Rochefort Regiments up the hill, while the Marquis de Castries brought his massed elite companies from the far right flank, leaving the Chasseurs de Fischer to hold Warburg.
With almost half of the French infantry now committed to recapturing the Hein-Berg, the Marquis de Ségur’s left wing of the main position was dangerously weakened; a fact that had not gone unnoticed by the Allies. Covered by heavy artillery fire from the heights to their rear, Spörcken’s and Zastrow’s divisions assaulted the French left flank, utterly crushing it.

Marquis de Ségur
D’Amenzaga’s four Swiss regiments (the Planta, Lochmann, Jenner & Courten Regiments) attempted to stabilise the situation, but were also thrown back by the Allied assault. Whole French battalions broke into disorganised mobs and fled south to the Diemel and the possibility of safety on the opposite bank, though many were cut down or captured before they reached safety. A magnificent charge by the British 1st (Royal) and 7th (Queen’s Own) Dragoons completed the destruction of the French left wing.
Recognising that the day was lost, du Muy ordered his remaining artillery and the unengaged infantry of Maupeou’s right wing (the Enghien, Touraine and La Tour-du-Pin Regiments) to retire to the Diemel, covered by the cavalry and to hold the river crossings. However, the Marquess of Granby had arrived…

Count William of Schaumburg-Lippe
As Granby deployed his cavalry, Count William of Schaumburg-Lippe galloped forward with his two batteries of British light artillery, laying down extremely effective supporting fire for the British cavalry.
Granby meanwhile, quickly formed his cavalry into two lines, extending roughly eastward from the village of Menne. In the first line were the heaviest cavalry; three squadrons of the Royal Horse Guards, seven squadrons of Dragoon Guards and four squadrons of Horse. These were followed by six squadrons of Dragoons. Without waiting for further orders, Granby led them straight toward the French position at the gallop. In so doing, his hat and wig flew off, leaving his bald head shining in the sun, which reputedly served as an effective reference point for the squadrons following behind!

John Manners, Marquess of Granby
This incident reputedly gave rise to the phrase ‘Going at it bald-headed’, meaning to rush straight in without heed of the consequences and is beautifully modelled in 18mm by Eureka Miniatures (see below).
As perhaps is clear from the above account, the French army was already defeated at this point, so Granby’s celebrated charge was perhaps too late in the day but it is a spectacular moment in history and worth seeing on the wargames table! 🙂
The bulk of the French cavalry had already begun to withdraw by the time Granby launched his charge, but two French cavalry brigades, the Royal-Piémont and Bourbon Brigades, were sent forward to meet them (French brigades were named for the senior regiment present. Each brigade consisted of three regiments, each of two squadrons). Sadly for the French cavalry, the Royal-Piémont Brigade fled before the British cavalry had even made contact! The Bourbon Brigade however, was made of sterner stuff and made a successful charge on the flank of the 1st (King’s) Dragoon Guards. However, the Royal Horse Guards (‘The Blues’) rode to the recue and the French cavalry were completely beaten within two minutes! The British cavalry now fell upon the flank and rear of what was left of the French left wing.

Fischer
In the meantime, Bülow’s Légion Britannique, having retreated from Castries’ elite battalions during the morning, now came back in strength and overwhelmed the defenders of Warburg. The Chasseurs de Fischer sustained heavy casualties as they attempted the hold the crumbling mediaeval walls of the old town, but the survivors were soon forced to join the great mass of fugitives heading for the Diemel as Bülow’s band of ruffians stormed the town!
The French Touraine Brigade (consisting of two battalions each of the Touraine and Enghien Infantry Regiments) had been unengaged on the left wing and was now holding the river crossings, allowing the French cavalry and dragoons to retreat over the bridges. They were soon joined by the four battalions of the La Tour-du-Pin Regiment However, the bridges soon became blocked by baggage, forcing many of the retreating French units to swim the Diemel.

Von Hardenberg
To add to French misery, Count William of Schaumburg-Lippe now galloped up with his two batteries of British artillery and began bombarding the crossing-point, throwing the retreating units into utter disarray! Du Muy now gave up any thought of trying to hold the Diemel crossings and ordered a full retreat to Volkmarsen, some 10km to the south. There he encountered the head of de Broglie’s main army. To his credit, de Broglie, his army having been delayed from coming to du Muy’s aid by thick fog, took full responsibility for the defeat. The French had lost 1,600 men killed and wounded, 78 officers and 2,100 men taken prisoner (mostly from the infantry regiments of the left and centre), 28 ammunition wagons and 12 artillery pieces. Part of the French baggage had also been captured off the battlefield by Scheither’s Hanoverian Freikorps.
On the Allied side, Frederick of Brunswick ordered Granby to take the cavalry and 12 battalions of infantry across the Diemel to maintain the pursuit, while the rest of the army settled into camp among the ruins of the former French camp. The Allies had lost 66 officers and 1,173 men, mostly from the British contingent. Although a decisive tactical victory for the Allies, de Broglie’s colossal Grande Armée still had a massive superiority in arms. However, this victory allowed Ferdinand to clear his lines of communication and successfully escape the trap that Broglie was constructing. For the British, the magnificent performance of both Granby’s cavalry and the two British dragoon regiments under the Erbprinz‘s command, completely restored their reputation and undid the shame of the British cavalry’s inaction at Minden the previous year.
 Scenario Outline
This scenario lasts 20 turns.
Each army is deployed as per the scenario map (below), though refer to the Order of Battle notes for each side, where there are some clarifications and options for deployment.
Position Batteries start the game unlimbered and their facing may be adjusted before the start of the game. Battalion Guns may be distributed within their formations as the owning player sees fit and may be limbered or unlimbered.
The main scenario map is scaled to 12 x 6 feet, assuming my usual scale of five battalions (without intervals) per table foot of frontage.
Granby’s command will arrive during the Movement Phase of Turn 8, anywhere between Points A & B on the scenario map. Granby’s cavalry regiments will arrive in deployed in line formation, arrayed in two lines, as described in the order of battle below. Schaumburg-Lippe’s two British batteries are deployed anywhere within Granby’s command-radius. Granby’s command may move a full move on to table during the turn in which they arrive (the first line is completely made up of heavy cavalry regiments, which move 10 inches).
Although Prince Ferdinand of Brunswick isn’t represented in the game, he is close-by, observing the battle and will give Granby his orders as he arrives on the battlefield. Granby’s orders may therefore be issued as he arrives on the table.
Any army that manages to break the opposing army will win a Decisive Victory.
French formations may be ordered to retreat from the battlefield between Points C & D on the scenario map (below). Just give them ‘Retreat’ orders and a new command arrow ending at the table-edge between those two points. Formations with ‘Retreat’ orders behave in the same manner as those on ‘Attack’ orders (i.e. must move at least half move toward their destination and may charge enemy units), but once ordered to ‘Retreat’, the order may not be changed. Any artillery units within a Retreating formation and not within 4 inches of the front of a formed enemy unit (blown cavalry don’t count) may limber up for ‘free’, though once limbered they may not be unlimbered.
Any French formation successfully retreated from the battlefield between Points C & D will not count against army morale. The overall result will still be a French defeat, but this may prevent the defeat from becoming a Decisive Defeat.
Sole Allied possession of the top contour of the Hein-Berg will be the equivalent of 10 morale points suffered by the French army.
 For those who can’t stretch to a 12-foot table, I’ve also done this compressed version of the map, adjusted to 8 x 6 feet (below). I actually did this as the result of limited space at the show we were due to attend, but thought it might work rather well and I may well use this compressed version of the table for our Christmas game at WASP.

 The Advanced Guard of the Allied Army
Carl Wilhelm Ferdinand, Hereditary Prince (Erbprinz) of Brunswick
(Good (2 d6) & 2 ADCs)
Vanguard – Colonel John Beckwith (Excellent)
British Grenadier Battalion ‘Daulhat’¹ [5/2]
British Grenadier Battalion ‘Maxwell’¹ [5/2]
British 87th Highlanders (Keith’s)² [5/2]
British 88th Highlanders (Campbell’s)² [5/2]
Right Wing Infantry – Generallieutenant August Friedrich von Spörcken (Excellent)
Hanoverian Grenadier Battalion ‘Wersabé’¹ [5/2]
Hanoverian Grenadier Battalion ‘Bock’¹ [5/2]
Hanoverian Grenadier Battalion ‘Geyso’¹ [5/2]
Hanoverian Infantry Regiment ‘Scheither’¹ [4/1 – Large Unit]
Hanoverian Infantry Regiment ‘Estorff’¹ [4/1 – Large Unit]
Hanoverian Infantry Regiment ‘Post’¹ [4/1 – Large Unit]
Hanoverian Infantry Regiment ‘Block’² [4/1 – Large Unit]
Hanoverian Infantry Regiment ‘Monroy’² [4/1 – Large Unit]
Hanoverian Battalion Guns [2/0]
Hanoverian Battalion Guns [2/0]
Heavy Artillery Battery [3/0]
Heavy Artillery Battery [3/0]
Right Wing Cavalry – Generallieutenant Christian Ludewig von Hardenberg (Average)
4 Sqns, Hanoverian Dragoon Regiment ‘Breydenbach’¹ [5/2]
2 Sqns, British 1st (Royal) Dragoons (Conway’s)¹ } [5/2]
2 Sqns, British 7th (Queen’s Own) Dragoons (Cope’s)¹ } [combined with above]
2 Sqns, Hessian Horse Regiment ‘Ensiedel’² } [6/2]
2 Sqns, Hessian Horse Regiment ‘Prüschenck’² } [combined with above]
Centre – Generallieutenant Georg Ludwig von Zastrow (Good)
Hessian Infantry Regiment ‘4. Garde’¹ [5/2 – Large Unit]
Brunswick Grenadier Battalion ‘Witdorf’¹ [5/2]
Brunswick Grenadier Battalion ‘Stammer’¹ [5/2]
Brunswick Grenadier Battalion ‘Redecker’¹ [5/2]
Hessian Landgrenadierregiment² [4/1]
Hessian Infantry Regiment ‘Toll’² [4/1 – Large Unit]
Hessian Grenadier Battalion ‘Mirbach’³ [5/2]
Hessian Grenadier Battalion ‘Papenheim’³ [5/2]
Hessian Grenadier Battalion ‘Rückersfeld’³ [5/2]
Brunswick Battalion Guns [2/0]
Hessian Battalion Guns [2/0]
Hessian Battalion Guns [2/0]
Heavy Artillery Battery [3/0]
Heavy Artillery Battery [3/0]
Centre Cavalry (Average)
4 Sqns, Hanoverian Dragoon Regiment ‘Bock’ [5/2]
4 Sqns, Hanoverian Dragoon Regiment ‘Reden’ [5/2]
2 Sqns, Hanoverian Horse Regiment ‘Bremer’ [combined with above]
Left Wing (Légion Britannique) – Major August Christian Freiherr von Bülow (Excellent)
Hattorf’s 5 Sqns, Légion Britannique Dragoons (poor) [4/1]
Stockhausen’s (I.) Battalion, Légion Britannique [3/0]
Udam’s (II.) Battalion, Légion Britannique [3/0]
Appelboom’s (III.) Battalion, Légion Britannique [3/0]
De Laune’s (IV.) Battalion, Légion Britannique [3/0]
Fircks’ (V.) Battalion, Légion Britannique [3/0]
Hanoverian Battalion Guns [2/0]
British Cavalry Division – Lieutenant General John Manners Marquess of Granby (Excellent)
3 Sqns, 1st (King’s) Dragoon Guards (Bland’s)¹ [6/2]
2 Sqns, 3rd Dragoon Guards (Howard’s)¹ [6/2]
2 Sqns, 2nd (Queen’s) Dragoon Guards (The Bays or Waldegrave’s)¹ [combined with above]
3 Sqns, Royal Horse Guards (The Blues)¹ [6/2]
2 Sqns, 4th Regiment of Horse (The Black Horse or Honeywood’s)¹ [6/2]
2 Sqns, 3rd Regiment of Horse (Carabiniers or Dejean’s)¹ [combined with above]
2 Sqns, 2nd (Royal North British) Dragoons (The Scots Greys or Campbell’s)² [5/2]
2 Sqns, 10th Dragoons (Mordaunt’s)² [combined with above]
2 Sqns, 6th (Inniskilling) Dragoons (Cholmondley’s)² [5/2]
2 Sqns, 11th Dragoons (Ancram’s)² [combined with above]
British Horse Battery [3/0]
British Horse Battery [3/0]
 Allied Order of Battle Notes
1. Hessen-Cassel infantry regiments actually consisted of two battalions from 1760 onward. However, these reorganised regiments were no stronger than the previous single-battalion regiments, so for game purposes are still classed as single Large Units. Nevertheless, the Landgrenadierregiment was organised as a single battalion of four companies (like the combined grenadier battalions), so doesn’t class as a Large Unit.
2. The Hessian Langrenadierregiment was formed from the massed grenadier companies of the Landmilitia regiments. While the Landmilitia regiments performed competently enough in the field, I decided to class this unit as MR 4 instead of MR 5.
3. In most cases, the Allied cavalry regiments are rather small and are brigaded together into combined units for game purposes.
4. The talented artillerist Count William of Schaumburg-Lippe led the two British artillery brigades in close support of Granby’s cavalry. His guns followed the cavalry with a speed that ‘amazed all onlookers’ (presumably by mounting the gunners on horseback and/or on the guns and limbers) and succeeded in providing close and effective fire-support to the cavalry. These two batteries may therefore be classed as Horse Artillery for the purposes of this scenario.
5. The Hereditary Prince (Erbprinz) Carl Wilhelm Ferdinand of Brunswick should not be confused with his uncle, the Allied C-in-C, Prince Ferdinand of Brunswick.
6. I have no information as to the identity of the ’26 heavy guns’ present with the Hereditary Prince’s force. They were commanded by a Hessian Lieutenant Colonel, though could be Hessian, British, Hanoverian or Schaumburg-Lipper, so take your pick.
7. The term ‘heavy artillery’ was often used to describe position batteries of any calibre (as opposed to small detachments of artillery parceled out as battalion guns). Some or all of these ‘heavy’ batteries could therefore be ‘light artillery’ in game terms. However, given their position on high ground well to the rear, it does seem very likely that these were long-ranged heavy guns.
8. The small numbers next to unit names indicate their line within the formation (1st, 2nd or 3rd Line). Units are always listed from right to left along their line.
9. The two Highland battalions and the five battalions of the Légion Britannique may each deploy as two skirmisher stands.
10. The Hanoverian ‘Bock’ and ‘Reden’ Dragoon Regiments are brigaded with the two squadrons of the ‘Bremer’ Horse. However, the ‘Bremer’ Horse aren’t strong enough in game terms to be represented as a unit in their own right and in my opinion, don’t add enough manpower to beef the dragoons up to Large Unit status.
11. Spörcken and Hardenberg are Hanoverian officers, Zastrow was a Brunswicker (Hanover, Brunswick and Prussia all had at least one Zastrow) and Bülow was a seconded Prussian officer. Beckwith and Granby are British.
12. The British Royal Horse Guards and 3rd & 4th Regiments of Horse are classed as Cuirassiers. The British Dragoon Guards, Hessian Regiments of Horse and Hanoverian Regiments of Horse are not equipped with cuirasses and are therefore classed as Heavy Horse. In Tricorn this only matters in the event of a draw during mêlée. British and Hanoverian dragoons are simply classed as Dragoons, though Hattorf’s Légion Britannique Dragoons are rated as Poor Dragoons, so are MR 4.
13. The name of Colonel Daulhat of the British grenadiers is also spelled ‘Dalhaut’ or ‘Daulhatt’ in some accounts, but the Daulhat family had a long history in the British Army and I’m sure this is the correct form of the name.
Allied Formation Breakpoints
Division FMR ⅓ ½ ¾
Beckwith 20 7 10 15
Spörcken 45 15 23 34
Hardenburg 16 6 8 12
Zastrow 54 19 27 41
Centre Cavalry 10 4 5 8
Bülow (Leg. Brit.) 21 7 11 16
Granby 40 14 20 30
Army FMR ¼ ⅓ ½
Allied Army 207 52 69 104
 The Advanced Guard of the Grande Armée
Lieutenant-Général Chevalier du Muy
(Average (1 d6) & 2 ADCs)
Right Flank-Guard (Chasseurs de Fischer) – Colonel Johann Christian Fischer (Poor)
4 Coys, Chasseurs à Pied de Fischer [3/0]
4 Coys, Chasseurs à Pied de Fischer [3/0]
4 Coys, Chasseurs à Cheval de Fischer [4/1]
4 Coys, Chasseurs à Cheval de Fischer [4/1]
Grenadiers & Chasseurs Réunis – Lieutenant-Général Marquis de Castries (Excellent)
1st Bn, Grenadiers-Réunis [5/2]
2nd Bn, Grenadiers-Réunis [5/2]
1st Bn, Chasseurs-Réunis [4/1]
2nd Bn, Chasseurs-Réunis [4/1]
Right Wing – Lieutenant-Général de Maupeou (Average)
1st Bn, La Tour-du-Pin Infantry Regiment [4/1]
2nd Bn, La Tour-du-Pin Infantry Regiment [4/1]
3rd Bn, La Tour-du-Pin Infantry Regiment [4/1]
4th Bn, La Tour-du-Pin Infantry Regiment [4/1]
1st Bn, Touraine Infantry Regiment [4/1]
2nd Bn, Touraine Infantry Regiment [4/1]
1st Bn, Enghien Infantry Regiment [4/1]
2nd Bn, Enghien Infantry Regiment [4/1]
Battalion Guns [2/0]
Heavy Artillery Battery [3/0]
Heavy Artillery Battery [3/0]
Cavalry Right Wing – Lieutenant-Général Franz Walther von Lützelburg (Poor)
Royal-Étranger Cavalry Brigade (Royal-Étranger, Archiac & Saint-Aldegonde) (poor) [5/2]
La Reine Cavalry Brigade (La Reine, Balincourt & Crussol) (poor) [5/2]
Bourbon Cavalry Brigade (Bourbon, Beauvilliers & Montcalm) (poor) [5/2]
Cavalry Left Wing – Lieutenant-Général Marquis d’Auvet (Good)
Royal-Piémont Cavalry Brigade (Royal-Piémont, Descars & Espinchal) (poor) [5/2]
4 Sqns, Thianges Dragoon Regiment (poor) [4/1]
4 Sqns, Royal Dragoon Regiment (poor) [4/1]
Infantry Reserve – Mestre de Camp de Travers (Good)
1st Bn, Rouergue Infantry Regiment [4/1]
2nd Bn, Rouergue Infantry Regiment [4/1]
1st Bn, Rohan-Rochefort Infantry Regiment [4/1]
2nd Bn, Rohan-Rochefort Infantry Regiment [4/1]
Battalion Guns [2/0]
Left Wing – Lieutenant-Général Marquis d’Amenzaga (Average)
1st Bn, Planta Swiss Infantry Regiment [4/1]
2nd Bn, Planta Swiss Infantry Regiment [4/1]
1st Bn, Lochmann Swiss Infantry Regiment [4/1]
2nd Bn, Lochmann Swiss Infantry Regiment [4/1]
1st Bn, Jenner Swiss Infantry Regiment (elite) [5/2]
2nd Bn, Jenner Swiss Infantry Regiment (elite) [5/2]
1st Bn, Courten Swiss Infantry Regiment [4/1]
2nd Bn, Courten Swiss Infantry Regiment [4/1]
Battalion Guns [2/0]
Heavy Artillery Battery [3/0]
Left Flank – Lieutenant-Général Marquis de Ségur (Good)
1st Bn, La Couronne Infantry Regiment (elite) [5/2]
2nd Bn, La Couronne Infantry Regiment (elite) [5/2]
1st Bn, D’Aumont Infantry Regiment [4/1]
2nd Bn, D’Aumont Infantry Regiment [4/1]
1st Bn, Bourbonnais Infantry Regiment (elite) [5/2]
2nd Bn, Bourbonnais Infantry Regiment (elite) [5/2]
3rd Bn, Bourbonnais Infantry Regiment (elite) [5/2]
4th Bn, Bourbonnais Infantry Regiment (elite) [5/2]
Battalion Guns [2/0]
Heavy Artillery Battery [3/0]
 French Order of Battle Notes
1. The term ‘heavy artillery’ was often used to describe position batteries of any calibre (as opposed to small detachments of artillery parceled out as battalion guns). Some or all of these ‘heavy’ batteries could therefore be ‘light artillery’ in game terms. However, I’ve classed them all here as pukka heavy guns. In reality the 24 French heavy guns were grouped into five batteries, though I’ve rationalised this for game purposes as four batteries, each of six guns.
2. The battalions of the Chasseurs à Pied de Fischer, the combined grenadiers and the combined chasseurs may each alternatively deploy as 2x Skirmishers.
3. Unlike the dragoons of most other nations, which had become medium-weight shock cavalry, French dragoon regiments were still very much roled as mounted infantry, with shock action as a secondary role. They are therefore classed as Poor Dragoons, with MR 4. However, they may dismount and fight as infantry battalions with the same MR, or as 2x Skirmishers.
4. The majority of French cavalry regiments were very weak at this time. Most had only two weak squadrons, with an average campaign strength of only 240-260 men. Consequently, in Tricorn a unit represents a brigade of three or four such regiments. Note however, that these are classed as Poor Cuirassiers, so are MR 5.
5. Muy’s left wing is deployed on an extremely compressed frontage. Maps of the battle show the battalions as being deployed in a single line, but it seems likely that the brigades stationed on the left wing might have adopted the typical French deployment of deploying the right-hand battalion in each brigade en potence; i.e. at right-angles to the main line, to protect the brigade’s flank should the brigade on their right collapse. The left-most brigade would then deploy its left-hand battalion en potence to protect the open flank (either in column facing the front, or in line facing the flank). This style of deployment was used at other battles (most notably at Minden) and would give the remaining three battalions in each brigade room to deploy fully in line. I’ve shown this deployment on the scenario map.
6. These is little information on the exact deployment of Castries’ temporary corps of massed grenadiers and chasseurs. This formation had been formed early in the day, from the massed grenadier and chasseur companies of the army and had then driven Bülow’s Légion Britannique back from the high-ground immediately north of Warburg. I’ve therefore placed them roughly where they would have been, having successfully driven off Bülow. When the crisis emerged on the left flank, Castries immediately marched his corps over to the left flank to assist there.
7. Similarly, there is little information as to the exact deployment of the Chasseurs de Fischer. All I know is that they were occupying Warburg, but also assisted Castries in driving back Bülow during the early hours. Following that action, they fell back to defend Warburg, but were eventually driven out later in the day by the resurgent Bülow. The location of the mounted Chasseur squadrons is purely speculative and they may not have been present.
8. Although Travers is not mentioned as commander of the Reserve (Rouergue) Brigade, he is mentioned as leading the brigade in a counter-attack against the Allied infantry, so I list him here as commander of the Reserve.
9. Some sources place the two French dragoon regiments on the right flank with Castries’ command, engaging the Légion Britannique alongside the massed grenadier and chasseur companies and the Chasseurs de Fischer. The French player may therefore place the two dragoon regiments, under d’Auvet’s command, within Castries’ or Fischer’s deployment area. In which case, transfer the Royal-Piémont Cavalry Brigade from d’Auvet to Lützelburg’s command and re-calculate the divisional breakpoints.
10. The German mercenary Johann Christian Fischer is sometimes referred to in the French form, ‘Jean Chrétien Fischer’ or ‘de Fischer’. I’m not certain if he was ever raised to the nobility and therefore entitled to include the ‘de’ in his name.
11. The Kronoskaf account of the battle refers to du Muy’s corps as the ‘Rearguard’ of the army. I’m not sure I understand the logic of this, as they were definitely at the point of the French advance, having just established a bridgehead over the Diemel, with Broglie’s main army marching to reinforce them.
French Formation Breakpoints
Division FMR ⅓ ½ ¾
Fischer 14 5 7 11
Castries 18 6 9 14
Maupeou 40 14 20 30
Lützelburg 15 5 8 12
D’Auvet 13 5 7 10
Travers 18 6 9 14
D’Amenzaga 39 13 20 30
Ségur 42 14 21 31
Army FMR ¼ ⅓ ½
French Army 200 50 67 100
 Terrain Notes
The battlefield terrain is for the most part, as defined in the terrain chart on Page 2 of the Tricorn Quick-Reference Sheets. Here are some scenario-specific terrain definitions:
River Diemel – The River Diemel is impassable to all troop types.
Streams – Are passable to all troop-types, as per the standard rules. A defender gains a +1 defensive modifier against any unit that crossed a stream during its charge (not cumulative with other terrain modifiers)
Farms, Mills & Watch-Tower – These are merely decoration on the table and do not affect play.
Gardens & Allotments – The town of Warburg is surrounded by a belt of gardens, allotments, orchards and smallholdings (marked on the map by green cross-hatching). Class this area as ‘Orchards’ as per the standard rules. The defender gains a +1 defensive modifier (not cumulative with other terrain modifiers).
Hills – The defender will gain a +1 defensive modifier during combat (not cumulative with other terrain modifiers).
The Hein-Berg – The top contour of the Hein-Berg is very steep. For movement, class all units crossing the top contour-line the same as crossing a stream. Instead of the usual +1 for defending a hill, any unit defending the top contour of the Hein-Berg will gain a +2 defensive modifier.
Warburg – The crumbling mediaeval walls of Warburg give a defender some advantage, though the walls have been breached in many areas by centuries of building-work, creating doors, windows and gateways and other points of entry for infantry. Divide the town up into Built-Up Sectors (BUS), each of which may only be defended by a single battalion or pair of skirmisher stands. I suggest 4x BUS for the southern part of the town and 5x BUS for the northern part of the town. Where an attacked has to cross the outer wall, the defender gains a +2 defensive modifier. If fighting within the town, the defender gains only a +1 defensive modifier. Cavalry and Artillery may only pass through the town in column/limbered formation and only via the main gates; where a road meets the town wall (N.B. there is only one connecting gate between the northern and southern halves of the town). Note that one historical map, in the Royal Collections Trust, shows Warburg as surrounded by modern bastioned fortifications. This was definitely not the case.
Villages – Ossendorf comprises three BUS (only one if using the compressed version of the map), while Menne comprises one BUS. These are not prepared for defence and only give the defender a +1 defensive bonus.
Woodland – Some maps show some small areas of woodland along the Diemel and around the fringes of the battlefield, but these didn’t play any significant part of the battle. One map shows a wooded area (of approx 12 inches square in map-scale) directly in front of the French left wing (i.e. the La Couronne and d’Aumont Regiments), but this is the same map that shows the bastions and ravelins around Warburg, so I wouldn’t put too much faith in its accuracy.

That’s it for now! I’m looking forward to playing this one. As an aside, I’ve just begun a transatlantic Play-By-Mail Franco-Prussian War campaign with some very fine gentlemen. Despite knowing absolutely nothing about the war, I’ve been placed in charge of the Prussian 2nd Army (i.e. the main Prussian striking-force). We’re doomed… Anyway, we’ve just submitted out first orders for the invasion of France, so I can’t wait to see how it turns out. I will post the results here, once it becomes non-operationally-sensitive to do so (the French have their spies, I’m sure).
On To Paris! 🙂

 As it’s Christmas, I thought I’d share with you what is possibly the most festive all all regiments, the French Mestre de Camp Général Dragoons in their Santa hats?! 🙂
 French dragoon regiments during this period were much stronger than the vast majority of the heavy cavalry regiments. Each dragoon regiment had four squadrons, each of four companies, for a total of 694 men at full strength (including officers and regimental staff), increasing slightly in 1757 to 710 men. This means that for Tricorn, I represent each dragoon regiment as a separate unit of 12 figures.
 French dragoons were unusual during this period in that they were still mostly used for scouting and flanking and were expected to routinely fight on foot. In almost all other armies, the dragoons had become a medium-heavy class of shock cavalry. The French dragoons therefore, were armed with infantry-pattern muskets and bayonets and retained buckled leather gaiters (known as bottines) to theoretically allow ease of movement when fighting dismounted. However, shortly after the start of the Seven Years War, bottines were rapidly replaced by shoes and white canvas gaiters when a unit was fighting on foot.
 Then in 1757, most dragoon regiments had a facing colour added to their cuffs and the pokalem turn-up. For the Mestre de Camp Général Regiment, the new facing colour was white. The lace edge-colour also changed back to white, which at this scale is impossible to see on white facings, making the cuffs and pokalem turn-up just look plain white.
 The musicians’ livery for the regiment isn’t known for certain. The arms of the Colonel, Marie François Henri de Franquetot, Comte de Coigny were red, with a yellow horizontal central band, three yellow crescents (two above and one below) and three blue stars superimposed on the yellow band. With the dominant armorial colours being yellow and red, coats in these colours would seem to be as good a fit as any. As it happens, I’ve since discovered that the first uniform for the Tessé Dragoons was a yellow coat with red cuffs, so this (accidentally) links back to the regiment’s past.
 Anyway, have a Very Merry Christmas! I hope that unlike mine, your family gives you lots of what you ACTUALLY want for Christmas (models, books, etc) and that you manage to get some Christmas wargaming in. We’ll be doing out Christmas refight of Warburg on the 27th, so more of that soon. Cheers!
 As discussed last time, we’re going to be refighting the
  I therefore needed to paint some Highlander skirmishers for

 Above: The 87th Regiment of Foot (Keith’s Highlanders). Keith’s three companies of Highlanders were sent to Germany in November 1759 to join Ferdinand of Brunswick’s army. Initially tasked with joining the petit-guerre of raiding and reconnaissance. With cattle-raiding in the blood, the Highlanders proved to be naturally adept in this role and greatly impressed Ferdinand, who requested that the unit be expanded to a full battalion. Therefore, in early 1760 a further five companies were dispatched to Germany, thus establishing a weak battalion of eight companies.
 Above: The 87th Regiment of Foot (Keith’s Highlanders). Traditionally considered to be light infantry experts of the petit-guerre, the Highlanders in Germany also proved themselves more than capable of fighting alongside other regiments in the line and at Vellinghausen demonstrated their fearsome ability to conduct close assaults.
 Above: The 87th Regiment of Foot (Keith’s Highlanders). This regiment wore the typical short Highland jacket in red. This garment lacked lapels and tails, though had cuffs and collar in the facing colour. There is some debate in sources as to whether the regiment wore green or buff facings. The original cadre taken from the 42nd Regiment would have initially worn the buff facings of their old regiment, but it’s clear that the regiment soon changed to green facings, as modelled by Captain James Gorry on the right and Colonel Keith above.
 Above: The 87th Regiment of Foot (Keith’s Highlanders). Waistcoats were red, with white lace edging and buttonhole lace. However, officers often wore fashionable buff waistcoats, as modelled by Captain Gorry above. Kilts were of the standard Government sett of dark green with green-blue stripes and blue squares where the stripes meet. The stripes are edged and over-striped in black. However, while I have in the past done the ‘full fig’ with fine black lining, this time I just went for ‘impressionist’ tartan, leaving out the black lining. To be honest, it looks no bloody different when viewed on the tabletop! 🙂 The excess kilt-material was pinned up behind the left shoulder and a black or dark brown ‘purse’ (sporran) was worn at the front, along with a couple of scabbarded sgian dubh daggers and a black belly-box, decorated with the crowned ‘GR’ cypher.
 Above: The 87th Regiment of Foot (Keith’s Highlanders). Belts and scabbards were black with brass fittings and buckles. All ranks carried a broadsword which had a steel basket-hilt, lined with red cloth. This was suspended from a broad black belt worn over the right shoulder. Hose were the universal red-and-white diced pattern, held up with red garters.
 Above: The 87th Regiment of Foot (Keith’s Highlanders). The regiment’s drummers were dressed in reverse colours; i.e. green jackets with collar, cuffs and waistcoat in red. Lace decoration was ‘as the Colonel saw fit’ and as there is no record of what they wore, I’ve kept it reasonably plain and simple. Tartan was probably the Royal Stewart sett, which at that time consisted of green stripes (in pairs or threes), over red, with fine over-striping of white and yellow. Again, I’ve gone for ‘impressionist tartan’ and haven’t bothered with the over-striping. Drums had red edges and the front part was painted in the facing colour, with the crowned royal cypher and regimental number.
 Above: The
  Above: The 88th Regiment of Foot (Campbell’s Highlanders). Sources are again split as to whether this regiment wore green or buff facings. However, there are this time no portraits or other pictures from the period to give us a clue and as a consequence, I’ve gone for buff, just to make them look different from the 87th.
 Above: The 88th Regiment of Foot (Campbell’s Highlanders). All other details of uniform and equipment for the 88th are exactly the same as the 87th, except the the officers’ lace colour was now silver.
 Above: The 88th Regiment of Foot (Campbell’s Highlanders). Again the drummers of the 88th were dressed in reversed colours with Royal Stewart tartan. However, this time I’ve opted to dress the piper in the regular red coat of the rank-and-file.
 Above: The 88th Regiment of Foot (Campbell’s Highlanders). Some skirmishers for the regiment.
 Above: The 88th Regiment of Foot (Campbell’s Highlanders). The skirmishers again.
 Above: Colonel John Beckwith (20th Regiment of Foot). In 1759, as a Lieutenant Colonel John Beckwith commanded the
  Above: Colonel John Beckwith (20th Regiment of Foot). Following almost two years excellent service as commander of the elite brigade, Beckwith had still not received his deserved promotion to Major General. However, he had a cunning plan. In late 1761, he wrote to the King of Prussia, recommending that the
  Above: Colonel John Beckwith (20th Regiment of Foot). Being commissioned into the 20th Foot, Beckwith would probably have worn a variation on his old regimental uniform, which had pale yellow facings and silver lace.
 Having shocked the surviving readers of this blog last week by
  These are particularly bland; all with white coats and most don’t even have lapels… I can sense some of you starting to snore already, so pull up a pillow…
 Above:
  Above: Dragoon Regiment ‘Breidenbach’. As in the Hessian and French armies, Hanoverian dragoon regiments were roughly double the strength of the line cavalry regiments, having four squadrons instead of two. Each squadron had two companies, each of 87 men. However, as an added complication, eight men from each company would then be detached to the Horse Grenadier Company, which had its own permanent staff of five men (1 lieutenant, 2 NCOs and 2 drummers), so in the field, the regiment would have nine companies, for a total of 712 men at full strength.
 Above: Dragoon Regiment ‘Breidenbach’. The regiment’s coats had light blue lapels, cuffs, aiguillette and tail-turnbacks, with white metal buttons and white shoulder-strap and buttonhole lace. Neck-stocks were red and the aiguillette had red tips to the cords. Small-clothes, belts, gauntlets and cartridge-pouches were light buff, with light blue lace edging to the waistcoat. Hats had white lace, black cockades and were often adorned with a sprig of oakleaves or other greenery. Scabbards were black with iron fittings and swords had iron hilts.
 Above: Dragoon Regiment ‘Breidenbach’. The regiment’s Horse Grenadiers wore a mitre cap with a white bag with light blue piping and a red-over-light blue pompom. The front-piece and headband were light blue. The front-piece was decorated with the crowned Badge of Hanover, flanked by white foliage. Below that was a red false-flap, decorated with a white or silver grenade badge. There was another grenade badge worn centrally on the rear of the headband.
 Above: The ‘Dachenhausen’ Regiment of Horse (left) and ‘Gilten’ Regiment of Horse (right).
 Above: The ‘Dachenhausen’ Regiment of Horse (left) and ‘Gilten’ Regiment of Horse (right). All Hanoverian regiments of horse wore white coats without lapels or aiguillette. I’ve therefore used yet more British dragoon figures by
  Above: The ‘Gilten’ Regiment of Horse (left) and ‘Dachenhausen’ Regiment of Horse (right). Officers of horse had metallic lace edging to cuffs, collar, hat and horse furniture, as well as a silver gorget worn at the throat and a yellow sash worn over the shoulder.
 Above: The ‘Zepelin’ Regiment of Horse (left) and the ‘Reden’ Regiment of Horse (right).
 Above: The ‘Zepelin’ Regiment of Horse (left) and the ‘Reden’ Regiment of Horse (right).
 Above: The ‘Reden’ Regiment of Horse (left) and the ‘Zepelin’ Regiment of Horse (right) again dressed their musicians in livery-coats matching the facing colour and heavily decorated with lace.
 It was something a bit different for me last week, as I went down to

 Above: A small Shū of only two Sonae, belonging to Oda Nobunaga’s army. This is the Akechi clan, commanded by Akechi Mitsuhide (identified by the ‘F’ marker on the Sonae bases). The clan’s two Sonae are average across the board, with both Sonae having a factor of 2 for both Command and Military ability. The right-hand Sonae (to which Akechi Mitsuhide has attached himself) also has a dot above its Command factor, indicating the inclusion of guns.
 Above: Peasants work in the paddy-fields.
 Above: In the nearby village, more peasants hang out the washing and do a spot of fishing.
 Above: Other peasants take a stroll with the kids.
 Above: Two peasants play Go in the shade of a pine tree, while a third looks on, probably offering ‘helpful tactical advice’.
 Above: I thought I’d add this coin to show the scale of Gareth’s incredible modelling and painting. His figures are mostly by Baccus Miniatures, with a few 3D-printed models mixed in. The scenery is all scratch-built. For the purposes of our game, the scenic items (aside from woods and hills) were purely for decoration and were simply moved aside as troops moved through. The underlying terrain cloth is a golden-brown ‘teddy-bear fur’ rug, painted with large patches of green. This harks back to our old demo games, which used the same colour scheme in an attempt to match those wonderful Japanese folding screens (such as the famous Ōsaka Screen), which use gold leaf as the ground-colour, with large patches of green grass.
 Above: The opening positions, showing the army of Oda Nobunaga on the left and the army of Mōri Terumoto on the right. The Mōri army is slightly stronger, but the Oda have the qualitative edge. Here’s Gareth’s outline of the scenario, together with a rough order of battle showing the ID letter for each Shū, the clan to which they belong and the name of the Bushō. Each Shū has 2-4 Sonae. Most Shū have one Sonae equipped with guns. I must add that this period is not my my area of expertise, so any errors below are entirely Gareth’s… 😉
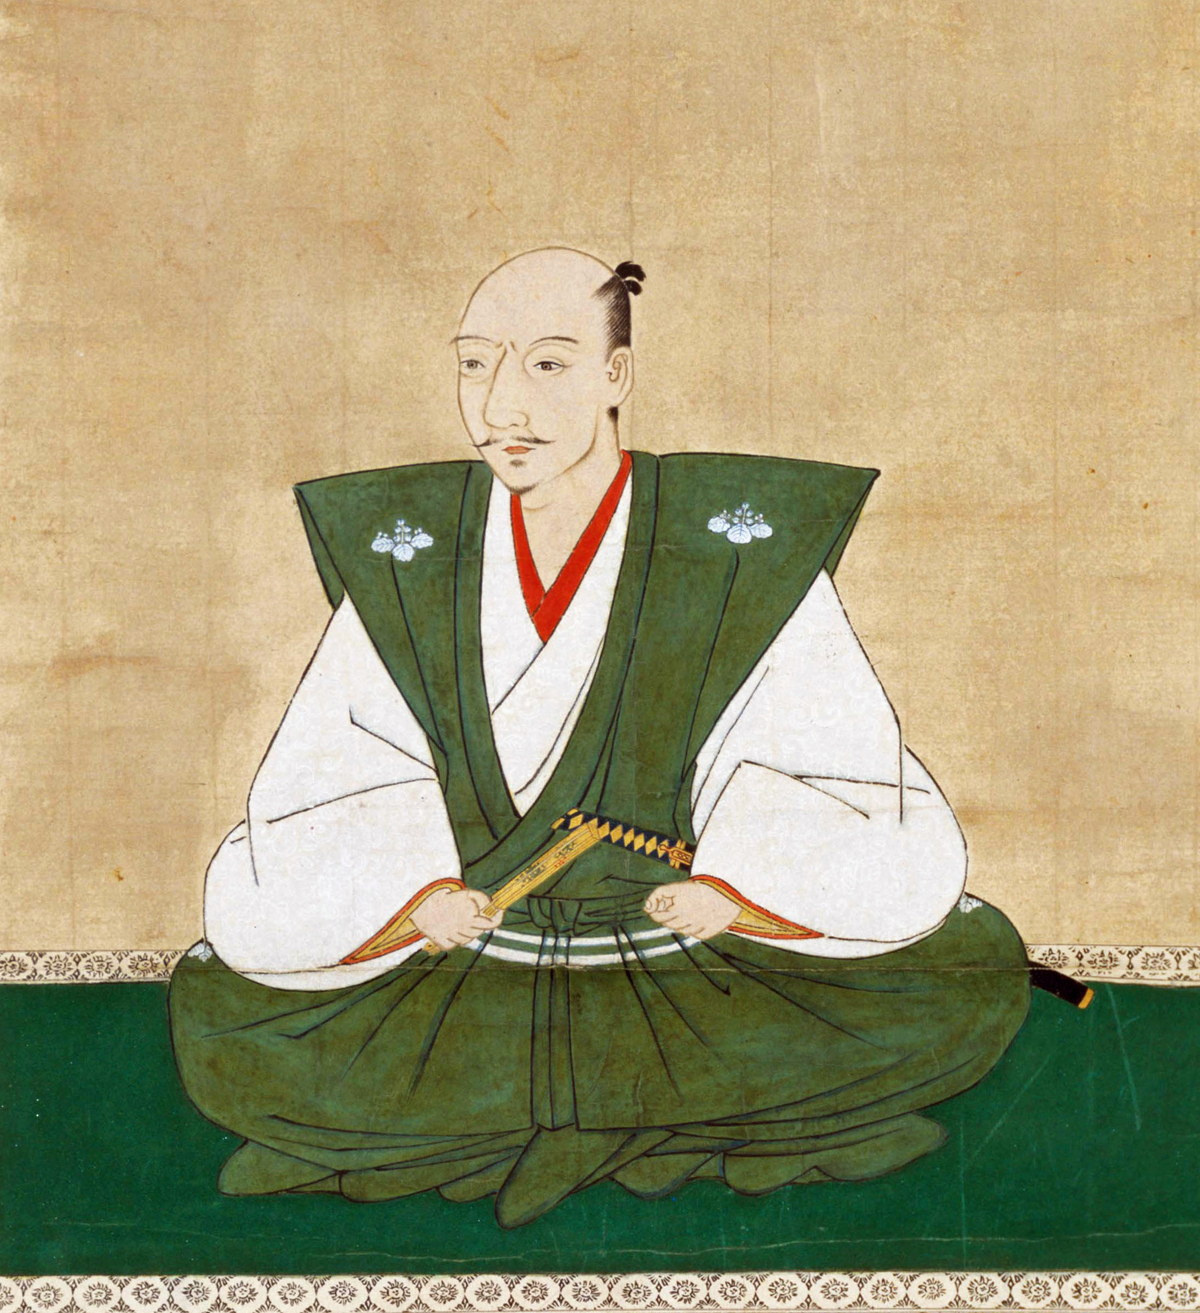 Oda Army (Gareth):
 Mōri Army (Me):
  Above: Mōri Terumoto’s headquarters is situated on top of a hill near the right flank. Terumoto gains a bonus when transmitting orders provided he remains within his headquarters, but will lost that bonus if he decides to mount up and move.
 Above: To the rear of Mōri Terumoto’s headquarters are his household troops (A), consisting of three high-quality Sonae. On the forward slope is the Shū of Fukubara Sadatoshi (B) with two Sonae. On the right flank stands the large Shū of minor clan contingents (E), consisting of four Sonae under the command of Awaya Motonobu.
 Above: In the centre of the Mōri line is the Shū of the Kikkawa clan (D), resplendent in their black-and-white-striped sashimono. This formation consists of three Sonae, commanded by Kikkawa Motoharu.
 Above: The Mōri left wing is refused, lurking in the dead ground behind a hill. This wing comprises mostly Poor troops and is therefore kept as far away from the enemy as possible! Behind the Kobayaka clan are the Murakami and their retainers (G). The Sonae of Murakami household troops (with the brown sashimono and nobori) comprises average troops, but the two retainer Sonae on their right are universally poor.
 Above: Gareth’s overall view of the Mōri army.
 Above: Oda Nobunaga has also positioned his headquarters on a hilltop, to get a good view of the action. In front of him stand the three Sonae of his household troops (A); two Sonae with black sashimono and nobori banners, plus one Sonae (on the right) with yellow. On the left flank stands a Shū of four Oda household Sonae (B), under the command of Sassa Narimasa.
 Above: To the right of Oda’s headquarters is a third Shū of Oda household troops (C), comprising three Sonae, commanded by Oda Nobutada.
 Above: To the right of the Oda household is the Shū of the Shibata clan (D) commanded by Shibata Katsuie, with two Sonae carrying red sashimono and white nobori.
 Above: In front of the Akechi clan is the Shū of the Maeda clan (G), carrying white banners. This clan again has two Sonae, led by Maeda Toshiie. Toshiie himself is easily identifiable on the battlefield thanks to his famous gold catfish-tail helmet and his personal banner depicting ‘Shoki the Demon-Queller’.
 Above: Gareth’s overall view of the Oda army.
 Above: With a wave of his tessen, Mōri Terumoto orders his right wing (the small Shū of Mōri troops under Fukubara Sadatoshi and the large, rag-tag Shū of Awaya Motonobu to advance rapidly, to take up more advantageous defensive positions on the high ground to their front. The respective Būsho are marked with a circular base of pack-mules, indicating that they are under March orders.
 Above: The rest of the Mōri army remains stationary in their original positions under Defend orders (as indicated by the fence markers). Terumoto-sama has decided to refuse his left flank and anchor it on dense woodland, but now starts to regret his decision, as the hill forward of the left flak might have been more defensive ground.
 Above: Oda Nobunaga meanwhile, knowing the quality of his troops, decides on a much more aggressive approach. His entire right wing moves forward in echelon, hoping to destroy the poor-quality troops on the Mōri left flank and then rolling the Mōri army up from there. The tip of the yari is formed by the excellent Sonae of the Hashiba (red banners) and Maeda clans (white banners).
 Above: Next in the echelon are the Akechi and Shibata clans. Note the marker with a mounted tsukai-ban (messenger) figure, wearing a voluminous red horo on his back (looking rather like a Ninja Turtle). This marker indicates a Shū on Attack orders. A marker with a single nobori banner-bearer indicates a Shū on Regroup orders, but there are none of those on the table yet.
 Above: The Hashiba clan quickly closes to contact and charges the leftmost Sonae of the Harmia clan. The Harima are not good troops and casualties quickly mount, despite despite their reasonably good position.
 Above: Despite Bessho Nagaharu’s best efforts, his leftmost Sonae quickly collects a critical number of grass-tufts, but inflicts only one in return!
 Above: The view across the battlefield from the endangered Mōri left flank.
 Above: The view from the opposite flank. In the foreground, Awaya Motonubu’s mixed Shū has occupied the hilltop and adopted Defend orders in the nick of time as in front of them, Sassa Narimasa’s Shū is moving to attack the hill.
 Above: Back on the Mōri left flank, the Harima clans are collapsing in the face of the ferocious Hashiba attack! Bessho Nagaharu has thus far managed to escape death or capture, but now he makes his last stand with his household Sonae.
 Above: The ferocity of Hashiba Hideyoshi’s attack has been so astonishing and rapid that Murakami Motoyoshi has not managed to organise a counter-attack to save his neighbour!
 Above: The Akechi (light blue) charge home on the Kobayakawa (red)! However, Oda plans quickly unravel as both Akechi Sonae suffer heavy casualties while assaulting a single Kobayakawa Sonae.
 Above: Over on the Mōri left flank, Bessho Nagaharu is still holding out with the last remnants of the local Harima clans. However, the leading Maeda Sonae has charged home on the left-flanking Murakami Sonae, inflicting heavy casualties (at some expense to the Maeda). The second Maeda Sonae meanwhile, wheels to outflank the Kobayakawa, who are already hard-pressed by the Akechi! [edited to de-gibbish]
 Above: Over on the right flank however, things are going rather better. Awaya Motonobu’s Shū is still managing to hold his hilltop against Sassa Narimasa’s Oda troops, while on his left Fukubara Sadatoshi has charged into the fight with his Shū of Mōri household troops, inflicting significant damage on the right-hand Oda Sonae. All they have to do is hold their ground…
 Above: In the centre, the black-and-white striped banners of the Kikkawa clan charge through the paddy-fields to strike home on the Shibata! However, Shibata Katsuie proves to be a wily foe and wheels one of his Sonae to outflank the Kikkawa assault. In turn, Kobayakawa Takakage orders his clan to counter-attack and succeeds in outflanking the outflanking Shibata Sonae! However, the Kobayaka are now being outflanked by the Maeda…
 Above: Back on the left flank, Bessho Nagaharu’s heroic resistance finally ends as he goes down fighting, having inflicted heavy losses on the Hashiba in sweet revenge. The brown-bannered Murakami Sonae has also gone down fighting, beset on two sides by Hashiba and Maeda Sonae. However, Murakami Motoyoshi is starting to get his act together and has managed to turn one of his Sonae to face the threat on the flank.
 Above: Over on the opposite flank, Awaya Motonobu’s mixed bag of minor clans is starting to be pushed off his hill!
 Above: At last, the Mōri army has some success as the Shibata clan is destroyed by the combined efforts of the Kikkawa and Kobayakawa! However, One of the red-bannered Kobayakawa Sonae has been destroyed by the combined efforts of the Maeda and Akechi clans, while the hoped-for Mōri breakthrough in the centre has now been blocked by the intervention of a fresh Shū of Oda household troops led by Oda Nobunaga’s son and heir, Oda Nobutada.
 Above: “Amaterasu on a jitensha! Do I have to do everything myself?!” Alarmed by the deteriorating situation on the left, Mōri Terumoto calls for his horse and leads his personal household troops to stabilise the situation!
 Above: Determined to push Awaya Motonobu off the hill, Sassa Narimasa presses home his attack. However, Sassa Narimasa’s right-flanking Sonae is destroyed by Fukubara Sadatoshi… The battle for the hill could still go either way.
 Above: Suddenly, the gods smile on the Mōri! By some miracle, the Murakami, hard-pressed on the left flank, manage to repulse yet another Hashiba attack, breaking one of the two Hashiba Sonae! Shocked by the repulse, the rest of the Hasiba clan break and run, closely followed by one of the two Maeda Sonae! The astonished Murakami immediately advance, hoping to crush Maeda Toshiie in concert with the Kobayakawa and roll up the Oda right flank.
 Above: However, Oda Nobutada soon pisses on the Mōri osumi… The injection of a third Kikkawa Sonae into the battle at the village makes little difference as the other two Sonae are destroyed. The lead Kobayakawa Sonae is similarly destroyed by the Akechi and yet another Kobayakawa Sonae flees the field in response to the unfolding disaster!
 Above: As the Taishō leads the charge against Oda Nobutada, the Murakami advance to roll up the Oda right flank. However, Maeda Toshiie escapes the trap, ‘advancing to the rear’ with his remaining Sonae to regroup. The Akechi meanwhile, find themselves in trouble, having suffered heavy losses and now beset by the remnants of the Murakami and Kobayakawa clans, as well as fresh Mōri household troops! In the distance, Oda Nobunaga has also mounted up and is riding to join the battle…


 Historical Background – The First Silesian War


 The Austrians meanwhile, were in complete panic, as the Prussians had appeared in their rear, forcing them to deploy in an unthinkable (for the 18th Century) reversed deployment (the shame)! However, perhaps due to inexperience and caution, Frederick decided to deploy his army instead of charging headlong into the panicked enemy, thus giving the Austrians time to recover their composure and await the Prussian advance… And wait… and wait…


 When the King finally returned to the army, he was clearly a man on a mission. The shortcomings of his cavalry arm were manifest and despite the war in Silesia still going on, he immediately implemented a programme of reforms and training, often conducting the training in person. In the meantime, the Silesian Campaign remained locked in a stalemate and on 9th October 1741 he agreed to an armistice that ceded Lower Silesia to Prussia.


 The Prussian Army – King Frederick II
 The Austrian Army – Feldzeugmeister von Neipperg
 Terrain and Weather Notes


 Above: The bulk of the French army starts the game having just been alerted and in the process of forming up in its camping-grounds (Note to self: I must make some tent-lines…). The Gendarmerie de France are in the foreground, with the remainder of the French cavalry and d’Auvet’s infantry in the background.
 Above: Ségur’s infantry, consisting of eight battalions from the Auvergne Regiment and the blue-coated Alsace Regiment (here represented by my German Brigade) are deployed in the straggling village and farmland of Rosenray, with a battery of heavy artillery to the rear.
 Above: Historically, Ségur was very aggressive, throwing his infantry forward to meet the Allies at Kampenbrüch. However, on this occasion he’s happy to wait at Rosenray until Thiard de Bissy’s cavalry and d’Auvet’s infantry secure his left flank.
 Above: D’Auvet’s division has ten battalions from the Normandie, La Tour-du-Pin and Briqueville Regiments. Aside from the aforementioned Gendarmerie de France, Thiard de Bissy’s cavalry consists of two brigades, each of four weak regiments (in game terms, two large (16-figure) units).
 Above: Seeking a better view of the situation, de Castries takes up position on the high ground, next to the heavy guns.
 Above: The French guns are presently facing north across the canal, covering the approaches to the bridge at Rosenray. However, they will soon be slewed left to engage the approaching Allies.
 Above: Meanwhile in Kampenbrüch, the picked Highlanders of Keith’s 87th and Campbell’s 88th Regiments make short work of the French picquets.
 Above: The Highlanders push forward into the village, passing an old redoubt left over from earlier wars.
 Above: With the Highlanders making headway in Kampenbrüch, Waldegrave’s infantry swing right into the open ground south of the village. The division is led by a British brigade of three battalions; the 20th Foot (Kingsley’s), 25th Foot (Home’s) and 23rd Royal Welch Fusiliers. A German Allied brigade forms the second line; the Hanoverian ‘Marschalk’ and ‘Reden’ Regiments and the Hessian ‘Erbprinz’ Regiment. The two British grenadier battalions, Maxwell’s and Lennox’s, are formed on the extreme right flank. The only artillery support is provided by a handful of battalion guns.
 Above: Elliot’s cavalry brigade forms up to the rear of Waldegrave’s infantry. Elliot has two small British regiments; the 1st (Royal) Dragoons (Conway’s) and the 6th (Inniskilling) Dragoons (Cholmondley’s), which for game purposes are massed into a single unit. On their right is a detachment of the Prussian ‘Malachowski’ Hussars; this theoretically small unit of only two squadrons has been reinforced to around 400-500 men, so I’ve represented it as a separate unit, rather than mass it with the dragoon brigade.
 Above: The Gendarmerie de France move forward, determined to dominate the southern flank of the battle and threaten any Allied advance on Rosenray.
 Above: As Waldegrave’s infantry advance, Elliot’s cavalry take post on the right flank. However, Elliot is outnumbered and outclassed by the Gendarmerie and doesn’t fancy his chances!
 Above: The Highlanders meanwhile, mop up the last French picquets in Kampenbrüch.
 Above: At Rosenray, French battalion guns begin to open a long-range fire on the approaching lines of infantry.
 Above: On the hill behind the village, Castries and his staff watch as the 12-pounders commence their bombardment of the approaching enemy force.
 Above: As the two formations close with each other, Elliot seizes the initiative and orders the ‘Malachowski’ Hussars to charge! However, the leading squadrons of the Gendarmerie de France, their lineage and traditions going all the way back to the Hundred Years War, contemptuously repulse the Prussians with ease, sending them reeling back through the supporting British dragoons!
 Above: Retiring from the combat with only light casualties, the Gendarmerie are sure to rally… Aren’t they…? However, the Gendarmerie have succumbed to
  Above: The British dragoons breathe a collective sigh of relief and reform their ranks alongside the grenadiers. The ‘Malachowski’ Hussars also failed to rally, but the Erbprinz considers this to be a fair swap; two squadrons of Prussian hussars for four squadrons of elite French heavy cavalry! The dragoons also don’t seem to be too bothered about the loss of their Prussian comrades, despite the mass of French cavalry building up to their front.
 Above: Thankfully for Elliot, Harvey’s reserve cavalry division has crossed over the canal and is marching to deploy on Elliot’s exposed right flank, just in the nick of time. Leading Harvey’s column is a combined brigade formed from the British 10th Dragoons (Mordaunt’s) and a Hanoverian regiment of heavy horse, the Leibregiment. These are followed by the Hessian ‘Einsiedel’ and ‘Prüschenck’ Regiments of Horse.
 Above: Bringing up the rear of Harvey’s column is the Hessian ‘Prince Frederick’ Dragoon Regiment, resplendent in their Prussian-style sky-blue coats.
 Above: However, the remaining half of the Gendarmerie de France are très énervé…
 Above: The cavalry clash once again as the Gendarmerie de France charge the combined British-Hanoverian brigade. Elliot’s British dragoons also get stuck in, but the Allied cavalry is thrown back by the vengeful Gendarmerie. The British-Hanoverian brigade manages to rally, but Elliot’s dragoons keep running, carrying Elliot along with them. A short while later, the brigade of Hessian horse also makes a charge, but too is defeated by the Gendarmerie! The situation is starting to look bleak for the Allied cavalry. In the meantime, the French Royal-Piémont cavalry brigade charges the right flank of the British grenadiers, but is beaten off and retires to rally behind the Royal-Étranger brigade.
 Above: As the cavalry battle continues on the flank, Waldegrave’s infantry press on and are soon engaged in a sharp firefight on the southern edge of Rosenray, with elements of Ségur’s and d’Auvet’s divisions.
 Above: Waldegreave’s confidence is soon shaken, as the French infantry are numerous and are closely supported by artillery. Allied casualties quickly mount.
 Above: On the flank, the Allies have another crack at the Gendarmerie de France, again throwing in the British-Hanoverian brigade, as well as the fresh Hessian ‘Prince Frederick’ Dragoons. The Hessian Horse move up in support. This time the Gendarmerie are thrown back with heavy losses!
 Above: However, Waldegrave’s Allied infantry are starting to suffer very heavy losses in this increasingly attritional battle. This style of battle suits the French, as they have a lot more men to throw in to the fight.
 Above: At long last, Howard’s reserve infantry division has arrived at Kampenbrüch! This division consists of three British battalions; the 11th Foot (Bocland’s), 33rd Foot (Griffin’s) and 51st (Brudenell’s), as well as the Hessian 2nd Guards, Müller’s Hessian Militia Battalion, some battalion guns and a position battery of Hessian 6-pounders.
 Above: But is Howard going to be thrown into the existing battle on the right? Or is he going to open up a new axis of attack against Rosenray on the left?
 Above: The Highlanders continue to skirmish in front of Rosenray, but are only a minor irritation that would easily be swept away if Ségur decided to attack
 Above: A slightly more serious threat to Ségur are Winzingerode’s Hanoverian volunteers, who have inflicted losses on the 1st Battalion of the Alsace Regiment, as well as the heavy battery on the hilltop.
 Above: On the French left, Montbarrey’s division deploys to form a second line behind d’Auvet’s extreme left flank. He also pushes a 12-pounder battery forward to provide close support. In the foreground, the Normandie Regiment finally moves forward from its camp. The regiment has remained inexplicably motionless for much of the day until now, but finally lurches forward to form a second line extending south from Rosenray.
 Above: With the Gendarmerie de France beaten off, the British-Hanoverian brigade exploits the situation, launching a desperate charge against the Royal-Étranger cavalry brigade, who had been disordered and halted by fire from the grenadiers.
 Above: Allied worries soon prove unfounded however, as Andy’s dice once again snatch defeat from the jaws of victory. With the loss of the Royal-Étranger brigade, Thiard de Bissy’s division has lost 50% of its fighting strength and now decides en masse to quit the field!
 Above: With the French cavalry cleared away by Harvey, the threat to the Allied flank is removed.
 Above: A short time later, the British grenadiers, with the Hanoverian Marschalk Regiment in support, have advanced to plug the gap between Waldegrave’s line and the southern woods. The Allied cavalry’s part in this phase of the battle is over and they form up to the rear.
 Above: The infantry lines become more generally engaged. The Allies have the qualitative edge, but have taken more casualties. The French also have a lot more battalions in reserve and also now have a battery of 12-pounders right in the firing line! However, most of the French battalion guns have been knocked out by British musketry.
 Above: The Thianges Dragoons arrived with Montbarrey’s division and now form up on the left flank, ready to pounce on any Allied breakthrough. With both flanks anchored and with stacks of reserve, the French seem set to win this battle of attrition, though Castries doesn’t look very happy about it!
 Above: Meanwhile, the Erbprinz orders Howard to open up a new axis of attack on the left, where the French Alsace Regiment, defending the northern half of Rosenray, looks much weaker. However, Howard’s column has drawn the attention of the ever-present French 12-pounder battery on the hill.
 Above: With the French slowly winning the battle of attrition in the centre, the Allies MUST do something to break the impasse!
 Above: Waldegrave orders four battalions of his first line to charge! In the centre, the 20th Foot and Lennox’s Grenadier Battalion are halted by fire from the two battalions of the Briqueville Regiment, but the two flanking battalions (25th Foot and Maxwell’s Grenadier Battalion) make it into contact with two battalions of the La Tour-du-Pin Regiment.
 Above: The British charge is a partial success; while the Briqueville Regiment stands firm in the centre, the two flanking battalions are smashed.
 Above: French retribution is swift! The 1st Battalion of the Horion Regiment (on the left) and the 3rd Battalion of the Normandie Regiment (on the right) advance to plug the gaps and the French line charges the impudent Rosbifs!
 Above: However, the French charge is something of a damp squib as 1st Horion are stopped by the fire of Maxwell’s grenadiers, while the 1st Briqueville and 3rd Normandie are repulsed by the 20th Foot and 25th Foot. The only successful French battalion is 2nd Briqueville, who throw back Lennox’s grenadiers, though only inflict light casualties.
 Above: The situation as viewed from the southern flank. Lennox’s Grenadier Battalion has retreated, but manages to rally behind the cavalry.
 Above: The situation as seen from behind French lines. The retreating battalions of the Briqueville and Normandie Regiments have managed to rally behind the second line.
 Above: Another view from behind French lines. At present the French line appears rather ragged with two battalions destroyed and another two thrown back. Another British charge at this point might break d’Auvet’s first line altogether. However, the French still have sixteen battalions in this sector, nine of whom are completely fresh. By contrast, Waldegrave has eight battalions, all of whom have suffered losses, some of them dangerously so! Three of Waldegrave’s battalions are elite (so have a morale and combat grade one better than the French) and three are large units (so absorb an extra hit before breaking), but it’s unlikely to make a difference in the long term.
 Above: However, Castries’ main cause for concern is now on his right wing.
 Above: In front of Rosenray, Howard’s reserve division is advancing with grim determination against three battalions of the Alsace Regiment. The Alsace Regiment’s 1st Battalion is still pinned down, fending off Hanoverian and Highlander skirmishers near the canal.
 Above: The Auvergne Regiment, deployed in the southern half of Rosenray, has been largely unengaged, aside from an indecisive firefight near the chapel with the 23rd Royal Welch Fusiliers and Waldegrave’s battalion guns. The Erbprinz was terrified that these battalions might move to envelop Waldegrave’s left flank, but this for some reason hasn’t happened.
 Above: Sadly, that was where we had to leave the Battle of Clostercamp! It was 3pm and the open day was winding down, with everyone else packing up to leave, so we thought we’d better do likewise… 🙁 As mentioned above, I blame myself, as Andy and I probably wasted FAR too much time talking to old friends (and a few new ones)… However, we had played through fourteen turns in around four hours, so it wasn’t too shabby! 🙂


 With Howard’s reserve infantry now finally arriving, the Erbprinz was able to withdraw his corps back over the canal without further incident. The battle had been an Allied defeat and a very bloody one, with 1,170 men being killed or wounded and 462 captured, along with a gun and 14 ammunition wagons. The butcher’s bill for the French had been even higher, with 2,661 being killed or wounded. The battle had also been very costly for both sides in terms of senior officers being killed, wounded and captured.
 Scenario
 The Allied Army
 Notes
Notes Allied Reinforcement Arrival Schedule
 The French Army
 Notes
Notes French Reinforcement Arrival Schedule


 As mentioned in the last few articles, I’m presently expanding my ‘western’ armies for the Seven Years War (France, Saxony, Great Britain, Hanover, Hessen-Cassel, Brunswick and Schaumburg-Lippe), with plans to refight the larger battles in western Germany, such as
  The Gendarmerie de France were considered (not without some justification) to be an elite corps, being classed as senior to all French troops excepting the guard regiments of the
  Above: The Gendarmerie de France had a unique organisation and was very strong indeed. It wasn’t the strongest in the French Army; that title was held by the Royal-Carabiniers, but it still weighed in at a whopping sixteen companies, organised into eight squadrons! At full strength, the regiment had 1,240 enlisted troopers, so once the company, squadron and regimental staff are added, the regiment had around 1,400 men of all ranks.
 Above: Due to the colossal size of the Gendarmerie de France, I’ve represented the regiment as two tactical ‘wings’, in much the same manner as the ten-squadron Prussian Hussar Regiments and larger Dragoon Regiments. However, I must confess that I have cheated slightly, in that I’ve made each wing a ‘Large’ unit of 16 figures. I’ve done this for purely aesthetic reasons, as I wanted the frontage of the entire regiment to be divisible by eight, so that the sequence of squadron bandolier colours looked ‘right’ across the front of the regiment. In game terms they should really be two 12-figure units. I’ll make it up to the Allies…
 Above: As mentioned above, the eight squadrons of the Gendarmerie de France consisted of two paired companies. Six of the sixteen companies were known as Chevau-légers rather than Gendarmes, but the title made no difference in terms of seniority, uniform, tactics or fighting ability. The 1st Squadron consisted of the
  Above: Each squadron of the Gendarmerie de France was identified by the colour of the central stripe of their bandoliers, sword-belts and shoulder-straps: 1st Squadron – Yellow. 2nd Squadron – Purple. 3rd Squadron – Green. 4th Squadron – Aurore. 5th Squadron – Cherry Red. 6th Squadron – Red. 7th Squadron – Dark Blue. 8th Squadron – Medium Blue.
 Above: The 1st to 4th Squadrons of the Gendarmerie de France. Three companies had slightly different lace decoration on the coats:
 Above: A rear view of the 1st to 4th Squadrons of the Gendarmerie de France. The identifying belt-colour for each squadron was repeated on ‘rosettes’ attached to the horses’ manes and tails. So from right to left we have yellow (1st Squadron), purple (2nd Squadron), green (3rd Squadron) and aurore (4th Squadron). The regiment’s trumpeters wore the standard Royal Livery of blue with red cuffs and lace in a silver & red ‘chain’ pattern.
 Above: The 5th to 8th Squadrons of the Gendarmerie de France. The regiment’s horses are recorded as being of ‘mixed colours’, so I’ve gone with a mixture of chestnuts, browns and bays, with greys for the trumpeters.
 Above: A rear view of the 5th to 8th Squadrons of the Gendarmerie de France. Again, the horses’ manes and tails were decorated with ‘rosettes’ in the squadron colour, so from right to left we have the 5th Squadron (cherry red), 6th Squadron (red), 7th Squadron (dark blue) and 8th Squadron (medium blue).
 Above: The Gendarmerie de France. Each company had a standard, so there were sixteen standards in the regiment, in a dazzling array of designs. Frédéric Aubert of
  Above: The Gendarmerie de France. As mentioned before, I tend not to paint badges, crest, cyphers, etc, on horse furniture, as they tend to obscure the actual colour of the horse furniture. But if you’re interested, the holster-caps and the rear corners of the shabraques were decorated with the crowned cypher or badge of the company’s Colonel-in-Chief, which was embroidered in silver.

 As mentioned
  On 18th November we have a refight of the

 However, in 1760 the new Landgraf Frederick (Friedrich) II, having served as a Prussian general, reorganised the army along Prussian lines, splitting each regular infantry regiment into two small battalions of five companies apiece. The grenadier component of each regiment was expanded to two full companies. In wartime the two grenadier companies would now be paired at the start of a campaign with the grenadiers from another regiment, forming one of six permanent, Prussian-style grenadier battalions.
 Above: The Grenadierregiment was originally formed in 1672 as a combined grenadier battalion, but in 1702 became formalised as a regiment in its own right. It kept the status of grenadiers and therefore continued to wear grenadier-caps, but was also granted the right to carry colours and a regimental Chef (Colonel-proprietor) was appointed. By the time of the Seven Years War, it was therefore just another line infantry regiment (6th in order of seniority, although regimental numbers were not used at this time), albeit one with fancy headgear. We could argue until the cows come home as to whether it should be classes as ‘elite’ or not, but it seems to have been a good, solid regiment and in 1760 Frederick II re-designated the regiment as 2. Garderegiment.

 Above: The Grenadierregiment. In 1760 the regiment was re-titled as 2. Garderegiment and the uniform was altered, removing the white lace edging from lapels, collar and cuffs and reducing the number of buttons and lace buttonholes. However, the buttonhole lace bars had small tassels added. A white aiguillette was added to the right shoulder and a red shoulder-strap was added to the left. The colour of smallclothes was changed to lemon yellow. This uniform change probably came into effect during 1761.
 Above: The Grenadierregiment. Reversed colours for infantry drummers had been discontinued in the late 1740s or early 1750s. They wore the same coat as the rank-and-file, with the addition of red-and-white ‘national’ lace edging the facings and seams, as well as ‘swallow’s-nests’ on the shoulders and inverted chevrons down the sleeves. Drummers’ pompoms were coloured red & white.
 Above: The ‘Haudring’ Infantry Regiment was the 2nd most senior infantry regiment in the army. In 1757 the regimental Chef, Colonel Otto Friedrich von Haudring was killed at the Battle of Hastenbeck and so the regimental title changed to ‘Capellan’ for Colonel W. F. von Capellan. In 1759 the regimental title passed again to Baron G. H. von Toll and yet again in 1760 to Colonel G. F. von Bartheld.

 Above: The ‘Haudring’ Infantry Regiment. In 1760 and as mentioned above, the regiment was changed to a Fusilier Regiment. The basic uniform didn’t change very much; the white lace disappeared from the lapels and cuff-flaps, the neck-stock changed to black and the breeches were confirmed as white. Once again, sources are split over whether the tail-turnbacks were red or orange. The newly-authorised fusilier-caps had brass metalwork with an orange ‘bowl’, though these may have been slow to arrive and one source describes hats with green pompoms.
 Above: The ‘Haudring’ Infantry Regiment. Again, the drummers wore the same coat as the rank-and-file, though with the addition of red-and-white lace decoration.
 Above: The Cavalry Regiments ‘Ysenburg’ (on the left) and ‘Miltitz’ (on the right). The four senior Hessian heavy cavalry regiments were organised very similarly to those of Hanover and Great Britain, each consisting of two squadrons of three companies, for a total of 362 men. This was increased in 1760 to 412 men. One regiment on it’s own is not therefore really viable as a Tricorn unit in its own right, so I ‘brigade’ two regiments together to make a 12-figure unit, though from 1760, these units might tip the scales into 16-figure ‘Large’ unit territory.
 Above: The Cavalry Regiments ‘Ysenburg’ and ‘Miltitz’. All Hessian Cavalry Regiments wore the same style of uniform, namely a white coat, waistcoat and cloak, with the regimental facing colour displayed on the lapels, collar, Swedish-style cuffs, shoulder-straps, tail-turnbacks, aiguillette, waistcoat-edging and cloak-lining. The facing colour was repeated on the horse-furniture. Breeches were straw or ‘pale straw’, neck-stocks were black and belts were white and ‘Prussian-style’, with the buckles at the back. Hats had lace edging in the button colour, with a black cockade.
 Above: A cavalryman of the ‘Ysenburg’ Cavalry Regiment, painted in 1748 by David Morier. The armorial details of the horse furniture had changed by the time of the Seven Years War and the button colour had (probably) changed, but the rest of the uniform was unchanged. This painting gives an excellent indication of the shade of blue facings.
 Above: The Cavalry Regiments ‘Ysenburg’ and ‘Miltitz’. Each cavalry squadron carried a fringed square standard; the 1st Squadron in each regiment carried the Leibstandarte, which had a white field decorated with the lion badge of Hesse-Cassel, either in a ‘metal’ colour or in ‘true’ colours. The 2nd Squadron carried an Eskadronstandarte of the same design, though having a facing-coloured field. The standards of the ‘Miltitz’ Regiment are recorded as having gold fringes and armorials, while those of the ‘Ysenburg’ Regiment had silver. Staves are variously described as red or brown.
 Above: The Cavalry Regiments ‘Ysenburg’ and ‘Miltitz’. Trumpeters are recorded as wearing ‘reversed’ colours in both the early and late versions of the uniform, but I’ve been unable to dig out any more details. I’ve given them red & white ‘national’ lace edging on their collars, cuffs and lapels.
 Above: The ‘Prinz Friedrich’ Dragoon Regiment was one of two Hessian dragoon regiments. I should clarify that this regiment was actually titled the ‘Sachsen-Gotha’ Dragoons until 1758, having Prinz Moritz von Sachsen-Gotha as its Chef. However, by the time they were actively engaged in the war, the title had passed to Prinz Friedrich von Hessen, who owned the regiment for the duration of Hesse-Cassel’s active participation in the Seven Years War, so I’ll refer to them as the ‘Prinz Friedrich’ Dragoons.
 Above: The ‘Prinz Friedrich’ Dragoons wore a sky-blue uniform coat that was almost identical to that of the Prussian dragoons. The lapels, cuffs, collar, shoulder-strap, turnbacks and waistcoat were all yellow with white metal buttons and a white aiguillette at the right shoulder. Breeches were straw and neck-stocks were black. Belts were white and the cross-belts had the buckles at the back, Prussian-style. Unlike Prussian dragoons, the hats had white lace edging. The horse furniture was yellow with a double strip of white lace around the edge. A black sheepskin or bearskin covered the horn of the saddle and the tops of the holster-caps. The cloak was white, lined yellow; this was rolled with the yellow lining outermost and stowed behind the saddle.
 Above: The ‘Prinz Friedrich’ Dragoons had square standards with silver fringe and embroidery. The Leibstandarte was white, with the arms of Hesse-Cassel in silver, while the Eskadronstandarten were of the same design with a pale yellow field. Some sources describe the arms of Hesse-Cassel as being in ‘true’ colours, including a red & white-striped lion-rampant.
 Above: The ‘Prinz Friedrich’ Dragoon Regiment’s drummers were initially dressed in ‘reversed colours’, which I’ve interpreted as yellow coats with light blue facings. These were decorated with ‘swallow’s nests’ of red & white national lace on the shoulders and possibly other lace decoration (I’ve edged the collar, cuffs, lapels and pockets with lace). In 1761 the ‘reversed’ uniform was changed to the same colourings as the rest of the regiment, though still with lace decoration (i.e. Prussian-style).
 Above: At the start of the Seven Years War, the Hessian artillery arm occupied a very low status in the pecking order of the army and had not even been given official status as a ‘corps’. As a consequence, it had fewer than 100 men of all ranks and very few heavy guns. However, it slowly began to expand at the start of the war, initially providing a detachment of two 3pdr battalion guns for each of the eight infantry battalions contracted to serve in Britain. With their departure, a further five 3pdr detachments were formed to serve the infantry regiments remaining in Germany.
 Above: The uniform of the Hesse-Cassel Artillery Corps was very Prussian in style, comprising a dark blue coat with white belts and straw smallclothes. However, unlike the Prussian uniform, the coat had lapels and the facing colour was crimson, being displayed on lapels, collar, cuffs, shoulder-straps and turnbacks. The cuffs were Swedish in style, with two buttons. Buttons were pewter. Gaiters and neck-stocks were black. Hats were edged in white lace and had crimson pompoms. It was simple enough to paint the lapels onto these Prussian gunner figures.
 Above: Hessian gun-carriages were traditionally painted white with ironwork painted red, reflecting the red-and-white stripes of the national lion-rampant badge. A bad batch of Humbrol 60 Scarlet (which is the colour of dried blood) always comes in handy for these red-painted guns! 🙂 It’s entirely possible that the guns supplied by Hanover and Schaumburg-Lippe remained in their original paintwork, which for Hanover was red with black ironwork and for Schaumburg-Lippe was probably white with black ironwork (a surviving Schaumburg-Lippe 12pdr at Bückeburg Palace has been mounted upon a white-painted carriage as far back as records can ascertain). However, I’ve gone with the traditional Hessian colours, as they look rather spectacular! 🙂