
 No plan survives contact with the enemy and we had planned to do our next SYW Big Game at The Carmarthen Old Guard later this month, which was to have been the Battle of Kolin. However, our mate Phil can’t now make it, so we’re going to have to postpone it – probably until Christmas. Instead, Andy and I are going to dig out the Napoleonics and try the new scenario I wrote during lockdown for the Second Battle of Caldiero 1805, which should still be good fun. In the meantime, here’s my scenario for Kolin, written for my Tricorn 18th Century variant of Shako rules:
(I make no apologies, but this is another big ‘un…)
Historical Background

King Frederick II
Despite King Frederick II’s successful pre-emptive strike against Saxony in 1756, Prussia was still surrounded by strong enemies. His strike against the Austrians in Bohemia had ended in stalemate at the Battle of Lobositz. By March 1757, Austrian troops in Bohemia numbered well over 100,000 men and threatened at any moment to invade Saxony, Lusatia or Silesia. To the north, Frederick was forced to keep a small corps in Pomerania to guard against any Swedish incursion, while a somewhat larger corps had been sent to East Prussia under General Lehwaldt to counter the growing Russian threat. To the west, the French and the Holy Roman Empire were also mobilising for war, but would hopefully be countered by the Duke of Cumberland’s allied Hanoverian-British-Hessian-Brunswicker army. Allowing his enemies to simply build up their forces and then launch an overwhelming combined assault was simply not an option and he had to strike against the most immediate threat; the Austrians.

Prince Charles of Lorraine
Frederick’s strike came in mid-April 1757 and fell upon Prince Charles of Lorraine’s main Austrian army in Bohemia. Frederick advanced in four columns; his own column advanced from Dresden up the western bank of the Elbe, Bevern’s column descended from Lusatia on the eastern side of the Elbe, Prince Moritz advanced from western Saxony and Schwerin’s corps attacked from Silesia. All were aimed at the Bohemian capital of Prague, which was also the largest fortress in the region and base for Lorraine’s army.
The Battle of Prague was fought outside the city walls on 6th May and proved to be an extremely bloody affair, notably resulting in the loss of two of the greatest commanders of the age: the Austrian Marshal Browne and the Prussian Marshal Schwerin. The battle was a victory for Frederick’s Prussians, though proved not to be the knock-out blow that he’d hoped for and the Austrians were able to withdraw behind the city walls, forcing Frederick to besiege the city.

The death of Schwerin

Daun
However, Frederick did not have time for a siege! A new threat had emerged in the form of Marshal Daun’s Austrian army, which was advancing from the south to reinforce Lorraine’s army. However, arriving just too late to intervene, Daun was forced to fall back from Frederick’s superior force around Prague. Frederick, hoping to force Lorraine to capitulate before dealing with Daun, dispatched a corps under General Bevern to observe and obstruct Daun’s movements.
By mid-May, Daun had been reinforced by Serbelloni’s corps, which had remained idle at Königgrätz, by four regiments of Saxon cavalry sent from Poland under General Nostitz, by 16,000 men under General Bretlach, who had escaped the defeat at Prague and lastly by 7,000 light troops under the command of General Nádasdy, who had marched up from Olmütz. Daun now outnumbered Bevern by a considerable margin and finally with sufficient forces for the task, he was ordered to relieve Prague. Lorraine was simultaneously ordered to attempt a break-out and link up with Daun.

Bevern
Seeing the growing threat, Frederick continued to send reinforcements to Bevern and by 4th June, Bevern had 12,100 foot and 12,400 horse against Daun’s 26,000 foot, 13,500 horse and more than 6,000 light troops (hussars and grenzer). Despite the mismatch in numbers, Bevern was able to hold off Daun and even forced Daun back toward his base at Königgrätz, thus persuading Frederick to march east with a sizeable portion of his besieging force and finally defeat Daun’s relief effort (a dangerous gamble, with over 50,000 Austrian troops trapped within Prague).
However, by the time Frederick started marching, Daun had finally amassed his full strength of 54,000 men and was marching westward again, forcing Bevern back along the Kaiserstrasse arterial road to Neu-Kolin.

Zieten
By 14th June, Bevern had been joined by Frederick’s corps and both sides now began probing each other’s positions. At last on 17th June, Frederick was facing Daun’s army, which was deployed facing west on high ground a short distance to the west of Neu-Kolin, with its right flank resting on the Poborz Hill, overlooking the Kaiserstrasse. Frederick decided that evening to use the Kaiserstrasse to march around the Austrians’ flank and attack their rear near the village of Krzeczor; a somewhat ‘bold’ move, given that this move would be entirely under observation from the heights! Anticipating this move before it even began, Daun started moving his formations under cover of darkness, redeploying his army to face north along a line from Poborz Hill to Przerovsky Hill, with his reserve formations deployed at a right-angle to the left, occupying most of the original positions.
Unaware that his plan had been anticipated, Frederick began marching his army at daybreak on 18th June. As the army advanced through thick fog, they encountered little opposition except retiring groups of grenzer and occasional parties of hussars. At the head of the column was General Zieten with 50 squadrons of hussars, closely followed by Hülsen with four battalions of infantry and four squadrons of dragoons.


Nádasdy
As the fog cleared, the sun began to beat down and at 1030hrs, Frederick halted his hot and weary army on the Kaiserstrasse, to the immediate north of Daun’s positions. Observing from the upper floor of a roadside inn (variously identified in accounts as the ‘Novi Mesto’, ‘Slate-Slunce’ or ‘U-Slunce’), Frederick could see Austrians on the high ground at Poborz and Przerovsky, but no idea regarding the full extent of Daun’s positions. Nevertheless, he was determined to press on with his plan and at 1200hrs gave his orders for the attack:
Zieten would continue to push Nádasdy’s Austrian hussars back beyond the villages of Krzeczor and Kutlire, ensuring that they could not interfere with the main assault, which would be spearheaded by Hülsen (now reinforced by six grenadier battalions). Hülsen would capture the village of Krzeczor and the hill and oak-wood beyond, thus turning the Austrian right flank and paving the way for a further assault by the massed Prussian heavy cavalry and the rest of the infantry under Prince Moritz of Anhalt-Dessau, who would progressively attack obliquely around the Austrian flank.

Prince Moritz
However, at no point in his plan did Frederick countenance the possibility of the Austrians reacting to his moves! The three-hour halt in the Prussian march had given Daun valuable time to extend his right flank; he filled the forward villages, copses and a hundred year-old Swedish earthwork with Grenzer and established a powerful battery on the Krzeczor Hill.
Behind the hill and hidden from Prussian view, Daun placed the Grenadier Reserve, General Nostitz’s Saxon cavalry brigade and 1,000 Kommandierten cavalry (the duty detachments of the day from all the cuirassier and dragoon regiments in the army). As it was clear that the left flank was no longer under threat, the divisions of Wied, Starhemberg and Sincère, as well as the bulk of the cavalry under Serbelloni, were already marching from the left flank to meet the Prussians near Krzeczor, yet all hidden from Frederick’s view.
 Although Zieten had pushed Nádasty’s hussars back as planned, Hülsen’s attack started to unravel almost immediately. Kutlire, Krzeczor and the ‘Swedish Works’ proved to be strongly held by the 2nd Banalisten Grenz Regiment, who inflicted heavy losses on the approaching Prussians, particularly in the vicinity of the strongly-held church. Daun, watching from the heights, is said to have exclaimed “My God! I think the King is going to lose today!”
Nevertheless, the seemingly-unstoppable Prussian infantry steadily pushed through Krzeczor and within half an hour finally emerged in the open ground beyond; whereupon they were set upon by a mass of Austrian hussars that Zieten’s cavalry had missed! Zieten’s cavalry soon came up to support Hülsen, but were in turn charged by yet more Austrian hussars. As the indecisive scrap between the opposing hussars continued on the flank, Hülsen again resumed the advance, but soon came under increasing opposition from the Austrian Grenadier Reserve and Beck’s rallied grenzer in the vicinity of the Oak Wood. Hülsen’s supporting artillery had also been silenced by the large Austrian battery established on Krzeczor Hill. To make matters worse, Wied’s large Austrian reserve infantry division and Serbelloni’s massive cavalry wing were also now deploying to oppose Hülsen.
 In the meantime, Frederick had halted his army once again, to await the outcome of the flank-assault. For an hour, the Prussian infantry stood in column along the Kaisertstrasse, plagued by long-range sniping from swarms of grenzer hiding among the tall crops, as well as by desultory long-range artillery fire from the heights. At last, orders came from the King for Tresckow’s infantry to join the assault; they were to attack up the northern slope of Krzeczor Hill, thus supporting Hülsen’s right flank. The rest of the army was for the time being, to be refused, though the intention was still to march them to the left and exploit the hoped-for success of Hülsen’s attack.
However, fate was to play a hand. One of Frederick’s adjutants ordered one of Bevern’s brigadiers, Generalmajor von Manstein, to clear away the grenzer to his front. Manstein was reluctant to do so, as the grenzer weren’t actually causing much harm and he needed his men ready to launch their planned attack as soon as orders arrived from the King. However, the adjutant became more insistent and invoked the King’s authority. Manstein had no choice, so ordered the nearest battalion (II./’Bornstedt’ (IR 20)) to drive off the grenzer. However, the men of the ‘Bornstedt’ Regiment, having been plagued by the grenzer for hours, were a little over-enthusiastic in their pursuit of their tormentors! In a short while, the regiment’s I. Battalion had also joined the hunt, followed by a battalion of the ‘Anhalt-Dessau’ Regiment (IR 3) and eventually the entire division was launching an un-ordered and uncoordinated assault on Chotzemitz and the Przerovsky Hill!

Serbelloni
At Krzerczor meanwhile, Hülsen was embroiled in a fierce firefight with Wied’s infantry. Both sides were taking heavy losses, but the arrival of Starhemberg’s division in support of Wied threatened to tip the balance in the Austrians’ favour. Serbelloni’s cavalry had also arrived, but were forced to hold ground while they waited for Sincère’s infantry to arrive. Cavalry are never well-suited to holding ground and Hülsen’s artillery made the stationary Austrian cavalry pay a heavy price for that decision. At last, the ‘Münchow’ Fusilier Regiment (IR 36), along with two grenadier battalions, managed to capture the Oak Wood, but without support and under fresh attack, were soon forced to fall back.
Tresckow meanwhile, was also paying a heavy price as he advanced up the slope into the teeth of Austrian canister. Nevertheless, his infantry finally reached the top of the hill, only to be checked by freshly-arrived battalions of Sincère’s division. Repeated assaults by Tresckow’s battalions failed to make any headway and Daun finally had a solid line of infantry from Przerovsky Hill to Krzeczor Hill. Serbelloni’s cavalry at last were able to fall back to the rear, out of sight from the Prussian guns. Buoyed up by their success thus far in repulsing the Prussian assault and encouraged by further successes by Nádasdy’s troopers on the flank, Wied’s division advanced, pushing Hülsen’s infantry all the way back to Krzeczor village. It seemed as though Daun was about to have his victory. However, the pendulum was about to swing back.

Seydlitz
On the Austrian right flank, Nádasdy had had some success in holding off Zieten, thanks in no small part to the thousand Kommandierten heavy cavalry. However, Krosigk’s Prussian heavy cavalry (‘Prinz von Preussen’ Cuirassiers (CR 2), ‘Rochow’ Cuirassiers (CR 8), and ‘Normann’ Dragoons (DR 1)) had now passed Krzeczor village, forcing the Austrian horse to fall back once again. The way cleared of enemy cavalry, Krosigk wheeled his troopers around the village and smashed into Wied’s flank. The first battalions broke immediately. Seeing the whitecoats starting to panic, Hülsen’s infantry charged again and soon Wied’s men were utterly broken! Tragically, Krosigk was mortally wounded at the moment of his greatest triumph, but the Colonel of the ‘Rochow’ Cuirassiers, one Friedrich Wilhelm von Seydlitz, immediately took command and continued the rout of the Austrian infantry.
Serbelloni’s Austrian horse meanwhile, were still in the process of falling back into the reserve line following their bombardment by the Prussian gunners and were unable to intervene. However, two regiments; the ‘Kolowrat-Krakowsky’ Dragoons (DR 37) and the Saxon Carabiniergarde, had just arrived from the left flank to reinforce Serbelloni. They managed to push forward between Starhemberg’s infantry battalions and attempted to save the situation. Their efforts were in vain as Seydlitz, brilliantly controlling his marauding cuirassiers, defeated them in short order! With friendly cavalry fleeing through their lines, another three regiments (two of Sincère’s and one of Starhemberg’s) were broken before the rampage was finally brought to a halt by the Austrian ‘Botta’ Infantry Regiment (IR 12), who formed a new line at 90 degrees to Sincère’s main line and coolly delivered volleys into the ‘Normann’ Dragoons as they attempted to roll up the Austrian flank. Nostitz’s Saxon chevauxlégers then finally managed to drive off the blown Prussian cavalry.
 Daun’s army had almost been destroyed by just three regiments of Prussian cavalry, but with no reserves coming up in support, Seydlitz was forced to break off the attack. Serbelloni once again plugged the gap with his cavalry, who again became magnets for the Prussian artillery. Safe from pursuit, Wied’s battalions began to rally. Daun in the meantime, ordered Puebla to bring his uncommitted infantry over to form a continuous line on Andlau’s left and ordered Stampach to launch an attack with his cavalry on the right flank of the Prussian assault.
Frederick in the meantime, was preoccupied with the repeated efforts by Tresckow’s infantry to assault the northern slopes and was probably unaware of the dramatic events beyond Krzeczor. With Chotzemitz finally cleared of grenzer, Frederick ordered every last uncommitted battalion on the right wing to launch an assault on the Krzeczor Hill. However, despite repeated attempts, this assault fared no better than the previous efforts. At one point, Frederick was seen to draw his sword and lead the ‘Anhalt-Dessau’ Regiment (IR 3) forward. However, the regiment had other ideas and hadn’t moved. An ADC rode up to Frederick, asking “Sire! Will you attack the battery on your own?” Enraged, the King is said to have shouted at the reluctant infantry, “Rogues! Do you want to live forever?!”
 With the Prussian infantry now fully engaged, Stampach began his advance against the Prussian right flank. However, Schönaich’s Prussian cavalry were in a good blocking position and were able to frustrate Stampach’s manoeuvre, though the Austrian ‘Hessen-Darmstädt’ Dragoons (DR 19) managed to slip through. The dragoons fell upon a single, isolated battalion which happened to be none other than Frederick’s personal bodyguard, the I. (Leibgarde) Battalion of the Garde-Regiment (IR 15). Finding themselves surrounded by enemy cavalry, the Guardsmen managed to turn their rear rank about to defend the rear, but were very badly cut up and even lost their pair of battalion guns to the dragoons.
The attack on Krzeczor Hill was finally starting to bear fruit, as the fresh injection of fresh battalions had captured the top of the hill and driven a wedge into the Austrian lines. However, the infantry of both sides were now fatigued from the battle and the hot weather and the Prussian attack had ground to a halt once more. Frederick ordered forward the uncommitted cavalry division of the 79 year-old General Pennavaire. His four cuirassier regiments now swept up the slope between Bristvi and Chotzemitz and up, over the hill. Serbelloni ordered one of his own cuirassier brigades to meet them and the two cavalry formations thundered toward each other. For some reason, the Austrian cuirassiers broke off their attack at the last moment and the Prussian cuirassiers charged on toward Starhemberg’s infantry. However, the Prussian horses were now blown from their long ride over the hill and instead of charging home, the cuirassiers stopped short and fired pistols ineffectually at the Austrian lines, receiving a devastating volley in return!
 At that moment, Serbelloni struck! Pennavaire’s cuirassiers, already blown and reeling from infantry volleys, were now charged from the front and on both flanks by an overwhelming number of Austrian and Saxon cavalry and were utterly routed, being pursued as far as the Kaiserstrasse! The ‘Prinz von Preussen’ Cuirassiers (CR 2) from Seydlitz’s command attempted to save the situation but were broken by fire from Starhemberg’s infantry and artillery and also joined the rout. These fleeing cuirassiers disrupted Tresckow’s infantry as they fled, leaving them in no state to withstand being attacked from the rear by the Austrian and Saxon cavalry, who were now returning from their pursuit of Pennavaire. Three battalions were completely destroyed and Tresckow himself was captured.
 As evening started to fall, Frederick made a last roll of the dice. Assembling a force of seventeen battalions and the ‘Driesen’ Cuirassiers (CR 7) from the right flank and Normann’s pair of uncommitted dragoon regiments from the left, he launched yet another assault on the Krzeczor Hill. This new assault actually achieved some success against the exhausted Austrians, but once again the superb ‘Botta’ Infantry Regiment and the ‘Soro’ Grenadiers held firm. Andlau’s division now advanced from Przerovsky Hill and the Prussian infantry were forced to wheel to their right to meet them. This gave Serbelloni the perfect opportunity to charge the open Prussian left flank with as many cavalry as he could muster.
Serbelloni’s charge was devastating. Several battalions on the left flank of the line were ridden down and massacred, while the Leibgarde Battalion found themselves surrounded and having to fight back-to-back for the second time that day. The rest of the line meanwhile, found themselves assaulted from the front by Andlau’s infantry and also soon joined the rout. The ‘Driesen’ Cuirassiers were swept away along with the infantry, while Normann’s dragoons, charging through the narrow gap between Bristvi and the Swedish Works, found themselves outflanked and routed in turn.
Hülsen meanwhile, was still fighting in the Oak Wood, having captured it yet again while the battle raged on the Krzeczor Hill. However, he was coming under increased pressure from the rallied battalions of Wied’s division and now had new enemies appearing out of the smoke from Krzeczor Hill. As news reached him of the disaster on the hill, Hülsen was forced to join the retreat. Zieten meanwhile, had been doing his best to hold off Nádasdy’s hussars and had assumed the battle to be going to plan but was now horrified to receive fresh orders, telling him to cover the army’s retreat! Nevertheless, he followed his orders to the letter and a charge by the ‘Warnery’, ‘Seydlitz’ and ‘Werner’ Hussars dissuaded the Austrians (who were in any case, utterly exhausted) from any serious attempt at pursuit.
 Frederick meanwhile, as at Mollwitz in 1740, had already exited stage-left, escorted by the squadron of the Garde du Corps Cuirassiers. What was left of the army was ordered to retreat to northern Bohemia and the corps besieging Prague was ordered to break off the siege and rejoin the King.
Later that evening, the King was seen sitting disconsolately at the side of the road, absent-mindedly drawing in the dust with his stick, when a cuirassier brought him a drink of water in his hat, saying “Drink Majesty, and let battles be battles; it’s well that you are safe. Let us trust in God that it will soon be our turn to conquer!”
The casualties on both sides had been horrific. Of 54,000 men, the Austrians had lost 8,114 men, of whom 1,002 were dead and the rest being reported as wounded or missing. The Prussian troops had lost an astonishing 13,776 out of 33,000 men, of whom 5,380 were taken prisoner, including all the non-walking wounded. The remaining 8,396 were all dead or missing! The Austrians also captured 45 guns and 22 colours.
However, the old cuirassier was right; Frederick had just suffered his first defeat, but it would soon be his turn to conquer… And sooner than anyone could have realised.
 Order of Battle of the Prussian Army
King Friedrich II
(Excellent – 3 ADCs)
Advance Guard – Generallieutenant Hans Joachim von Zieten (Excellent)
I. Bn (5 Sqns), ‘Zieten’ (Leib) Hussars (HR 2) (elite) [5/2]
II. Bn (5 Sqns), ‘Zieten’ (Leib) Hussars (HR 2) (elite) [5/2]
I. Bn (5 Sqns), ‘Werner’ (Capucin) Hussars (HR 6) (elite) [5/2]
II. Bn (5 Sqns), ‘Werner’ (Capucin) Hussars (HR 6) (elite) [5/2]
I. Bn (5 Sqns), ‘Puttkamer’ (Weisse) Hussars (HR 4) (elite) [5/2]
II. Bn (5 Sqns), ‘Puttkamer’ (Weisse) Hussars (HR 4) (elite) [5/2]
5 Sqns, ‘Szekely’ (Grünne) Hussars (HR 1) (elite) [5/2]
5 Sqns, ‘Seydlitz’ (Rote) Hussars (HR 8) [4/1]
I. Bn (5 Sqns), ‘Wartenberg’ Hussars (HR 3) (elite) [5/2]
II. Bn (5 Sqns), ‘Wartenberg’ Hussars (HR 3) (elite) [5/2]
Advance Guard Support – Generalmajor Johann Dietrich von Hülsen (Good)
I. Bn, ‘Münchow’ Füsilier Regiment (IR 36) (elite) [5/2]
II. Bn, ‘Münchow’ Füsilier Regiment (IR 36) (elite) [5/2]
I. Bn, ‘Schultze’ Infantry Regiment (IR 29) (elite) [5/2]
II. Bn, ‘Schultze’ Infantry Regiment (IR 29) (elite) [5/2]
Grenadier Battalion ‘Wangenheim’ (47/g7) [5/2]
Grenadier Battalion ‘Möllendorf’ (9/10) [5/2]
I. Standing Grenadier Battalion ‘Kahlden’ (g1/g3/ng) [5/2]
Grenadier Battalion ‘Finck’ (13/26) [5/2]
Grenadier Battalion ‘Woldow’ (12/39) [5/2]
Grenadier Battalion ‘Nymschöfsky’ (33/42) [5/2]
Battalion Guns [2/0]
Battalion Guns [2/0]
Battalion Guns [2/0]
Cuirassier Reserve – Generallieutenant Peter Ernst von Pennavaire (Good)
5 Sqns, Leibregiment zu Pferde Cuirassiers (CR 3) [6/2 – Large Unit]
5 Sqns, Leib-Carabiniere Cuirassiers (CR 11) [6/2 – Large Unit]
5 Sqns, ‘Kyau’ Cuirassiers (CR 12) [6/2 – Large Unit]
5 Sqns, ‘Krockow’ Cuirassiers (CR 1) [6/2 – Large Unit]
Right Wing Cavalry – Generalmajor George Phillip von Schönaich (Average)
5 Sqns, ‘Driesen’ Cuirassiers (CR 7) [6/2 – Large Unit]
5 Sqns, ‘Meinicke’ Dragoons (DR 3) [5/2 – Large Unit]
5 Sqns, ‘Schönaich’ Cuirassiers (CR 6) } [6/2 – Large Unit]
1 Sqn, Garde du Corps Cuirassiers (CR 13) }
Left Wing Cavalry – Generalmajor Christian Siegfried von Krosigk (Good)
5 Sqns, ‘Stechow’ Dragoons (DR 11) [5/2 – Large Unit]
5 Sqns, ‘Normann’ Dragoons (DR 1) [5/2 – Large Unit]
5 Sqns, ‘Rochow’ Cuirassiers (CR 8) [6/2 – Large Unit]
5 Sqns, ‘Prinz von Preussen’ (Gelbe-Reitere) Cuirassiers (CR 2) [6/2 – Large Unit]
Dragoon Reserve – Generalmajor Karl Ludwig von Normann (Good)
5 Sqns, ‘Katte’ Dragoons (DR 4) [5/2 – Large Unit]
5 Sqns, ‘Blanckensee’ Dragoons (DR 2) [5/2 – Large Unit]
Infantry Centre – General der Infanterie Prinz Moritz von Anhalt-Dessau
Left Wing – Generallieutenant Joachim Friedrich von Tresckow (Average)
I. Bn, ‘Alt-Bevern’ Infantry Regiment (IR 7) (elite) [5/2]
II. Bn, ‘Alt-Bevern’ Infantry Regiment (IR 7) (elite) [5/2]
I. Bn, ‘Prinz Heinrich’ Füsilier-Regiment (IR 35) (elite) [5/2]
II. Bn, ‘Prinz Heinrich’ Füsilier-Regiment (IR 35) (elite) [5/2]
I. Bn, ‘Hülsen’ Infantry Regiment (IR 21) (elite) [5/2]
II. Bn, ‘Hülsen’ Infantry Regiment (IR 21) (elite) [5/2]
I. Bn, ‘Wied’ Füsilier Regiment (IR 41) [4/1]
II. Bn, ‘Wied’ Füsilier Regiment (IR 41) [4/1]
Battalion Guns [2/0]
Battalion Guns [2/0]
Right Wing – Generallieutenant August Wilhelm Bevern Herzog von Braunschweig-Lüneberg (Excellent)
I. Bn, ‘Anhalt’ Infantry Regiment (IR 3) (elite) [5/2]
II. Bn, ‘Anhalt’ Infantry Regiment (IR 3) (elite) [5/2]
III. Bn, ‘Anhalt’ Infantry Regiment (IR 3) (elite) [5/2]
I. Bn, ‘Bornstedt’ Infantry Regiment (IR 20) [4/1]
II. Bn, ‘Bornstedt’ Infantry Regiment (IR 20) [4/1]
I. Bn, ‘Manteuffel’ Infantry Regiment (IR 17) (elite) [5/2]
II. Bn, ‘Manteuffel’ Infantry Regiment (IR 17) (elite) [5/2]
I. Bn, ‘Fürst Moritz’ Infantry Regiment (IR 22) (elite) [5/2]
II. Bn, ‘Fürst Moritz’ Infantry Regiment (IR 22) (elite) [5/2]
I. Bn, ‘Kalckstein’ Infantry Regiment (IR 25) [4/1]
II. Bn, ‘Kalckstein’ Infantry Regiment (IR 25) [4/1]
I. Bn, ‘Kreytzen’ Füsilier Regiment (IR 40) [4/1]
II. Bn, ‘Kreytzen’ Füsilier Regiment (IR 40) [4/1]
I. (Leibgarde) Bn, Garde Infantry Regiment (IR 15) [6/2]
III. Standing Grenadier Battalion ‘Gemmingen’ (41/44) [5/2]
Battalion Guns [2/0]
Battalion Guns [2/0]
Battalion Guns [2/0]
Battalion Guns [2/0]
Artillery Reserve
Heavy Battery [3/0]
Heavy Battery [3/0]
Heavy Battery [3/0]
Heavy Battery [3/0]
Heavy Battery [3/0]
 Prussian Notes
1. The Artillery Reserve is limbered on the road, alongside the leading battalions of Tresckow’s Division.
2. The units above are for the most part, listed from the left of the line.
3. The Garde du Corps (CR 13) only had one squadron present (the other two squadrons had been left at Prague), so is too weak to be represented as a separate unit. Its strength is therefore absorbed into the rest of Schönaich’s command.
4. The divisions of Ziethen, Hülsen and Schönaich start the game deployed in line. All other divisions are deployed in column along the Kaiserstrasse. All guns are limbered.
5. Frederick may give his divisions any orders at the start of the game. Note however, that no new orders may be transmitted before the Orders Phase at the end of Turn 2.
6. The ‘Stechow’ Dragoons (DR 11) were officially under Zieten’s command, but they were under Hülsen’s command during the morning and then appear to have started the battle deployed alongside Krosigk’s heavy cavalry, so I’ve grouped them with Krosigk for game purposes (though they spent virtually the entire battle unengaged on the Prussian left flank). Feel free to transfer them back to Zieten or Hülsen if you prefer.
7. The divisions of Zieten, Hülsen, Krosigk and Schönaich start the scenario deployed in line. All other formations are deployed in column along the Kaiserstrasse. All Prussian artillery is limbered.
Formation Breakpoints
Division FMR ⅓ ½ ¾
Zieten 49 17 25 37
Hülsen 56 19 28 42
Pennavaire 24 8 12 18
Schönaich 17 6 9 13
Krosigk 22 8 11 17
Normann 10 4 5 8
Tresckow 44 15 22 33
Bevern 78 26 39 59
Artillery Reserve* 15 – – –
Army FMR ¼ ⅓ ½
Prussian Army 313 79 105 157
* The MR value of any broken Artillery Reserve Batteries are added when assessing overall Army losses.

Order of Battle of the Austrian Army
Feldmarschall Leopold Joseph Graf von Daun
(Good – 2 ADCs)
Light Troops – General der Kavallerie Franz Leopold Graf Nádasdy (Excellent)
5 Sqns, ‘Nádasdy’ Hussars (H 11) [4/1]
6 Sqns, ‘Kálnoky’ Hussars (H 17) [4/1]
5 Sqns, ‘Jazygier-Kumanier’ Hussars (H 36) [4/1]
3 Sqns, ‘Baranyay’ Hussars (H 30) } [4/1]
2 Sqns, ‘Esterházy’ Hussars (H 24) }
2 Sqns, ‘Hadik’ Hussars (H ii) }
6 Sqns, ‘Festetics’ Hussars (H 32) [4/1]
6 Sqns, ‘Morocz’ Hussars (H 35) [4/1]
1 Sqn, ‘Desewffy’ Hussars (H 34) } [4/1]
2 Sqns, ‘Banalisten’ Grenz-Hussars (H 42) }
3 Sqns, ‘Kaiser’ Hussars (H 2) [4/1]
Advance Guard – Generalfeldwachtmeister Phillip Levin Freiherr von Beck (Average)
3 Sqns, ‘Kaiser’ Hussars (H 2) } [4/1]
1 Sqn, ‘Warasdiner’ Grenz-Hussars (H 41) }
2 Sqns, ‘Karlstädter’ Grenz-Hussars (H 40) }
I. Bn, Slavonisch-Gradiskaner Grenzer [3/0]
II. Bn, Slavonisch-Gradiskaner Grenzer [3/0 – 2x Skirmishers]
I. Bn, ‘2. Banalisten’ Grenzer [3/0]
II. Bn, ‘2. Banalisten’ Grenzer [3/0 – 2x Skirmishers]
Battalion Guns [2/0]
Detached Grenzer (from Beck’s Brigade) (Average)
I. Bn, Slavonisch-Broder Grenzer [3/0 – 2x Skirmishers]
II. Bn, Slavonisch-Broder Grenzer [3/0 – 2x Skirmishers]
I. Bn, Karlstädter-Szluiner’ Grenzer [3/0]
II. Bn, Karlstädter-Szluiner’ Grenzer [3/0 – 2x Skirmishers]
Saxon Cavalry – Generalmajor Friedrich Moritz Graf von Nostitz-Rieneck (Excellent)
3 Sqns, Saxon ‘Prinz Albrecht’ Chevauxlégers [5/2]
4 Sqns, Saxon ‘Graf Brühl’ Chevauxlégers [5/2]
4 Sqns, Saxon ‘Prinz Karl’ Chevauxlégers [5/2]
Austrian Kommandierten Cavalry Brigade ‘Starhemberg’ [6/2 – Large Unit]
Grenadier Reserve – Obristlieutenant Marquis de Fiorenza (Good)
Grenadier Battalion ‘Fiorenza’ (6 grenadier companies) [5/2 – Large Unit]
Grenadier Battalion ‘Soro’ (4 grenadier companies) [5/2]
Kommandierten Infantry Battalion [4/1 – Large Unit]
Battalion Guns [2/0]
Right Wing & Reserve Cavalry – General der Cavallerie Johann Baptist Graf Serbelloni (Good)
6 Sqns, ‘Birkenfeld’ Cuirassiers (C 23) [6/2]
6 Sqns, ‘Württemberg’ Dragoons (D 38) [5/2]
6 Sqns, ‘Kolowrat-Krakowski’ Dragoons (D 37) [5/2]
6 sqns, ‘Kalckreuth’ Cuirassiers (C 22) [6/2]
6 Sqns, ‘Prinz Savoyen’ Dragoons (D 9) [5/2]
6 Sqns, ‘Serbelloni’ Cuirassiers (C 12) [6/2]
5 Sqns, ‘Porporati’ Dragoons (D 39) [5/2]
Elite Regiment ‘Burghausen’ (massed Carabiniers & Horse Grenadiers) [6/2 – Large Unit]
Elite Regiment ‘Panovsky’ (massed Carabiniers & Horse Grenadiers) [6/2 – Large Unit]
6 Sqns, ‘Schmerzing’ Cuirassiers (C 20) [6/2]
6 Sqns, ‘Infant von Portugal’ Cuirassiers (C 5) [6/2]
6 Sqns, ‘Ligne’ Dragoons (D 31) [5/2]
2 Sqns, Saxon Carabiniergarde Cuirassiers [6/2 – mark 1 casualty at start]
Left Wing Cavalry – General der Cavallerie Carl Freiherr Karger von Stampach (Average)
4 Sqns, ‘Hessen-Darmstädt’ Dragoons (D 19) [5/2]
6 Sqns, ‘Gelhay’ Cuirassiers (C i) [6/2]
6 Sqns, ‘Alt-Modena’ Cuirassiers (C iii) [6/2]
6 Sqns, ‘Sachsen-Gotha’ Dragoons (D 28) [5/2]
5 Sqns, ‘Jung-Modena’ Dragoons (D 13) [5/2]
6 Sqns, ‘O’Donnell’ Cuirassiers (C 14) [6/2]
Right Wing Infantry – Generalfeldzeugmeister Ernst Dietrich Freiherr Marschall von Burgholzhausen
First Line – Feldmarschallieutenant Franz Joseph Freiherr von Andlau (Good)
I. Bn, ‘Erzherzog Carl’ Hungarian Infantry Regiment (IR 2) [4/1]
II. Bn, ‘Erzherzog Carl’ Hungarian Infantry Regiment (IR 2) [4/1]
I. Bn, ‘Moltke’ Infantry Regiment (IR 13) [4/1]
II. Bn, ‘Moltke’ Infantry Regiment (IR 13) [4/1]
III. Bn, ‘Moltke’ Infantry Regiment (IR 13) [4/1]
I. Bn, ‘Puebla’ Infantry Regiment (IR 26) [4/1]
II. Bn, ‘Puebla’ Infantry Regiment (IR 26) [4/1]
III. Bn, ‘Puebla’ Infantry Regiment (IR 26) [4/1]
I. Bn, ‘Mercy-Argentau’ Infantry Regiment (IR 56) [4/1]
Battalion Guns [2/0]
Battalion Guns [2/0]
Second Line – Feldmarschallieutenant Emmanuel Michael Graf von Starhemberg (Average)
I. Bn, ‘Haller’ Hungarian Infantry Regiment (IR 31) [4/1]
II. Bn, ‘Haller’ Hungarian Infantry Regiment (IR 31) [4/1]
I. Bn, ‘Gaisruck’ Infantry Regiment (IR 42) [4/1]
II. Bn, ‘Gaisruck’ Infantry Regiment (IR 42) [4/1]
III. Bn, ‘Gaisruck’ Infantry Regiment (IR 42) [4/1]
I. Bn, ‘Neipperg’ Infantry Regiment (IR 7) [4/1]
II. Bn, ‘Neipperg’ Infantry Regiment (IR 7) [4/1]
III. Bn, ‘Neipperg’ Infantry Regiment (IR 7) [4/1]
Battalion Guns [2/0]
Battalion Guns [2/0]
Left Wing Infantry – Generalfeldzeugmeister Anton Graf von Colloredo zu Waldsee
First Line – Feldmarschallieutenant Anton von Portugal Graf von Puebla (Average)
I. Bn, ‘Arenberg’ Infantry Regiment (IR 21) [4/1]
II. Bn, ‘Arenberg’ Infantry Regiment (IR 21) [4/1]
III. Bn, ‘Arenberg’ Infantry Regiment (IR 21) [4/1]
I. Bn, ‘Thürheim’ Infantry Regiment (IR 25) [4/1]
II. Bn, ‘Thürheim’ Infantry Regiment (IR 25) [4/1]
III. Bn, ‘Thürheim’ Infantry Regiment (IR 25) [4/1]
I. Bn, ‘Leopold Daun’ Infantry Regiment (IR 59) [4/1]
II. Bn, ‘Leopold Daun’ Infantry Regiment (IR 59) [4/1]
III. Bn, ‘Leopold Daun’ Infantry Regiment (IR 59) [4/1]
I. Bn, ‘Harrach’ Infantry Regiment (IR 47) [4/1]
II. Bn, ‘Harrach’ Infantry Regiment (IR 47) [4/1]
I. Bn, Warasdiner-Kreutzer Grenzer [3/0 – 2x Skirmishers]
Battalion Guns [2/0]
Battalion Guns [2/0]
Battalion Guns [2/0]
Second Line – Feldmarschallieutenant Claudius Freiherr von Sincère (Average)
I. Bn, ‘Deutschmeister’ Infantry Regiment (IR 4) [4/1]
II. Bn, ‘Deutschmeister’ Infantry Regiment (IR 4) [4/1]
I. Bn, ‘Baden-Baden’ Infantry Regiment (IR 23) [4/1]
II. Bn, ‘Baden-Baden’ Infantry Regiment (IR 23) [4/1]
I. Bn, ‘Botta’ Infantry Regiment (IR 12) (elite) [5/2]
II. Bn, ‘Botta’ Infantry Regiment (IR 12) (elite) [5/2]
III. Bn, ‘Botta’ Infantry Regiment (IR 12) (elite) [5/2]
Battalion Guns [2/0]
Battalion Guns [2/0]
Reserves
Division of Feldmarschallieutenant Friedrich Georg Heinrich Graf von Wied-Runkel (Good)
I. Bn, ‘Los Rios’ Infantry Regiment (IR 9) [4/1]
I. Bn, ‘Salm-Salm’ Infantry Regiment (IR 14) [4/1]
II. Bn, ‘Salm-Salm’ Infantry Regiment (IR 14) [4/1]
I. Bn, ‘Platz’ Infantry Regiment (IR 43) [4/1]
I. Bn, ‘Starhemberg’ Infantry Regiment (IR 24) [4/1]
I. Bn, ‘D’Arberg’ Infantry Regiment (IR 55) [4/1]
I. Bn, ‘Sachsen-Gotha’ Infantry Regiment (IR 30) [4/1]
II. Bn, ‘Mercy-Argentau’ Infantry Regiment (IR 56) [4/1]
I. Bn, ‘Prinz de Ligne’ Infantry Regiment (IR 38) [4/1]
Battalion Guns [2/0]
Battalion Guns [2/0]
Artillery
Krzeczor Hill Battery
Heavy Battery [3/0]
Heavy Battery [3/0]
Heavy Battery [3/0]
Heavy Battery [3/0]
Przerovsky Hill Battery
Heavy Battery [3/0]
Heavy Battery [3/0]
Reserve Artillery
Heavy Battery [3/0]
Heavy Battery [3/0]
Heavy Battery [3/0]
Heavy Battery [3/0]
 Austrian Notes
1. The average Austrian cavalry regimental strength on the day was actually quite a bit lower than that of the Prussians (around 500 men, versus 750 men), so on this occasion they don’t class as Large Units. The exceptions are the two Elite Regiments and Starhemberg’s brigade of Kommandierten Cavalry (which was around 1,000 strong and was formed from the duty detachments of the day).
2. The actual cavalry order of battle bears little resemblance to the theoretical order of battle: Serbelloni’s cavalry wing was massively reinforced by the addition of Castiglione’s Brigade (C23 & D38) and the Saxon Carabinergarde from Köbell’s brigade of the army reserve, two regiments of combined elite companies and two regiments (C12 & D3) from Stampach’s wing. Stampach meanwhile received the remainder of Köbell’s Brigade (D13 & C14) from the army reserve.
3. The average infantry battalion strength on both sides was roughly equal, being a little over 600 men. The Austrians don’t therefore class as Large Units for this scenario. The exceptions to this rule are the Kommandierten Battalion and Grenadier Battalion ‘Fiorenza’.
4. The Saxon Carabiniergarde Regiment is sorely understrength with only two of its four squadrons present, so mark off one casualty at the start of the game.
5. The divisions of Nádasdy, Beck, Nostitz, Andlau, Starhemberg, Puebla and Stampach, as well as the Grenadier Reserve, all start the game deployed in line and may unlimber their battalion guns. All other divisions are deployed in column, as shown on the map, with limbered battalion guns. The Przerovsky Hill and Krzeczor Hill Batteries are unlimbered and the Reserve Batteries are limbered.
6. Ignore the command radius rules for Grenzer skirmishers in this scenario. The forward-deployed skirmishers may start the game within skirmisher range of the Prussian column.
7. Daun may give his divisions any orders at the start of the game. Note however, that no new orders may be transmitted before the Orders Phase at the end of Turn 2.
8. The location of the Kommandierten Infantry Battalion is something of a mystery. Sources show it variously as under the command of Beck, with Nádasdy on the right flank, with Puebla on the left flank and fighting with the grenadiers in the Oak Wood. I’ve decided to place it in the Oak Wood, under the command of the Grenadier Reserve, but feel free to attach the battalion to any other command.
9. On a similar note, I’ve no idea where the two regiments (Burghausen’s & Panovsky’s) of massed elite companies (Carabiniers and Horse Grenadiers) were stationed at the start of the battle. They do appear later in the battle, fighting in the area of Krzeczor Hill alongside Serbelloni’s cavalry, so I’ve arbitrarily placed them in the centre-rear and under Serbelloni’s command. Note that a lot of accounts refer to the Kommandierten Brigade as being elite companies, but this was not necessarily the case; they were the duty cavalry detachments of the day (picquets, etc), some of whom may have been from the elite companies.
10. Five battalions on the left flank of Puebla’s division (i.e. 2 bns of ‘Harrach’ (IR 47) and 3 bns of ‘Leopold Daun’ (IR 59)) ‘are off-table at the start of the game. They will appear, conformed to Puebla’s left flank, when Puebla’s division moves. Alternatively, in order to simplify matters, they could be deployed at the start of the game, as a second line for Puebla (or add an extra foot to the table!).
11. Some weak hussar units, particularly the Grenz-Hussar regiments and small detachments of regiments, have been combined with others to make viable units. So note that the number of hussar units in the game doesn’t match the number of regimental contingents present.
12. It’s not clear if the Austrian ‘heavy guns’ were actually all heavy (i.e. 12pdr or heavier). Some of them may have been 6pdr position batteries. The term ‘heavy artillery’ was often used to describe position batteries as opposed to battalion guns, regardless of calibre and could sometimes include 6pdrs (especially long-barreled ‘heavy’ 6pdrs). However, given the considerable damage caused by the Austrian batteries during this battle, I’ve classed them all as heavies.
13. If preferred, Nádasdy’s command may be split into two divisions, each of four hussar units. These are commanded by Hadik (Good) and Morocz (Average).
Formation Breakpoints
Division FMR ⅓ ½ ¾
Beck* 18 6 9 5
Detached Grenzer* 12 4 6 9
Nádasdy 32 11 16 24
Nostitz 21 7 11 16
Grenadier Reserve 16 6 8 12
Serbelloni 70 24 35 53
Stampach 33 11 16 25
Andlau 40 14 20 30
Starhemberg 36 12 18 27
Puebla* 53 18 27 40
Sincère 35 12 18 27
Wied 40 14 20 30
Artillery Reserve** 30 – – –
Army FMR ¼ ⅓ ½
Austrian Army 436 109 146 218
* Two broken Skirmisher stands from the same Grenzer Battalion count as 3 Morale Points when assessing formation losses. ‘Odd’ Skirmisher stands don’t count. Note that some battalions are formed in close order, defending strongpoints.
** The MR value of any broken Artillery Reserve Batteries are added when assessing overall Army losses.

Scenario Length
The game will finish at the end of Turn 24.
Victory Conditions
A Historic Victory will go to the side that breaks the enemy army.
If neither side has broken at the end of Turn 20, the side with sole possession of two of the three key pieces of terrain (Kzeczor Hill, Przerovsky Hill and the Oak Wood) may claim an Indecisive Victory.
If neither side has broken and if neither side has sole possession of two key locations, the battle will be declared a Draw.
Optional Fog-of-War
If you want to keep the Prussian player guessing as to the true Austrian dispositions, DO NOT show them the full scenario map. Instead of deploying the whole Austrian force at the start, deploy only those formations that are visible from Frederick’s position at the start: Puebla’s infantry division, Andlau’s infantry division, Stampach’s cavalry division, Nádasdy’s hussar division, Beck’s advance guard division, the Detached Grenzer and the Przerovsky Hill Battery, as per the map below. All other Austrian formations and batteries are kept off-table.
Once all Prussian units are deployed AND once Frederick has written his orders and shown them to the umpire, the Austrian player will then place his remaining units on the table and then write his orders.
Remember that Frederick will be unable to change his orders until the Command Phase at the end of Turn 2.
Prussian Fog-of-War Map

Optional Prussian Orders
Optional Rule 1: At the start of the game, only the commands of Zieten, Krosigk, Hülsen and Normann may be given orders. The Reserve Artillery may also act as desired. The remainder of the army must remain on Defend orders while they await the outcome of the initial attack. They may receive orders from the Command Phase of Turn 2 onward.
Optional Rule 2: As described above, Bevern’s division, having been forced to remain motionless in column on the Kaiserstrasse, while being plagued by grenzer and long-range artillery fire for several hours, launched an un-ordered and uncoordinated attack on the Przerovsky Hill. This might therefore be a ‘fun’ event to spring upon an unsuspecting Prussian player…
Following the Command Phase at the end of Turn 4, change Bevern’s divisional orders to ‘Attack’ and place a Command Arrow on the map, leading directly to the top of Przerovsky Hill. This will immediately supercede any orders previously issued to Bevern.
All units in Bevern’s division must immediately change formation into line (if necessary) and must move at full speed toward the new objective for two turns, even if this disrupts flank alignment.
Bevern’s division will keep these orders until they are changed in the normal manner. An ADC may NOT be sent to Bevern to change his orders until the Command Phase of Turn 6. Any ADCs already en route to Bevern will be returned to the King’s HQ at the end of the turn.
Terrain Notes
It should first be noted that the entire battlefield was a long ridge, running east to west up the centre of the table, with the Krzeczor and Przerovsky Hills being the highest point along it. However, the gentle, steady slopes didn’t confer any great advantage or disadvantage to either side, so I’ve only included the notable hills, where the ground does steepen markedly. I find that large areas of high ground are often beyond the terrain collections of most wargamers, so I’ve left it out for the sake of simplicity.
Feel free to add the ridge if you prefer. The contoured maps from the Prussian Greater General Staff study (shown above) are an excellent reference.
For the terrain effects described below, please refer to the Terrain Effects Chart on Page 2 of the Tricorn QRS (linked).
The small woods around Bristvi, Chotzemitz and Blinka are small wooded ravines, containing springs and stream-beds that were probably dry at this time of year. Class as Rough Ground.
All other woods shown on the map are classed as Woods, as per the chart. Formed units in column and limbered artillery may move along woodland roads at full speed, but may not charge while doing so. If charged while on a woodland road, cavalry will fight using their Disordered Morale Rating.
The streams are classed as Streams, as per the chart. Formed units in column and limbered artillery may cross them at full speed wherever a road crosses them.
The pond in front of Poborz is impassable but may be by-passed by Puebla’s off-table battalions; these may be brought on to table immediately to the north of the pond.
The roads are largely just decorative and only affect movement where they cross a stream or pass through a town, as discussed above.
The villages of Krzeczor and Radowesnitz each consist of two built-up sectors (BUS). The villages of Kutlire, Chotzemitz, Brzenau, Blinka and Poborz each consist of a single BUS. Each BUS may accommodate a single infantry battalion or two skirmisher stands.
The northern BUS of Krzeczor is dominated by the church and is classed as Fortified, with a +2 defensive modifier. All other BUS have the usual +1 defensive modifier.
Bristvi, Slate-Slunce and Novi-Mesto are too small to be represented as BUS and instead simply act as Rough Ground.
The Swedish Works are classed as Entrenchments, having a +1 defensive modifier and being impassable to cavalry and artillery.
The landscape had large areas of shoulder-high crops, but these don’t seem to have impeded movement to any degree, so I haven’t accounted f0r them.
That’s all for now! I’m hoping to get a couple of Napoleonic games in next week (a small one on Thursday night and a big one on Saturday), so it should be a good week for wargaming.
Lastly my apologies to anyone trying to subscribe to this blog. I’ve just noticed that the subscription widget has disappeared from the bottom of the page and despite my best efforts, I can’t get it back! I will ask Tech Support (daughter) to have a look at it on Sunday. 🙂


 As mentioned last time, I dug our my old 28mm American War of Independence collection last year and had a brief flurry of AWI games, using British Grenadier! rules. That led to some new purchases and a few new units being painted for both sides.
 Above: These were the very first AWI figures I ever painted; a single pack of eight Militia by Wargames Foundry, very kindly given to me by Mike Hickling, along with a pack of British infantry in the regulation 1768 uniform. Those two packs very quickly snowballed into rather large armies!
 Above: These fellas are classic Militia, dressed in a wide variety of civilian dress and variously armed. I’ve also added a ‘casually-dressed’ British officer figure (in the blue coat), to make the unit up to nine figures (three skirmisher stands, each of three figures).
 Above: The skirmishers needed some formed supports, so I bought more militia from Wargames Foundry, along with a few Continental command figures from Perry Miniatures. This regiment doesn’t represent any particular unit, but has a very slight uniformed ‘theme’ of brown coats, faced red with white metal buttons running through it, though with most still in civilian dress.
 Above: My first few units were geared toward the Battle of Bunker Hill of 1775, so I’ve given this regiment the famous Bunker Hill Flag (by GMB Designs).
 Above: Sargent’s Massachusetts Regiment was raised on 23rd April 1775 as Massachusetts state troops. On 14th June 1775 they were adopted into the Continental Army and on 1st January 1776 they were re-named as the 16th Continental Regiment. On 1st August 1779 they were finally re-named again to become the 8th Massachusetts Continental Regiment.
 Above: Sargent’s Regiment are carrying a generic ‘Grand Union’ or ‘Continental’ Flag, which came into being on 3rd December 1775 and changed again to the ‘Stars & Stripes’ (with 13 stars) from 14th June 1777. These are all Wargames Foundry figures.
 Above: Mollo depicted Sargent’s Regiment in 1775 as wearing this rather nice dark green uniform with black facings, white tail-turnbacks, buff smallclothes and white metal buttons. As with all Continental regiments, these uniforms didn’t last very long and they changed uniform multiple times during the course of the war, so any painted unit is only ever a very brief snapshot of that regiment at any given time.
 Above: Like Sargent’s Regiment, Patterson’s Massachusetts Regiment was raised on 23rd April 1775 as state troops and on 1th June 1775 was adopted into the Continental Army. On 1st January 1776 it was re-named as the 15th Continental Regiment. However, on 1st January 1777 the regiment was amalgamated with elements of the 6th & 18th Continental Regiments to become Vose’s Regiment. On 1st August 1779 it was re-named for the last time, becoming the 1st Massachusetts Continental Regiment.
 Above: Mollo depicted Patterson’s Regiment in 1775 as having blue uniforms with buff facings, white metal buttons and buff smallclothes. Again, there’s a lot of variation here, with various items of civilian dress and different colours of smallclothes, but the ‘theme’ is blue & buff.
 Above: Patterson’s Regiment is again made up from Wargames Foundry figures. The flag is of a generic ‘Liberty Tree’ pattern by GMB Designs.
 Above: Dubois’ New York Regiment was raised on 21st June 1776, being assigned to the Northern Department. On 26th January 1777 it was re-named as the 3rd New York Continental Regiment and in May 1779 was sent to the Main Continental Army, staying there for a year before being sent back to the Northern Department.
 Above: Mollo depicted the 3rd New York Regiment as having a grey uniform with dark green facings, white metal buttons and grey smallclothes.
 Above: Again, the 3rd New York Regiment is made up of Wargames Foundry figures. The flag is a rather fancy New York state flag by GMB Designs.


 Above: As was standard practice in the 18th Century, the British massed all the regimental ‘flank’ companies (i.e. the Grenadier Companies and Light Companies) in America into combined elite battalions. Initially one battalion of each type was formed at Boston and fought in the Battles of Lexington-Concorde and
  Above: My 1st Grenadier Battalion was painted in 2005, mostly using
  Above: It’s been a while and I’ve been scratching my head, trying to work out which regiments the combination of facing colours represent, but I think it’s probably representative of the 1st Grenadier Battalion during the New York Campaign of 1776 (4th, 5th, 10th, 17th, 22nd, 23rd, 27th, 35th, 38th & 40th Regiments of Foot).
 Above: My 2nd Grenadier Battalion was painted late last year and this time used Perry Miniatures figures throughout. They’re very similar sculpts to the old Foundry figures, but are slightly less ‘corn-fed’ and lack the goatskin backpacks of the Foundry grenadiers. Aside from the backpacks, they appear to be the same sculpts from the neck down. In contrast, the Perry grenadiers in charging and firing poses, as well as the command packs, are completely new sculpts, wearing ‘American trowsers’ rather than the regulation breeches, stockings and half-gaiters.
 Above: My 2nd Grenadiers are based on the battalion’s composition for the 1777 Philadelphia Campaign, namely the Grenadier Companies of the 37th, 40th, 43rd, 45th, 46th, 49th, 52nd, 55th, 57th, 53rd & 64th Regiments of Foot, the 71st Highlanders and the Marines. Each battalion’s grenadier company is represented by two figures. However, the Marines formed two battalions in America, so should probably have four figures, but I’ve only given them two. The sharp-eyed will also notice that I’ve temporarily omitted the 71st Highlanders, who had two battalions in America, so I will at some point add another base of four figures for those.
 Above: British combined elite battalions always lined up in order of regimental seniority, but not in the obvious way from right to left! This is a classic trap for the unwary figure-painter… The senior regiment would always stand on the right flank (so far so good), but the second-most-senior regiment would stand on the left flank of the line and then the remaining regiments would alternate by flank, working inwards, with the most junior regiments in the centre. So in the 2nd Grenadiers, the battalion was lined up from the right flank to left flank (left to right as we’re looking at them), 37th, 43rd, 46th, 52nd, 57th, 64th, Marines, 71st, 63rd, 55th, 49th, 45th, 40th.
 Above: The right wing of the 2nd Grenadiers. As senior regiment, the grenadiers of the 37th Foot (yellow facings) are on the right flank, then the 43rd (white), 46th (yellow), 52nd (buff), 64th (black) and Marines (white). Note that regiments with buff facings also had buff smallclothes, belts and tail-turnbacks. Those items of dress were white for all regiments without buff facings.
 Above: The left wing of the 2nd Grenadiers. The officer waving his hat wears the deep green facings of the 63rd, then the 55th (dark green), 49th (green), 45th (green) and 40th (buff).
 Above: The 1st Light Infantry Battalion. I painted these in 2005, using Wargames Foundry figures and the mix of regiments was taken from the Philadelphia Campaign of 1777. As mentioned above, the 1st Grenadier and 1st Light Infantry Battalions in 1777 both comprised companies from the 4th, 5th, 10th, 15th, 17th, 22nd, 23rd, 27th, 28th, 33rd, 35th, 38th & 44th Regiments of Foot. When lined up, these would be (from right to left) 4th (blue), 10th (yellow), 17th (grey-white), 23rd (blue), 28th (yellow), 35th (orange), 44th (yellow), 38th (yellow), 33rd (red), 27th (pale buff), 22nd (pale buff), 15th (yellow) & 5th (gosling green). Sadly however, I lined these up in slightly the wrong order when taking the photo! 🙁
 Above: Light Companies wore the grenadier-style shoulder-wings, red waistcoats and black belts, along with high-fronted leather caps known as ‘Keppel’ caps. These caps were circled with black-enameled iron chains as a form of protection from overhead sword-cuts and as a consequence are often known as ‘chain-caps’. However, some light companies (such as those of the 4th, 5th, 45th & 71st Regiments) are recorded as wearing light dragoon-style helmets. Wargames Foundry actually do suitable figures for those, but I didn’t realise it at the time.
 Above: Most Keppel caps were decorated with white edging and variations on the theme of a crowned ‘GR’ or ‘G III R’ cypher, often with the regimental number. However, some had ‘LI’ and a few had ‘ancient badges’, such as the lion rampant of the 4th Foot, ‘Britannia’ for the 5th, the Prince of Wales’ Feathers for the 23rd and a white castle on a blue disc for the 27th. Some also had coloured cloth ‘turbans’ and some pre-war examples had brass front-plates. As with the grenadier caps, these were expensive items that in reality were probably left in barracks and replaced with slouched hats soon after the start of the war.
 Above: The 2nd Light Infantry Battalion was painted late last year, this time using the new Light Infantry figures by Perry Miniatures. These lovely figures are less ‘corn-fed’ than the Wargames Foundry figures, or indeed the earlier figures in the Perry Miniatures AWI range. The headgear is moulded separately, so each pack of six figures comes with six Keppel caps, six peaked caps with plume and six ‘butterfly caps’ or ‘cap-hats’. they’re also wearing the typical campaign ‘American trowsers’, which came in whatever colour of cloth was locally available, but I’ve done all these in white (i.e. linen).
 Above: In addition to the formed 2nd Light Infantry Battalion, I also painted a dozen Light Infantry skirmishers for those times when you want to deploy them in their intended role, instead of as elite assault-infantry! I could use at least another dozen skirmishers.
 Above: The Light Company of the 55th Foot. I couldn’t find any recorded examples of this regiment’s headgear, so gave them peaked caps with fairly generic white lace edging, crowned ‘GR’ cypher and regimental number ‘LV’.
 Above: The Light Company of the 49th Foot. Again, I couldn’t find any recorded examples of their headgear, so went again with the peaked cap, this time with a crowned ‘LI’ inscription (matching a design recorded for the 46th Foot) and the number ’49’. I also gave them a green feather, which wasn’t official at this time, but was increasingly being used to signify light companies.
 Above: The Light Company of the 40th Foot are recorded as wearing this pattern of Keppel cap; devoid of lace edging, but bearing the crowned ‘GR’ cypher and the regimental number ‘XL’.
 Above: The Light Company of the 64th Foot are recorded as wearing this pattern of ‘cap-hat’ or ‘butterfly cap’, having white lace edging but no white band, bearing the crowned ‘GR’ cypher. Note that the sergeant has yellow lace; as mentioned above, this was a peculiarity recorded for the 64th Foot. His NCO status is also indicated by the crimson waist-sash with facing-coloured (i.e. black) central stripe.
 Above: A Light Company of Marines. Two battalions of Marines were formed for service in America and there were probably therefore two Marine Light Companies present, though I’ve only painted a single base of two figures. Their headgear is modelled on a recorded Marine Keppel cap from before the AWI, which had a red ‘turban’ and was decorated on the front with the royal crest in white metal.
 Above: the Light Company of the 63rd Foot. One recorded example of a Keppel cap belonging to the 63rd shows it to be decorated with the crowned ‘GR’ cypher and regimental number ’63’. There was no lace edging, but there was a green feather attached on the left side (sadly missing here).
 Above: The 2nd Light Infantry Battalion formed up in close order. The line-up and facing colours are exactly the same as those listed for the 2nd Grenadier Battalion above. I could find recorded examples of light company headgear for the 37th, 43rd, 46th, 52nd, 57th, 63rd & 64th Regiments and the Marines, but gave random headgear to the remaining four companies. The 45th were actually recorded as wearing a light dragoon-style helmet, but that option wasn’t included, so I gave them peaked caps. As with the 2nd Grenadiers, I haven’t included the two Light Companies of the 71st Highlanders. The 71st are also recorded as wearing light dragoon-style helmets.
 Above: As with their
  Above: A close-up of the right wing of the 2nd Light Infantry Battalion. The 37th (yellow facings) are on the right flank, then the 43rd (white), 46th (yellow), 52nd (buff), 57th (yellow) and 64th (black).
 Above: The left wing of the 2nd Light Infantry Battalion, starting with an officer of Marines (white), a horny-bloke of the 63rd (deep green, in reversed musician’s colours), the 55th (dark green), 49th (green), 45th (green) and 40th (buff).


 Above: Frederick’s Prussian army has halted in column along the Kaiserstrasse, following its attempt to march around the right flank of Field Marshal Daun’s Austrian army. Having identified the village and associated hill of Krzeczor as a key objective, Frederick orders General Hülsen, at the front of the column, to capture them. To assist him in the task, he reinforces Hülsen with a brigade of grenadiers from the rear of the column. The rest of the army waits for Hülsen’s attack to go in.
 Above: The village of Krzeczor has been prepared for defence by General Beck’s Grenzer. The village was actually fortified during the 17th Century by the Swedish army of Gustavus Adolphus and many of the massive ‘Swedish Works’ still represent a considerable obstacle, which the Grenzer now use to their advantage. The villages of Kutlire and Chotzemitz are also strongly held by the Grenzer and yet more Grenzer have dispersed out among the tall crops, to harass the Prussian column.
 Above: In the advance guard, General Zieten’s Prussian hussars face off against Nádasdy’s Austrian hussar division. On the right of the Prussian hussars, General Krosigk’s heavy cavalry deploy to support the flank of Hülsen’s infantry.
 Above: At the rear of the Prussian column, General Schönaich’s heavy cavalry deploy off the road to form the new right flank of the army. In the distance, a large formation of Austrian horse can be seen near the village of Poborz, which is believed to be the right flank of the Austrian army. To Schönaich’s rear, Pennavaire’s Cuirassier Reserve Division remains in column and waits for orders.
 Above: However, Frederick’s hubris in expecting the Austrians to remain stand idly by while he outflanks them is sorely misplaced! Field Marshal Daun had already been expecting such a move during the previous evening and has been changing the orientation of his army to face north. Having possession of the high ground, he has been watching Prussian progress throughout the morning and can clearly see what Frederick intends to do.
 Above: Daun’s first move was to place Andlau’s infantry division, plus a strong battery of heavy artillery on the Przerovsky Hill. This position can be clearly seen by Frederick from his observation point in the attic-room of the ‘Slate Slunce’ inn (just visible at the distant table-edge) and Frederick assumes this to be the extreme right flank of the main Austrian position.
 Above: On Andlau’s left is Stampach’s cavalry division and Puebla’s infantry division. These formations had originally formed the right flank of the army, now they will become the left flank, as the entire army moves across their rear to form up on the right.
 Above: With Frederick having issued his orders, the rest of the Austrian army is revealed! Frederick looks again at his issued orders and mutters something in Low German…
 Above: On the Austrian right flank, to the rear of Nádasdy’s hussars, is the Saxon General Nostitz, with three regiments of Saxon Chevauxlégers and a large composite regiment of Austrian kommandierten heavy cavalry (i.e. formed from the duty detachments of every heavy cavalry regiment in the army), commanded by one General Starhemberg (not to be confused with Feldmarschallieutenant Starhemberg, who commands one of the infantry divisions).
 Above: Daun orders Krzeczor Hill to be occupied by a powerful battery of heavy artillery. The guns are escorted by two composite grenadier battalions (commanded by Colonels Soro and Fiorenza) and the composite kommandierten infantry battalion. Fiorenza’s battalion is classed as a Large Unit, which meant that I needed to bump the unit up to 16 figures. However, the only individual base of ‘Austrian’ grenadier figures I could find were some Salzburg grenadiers from the Reichsarmee, who are waving a flag!
 Above: The rear slope of the Przerovsky Hill is a hive of white-coated activity! The Prussians can only see Andlau’s division and the large battery on the crest, but to Andlau’s immediate rear is Starhemberg’s supporting infantry division and a large mass of reserve heavy artillery. Further to the rear is Wied’s reserve infantry division, which is already marching to occupy the Krzerczor sector, along with the leading elements of Serbelloni’s large reserve cavalry division. In the foreground are the two composite regiments of heavy cavalry elite companies under Colonels Burghausen and Panovsky. These have also been added to Serbelloni’s already-large command.
 Above: On the Austrian left flank, the last infantry division, that of Sincère, has been pulled out of the former west-facing position and is marching past Puebla’s division at Poborz, to reinforce the new line that is taking shape near Krzeczor.
 Above: Having already sent a few regiments ahead to take up position near Krzeczor, Serbelloni follows on with the bulk of his reserve cavalry, even borrowing a brigade from Stampach to expand his already-large command! Serbelloni now commands a whopping thirteen regiments!
 Above: Another view from behind the Austrian centre. Note the MDF arrow markers. These were supplied as a special order (at no extra charge) from the fantastically-responsive
  Above: Another view of the Prussian column, with the heavy artillery reserve and Normann’s dragoon division in the foreground. Note that the majority of my Prussian army was painted and based during the 1990s and is still based on its original small 4-figure bases. That means I can put most of them in column formation without the need for markers. However, that does make them very slow to move and they can get VERY untidy on the table!
 Above: The battle begins… Hülsen’s Prussian infantry start their advance by making a curious echelon manoeuvre to their right. They are immediately surprised by the battery of guns that Daun has placed on the Krzeczor Hill and the Austrians claim first blood as 12pdr balls start bouncing through the serried ranks of Prussian grenadiers.
 Above: However, Nádasdy does something rather rash… Despite being outnumbered and outclassed by the Prussian hussars, he orders his hussars to advance.
 Above: Nostitz is bringing up the Kommandierten cavalry and the Saxon chevauxlégers to support Nádasdy. He had rather hoped that Nádasdy would retire a short distance and combine their forces before launching a charge…
 Above: On the Krzeczor Hill, the Austrian grenadiers move forward to defend the battery against the approaching Prussian infantry.
 Above: Serbelloni’s leading regiments (the ‘Birkenfeld’ Cuirassiers (C23), ‘Württemberg’ Dragoons (D38) and the two elite regiments) march across the rear of the Krzeczor Hill, to reinforce the impending cavalry battle on the flank.
 Above: The rest of Serbelloni’s cavalry quickly becomes snarled up in traffic behind Przerovsky Hill, as they wait for Wied’s infantry to clear out of the way. Starhemberg’s infantry division has also been delayed, having been ordered to form a second line on the right, in support of Wied.
 Above: On the Austrian left, Stampach’s cavalry demonstrate toward the Prussian right flank. Their mission is to maintain a threat and keep the Prussian cavalry from adding its weight to the cavalry battle on the far flank.
 Above: Speaking of which… The two hussar divisions clash near Kutlire. The Prussian ‘Puttkamer’ Hussars (HR 4) nearest the village become disordered by fire from the 2nd Banalisten Grenzer and are then repulsed by the ‘Festetics’ Hussars (H32) with heavy losses. However, this proves to be the only bright spot for the Austrians, as the rest of the first line of Austrian hussars is swept away!
 Above: Between Kutlire and Krzeczor, Beck’s composite regiment of Grenz-Hussar squadrons attempts to make a stand on the line of the stream against Krosigk’s Prussian heavy cavalry. However, fire from the Grenzer lurking among the houses on each flank fails to make an impact and the combined efforts of the ‘Prinz von Preussen’ Cuirassiers (CR 2) and ‘Stechow’ Dragoons (DR 11) soon force the hussars to give ground.
 Above: Hülsen’s advance continues to be subjected to a hail of heavy artillery fire from the Krzeczor Hill. At this rate the division will be whittled down long before it reaches the battery! Hülsen is soon relieved to receive new orders, directing him to wheel around the left of the village and assault the battery from Oak Wood, but he must take that village!
 Above: Having defeated the first line of Austrian hussars, Ziethen takes a gamble and urges his hussars to exploit their success and push on into the second line of Austrian hussar regiments, most of whom have been disordered by their retreating comrades. The second line of Austrian hussars is thrown back just as easily as the first. Many of the routed units fail to rally and with catastrophic losses, Nádasdy’s hussar division flees the field. Beck’s Grenz-Hussars however, manage to rally behind Nostitz’s Saxon cavalry.
 Above: The first line of Prussian hussars is left milling about on blown horses, but Nostitz’s Saxons are too far away to do anything about it. Krosigk however, is playing things safe and has pulled his heavy cavalry back behind the stream to rally, covered by the ‘Rochow’ Cuirassiers (CR 8). At the end of Turn 2, the Austrians have lost eight hussar units, while the Prussians have only lost a single unit. However, the day is far from over…
 Above: A short time later, Nostitz arrives on the scene. He was meant to be supporting Nádasdy, but the situation has changed somewhat… Nevertheless, he has his orders and drawing his sword, he orders his regiments to charge! The Austrian Kommandierten cavalry are sent straight at Zieten’s hussars, supported by the Saxon ‘Prinz Karl’ Chevauxlégers on the left and the ‘Graf Brühl’ Chevauxlégers on the right. The ‘Prinz Albrecht’ Chevauxlégers meanwhile, are sent left with Beck’s Grenz-Hussars in support, to keep Krosigk’s heavy cavalry busy on the stream-line.
 Above: Over on the Austrian left flank, Stampach starts to worry as Pennavaire’s cuirassiers join Schönaich’s division in lining up opposite the Austrian horse. The Prussians have a total of five cuirassier regiments and one dragoon regiment in this sector, whereas the Austrians have only three cuirassier regiments and three dragoon regiments.
 Above: To Stampach’s rear, Puebla’s infantry march to take up reserve positions behind Andlau’s division on Przerovsky Hill.
 Above: Wied’s infantry meanwhile, have reached Krzeczor Hill in the nick of time, just as the Prussians capture the village. Wied pushes his column on into the Oak Wood. Starhemberg’s infantry soon form a second line behind Wied, as Serbelloni’s cavalry stream past, heading for the rapidly-collapsing right flank.
 Above: In the centre, the reserve heavy artillery batteries deploy and start to rain death on the approaching Prussian lines.
 Above: With Krzeczor Church having fallen, the Slavonisch-Gradiskaner Grenzer holding the ‘Swedish Works’ suddenly find themselves outflanked! They attempt to withdraw, but are caught by the ‘Wangenheim’ Grenadiers (47/g7)! This is the last straw for Beck’s division. The surviving Grenzer are forced to flee or surrender.
 Above: Nostitz’s cavalry meanwhile, are still rallying from their earlier clash, when they are caught by the ‘Zieten’ Hussars (HR 2) and ‘Wartenberg’ Hussars (HR 3). The leading brigades of Serbelloni’s cavalry reserve can only look on in horror as Nostitz’s division is completely swept away!
 Above: The view from behind Zieten’s division. The ‘Szekely’ Hussars (HR 1 – in green) and ‘Puttkamer’ Hussars (HR 4 – in white) are rallying from their previous clashes, while the ‘Seydlitz’ Hussars (HR 8 – in red) await their turn to charge. Ziethen has thus far lost two of his eight units.
 Above: Hülsen’s infantry have steamrollered their way through Krzeczor village, but it will take some time to re-order their lines beyond the village, before pushing on to attack the Oak Wood and Krzeczor Hill. In the foreground, Normann’s dragoon division arrives to reinforce Krosigk.
 Above: The right wing of the Prussian infantry under the Duke of Braunschweig-Lüneburg, August Wilhelm von Bevern, has started rolling forward, their left flank being marked by the yellow flags of the ‘Anhalt-Dessau’ Regiment (IR 3). The Grenzer skirmishers cause only minor irritation. The huge mass of heavy artillery on the Przerovsky Hill is far more troublesome.
 Above: Bevern’s division is a big one; 15 battalions in all. This is the right wing. The second battalion in from the right flank is the Leibgarde (i.e. the 1st Battalion of the Garde Regiment (IR 15)).
 Above: It is suddenly a ‘target-rich environment’ for the Austrian gunners as they frantically load and fire their pieces as fast as possible at the long line of approaching Prussian infantry.
 Above: Over on the Austrian left flank, messengers arrive with new orders for Stampach’s cavalry. However, the change of orders is now somewhat academic, as the Prussian cavalry are almost upon them!
 Above: It’s now Turn 6 and there is something of an ‘operational pause’ on the Austrian right flank as the Prussian cavalry rally and re-order their lines following the destruction of Nádasdy, Nostitz and Beck.
 Above: Opposite them, Serbelloni’s cavalry are rapidly building up their strength beyond the stream. Four regiments of dragoons, one of cuirassiers and two of massed elite companies are already in place, with a further six regiments of cuirassiers and one of dragoons on the way.
 Above: Wied’s infantry have finally arrived to reinforce the very lonely Kommandierten Infantry Battalion in the Oak Wood. and not a moment too soon, as Hülsen’s Prussians are just starting to emerge from the village. The remainder of Hülsen’s infantry deploy on Krzeczor Hill (just out of shot to the left), supporting the grenadiers and heavy artillery.
 Above: To Wied’s rear, Starhemberg’s infantry push into the Oak Wood, to form a second line supporting Wied.
 Above: The view from the eastern end of the battlefield, as the two armies pause for breath, waiting for Round Two to begin.
 Above: I couldn’t decide if I liked the previous photo best or this one taken from a slightly higher angle, so I’ve posted both. Here we also have a textbook example of the ubiquitous ‘Wargamer’s Groin’ shot.
 Above: Yet another view of the great mass of Prussians around Krzeczor.
 Above: Over on the opposite flank, Stampach’s outnumbered Austrian cavalry prepare to receive the Prussian charge.
 Above: As Bevern’s division advances on Przerovsky Hill, the Grenzer fall back in front of them. The Prussian ‘Manteuffel’ Regiment (IR 17) pushes some of the Grenzer out of Chotzemitz, but the Grenzer are for now holding firm in the eastern half of the village.
 Above: Puebla’s division finally reaches its position in support of Andlau. The approaching Prussian infantry have the qualitative advantage, but they’re only coming on in a single line. Puebla will provide Andlau with defence-in-depth.
 Above: To the right of Andlau and Puebla, Sincère’s division has formed two lines and is about to advance to plug the gap between Krzeczor and Przerovsky Hills.
 Above: The last of Wied’s regiments slots into position on Krzeczor Hill just as Trescow’s Prussian division passes the hamlet of Bristvi and begins to climb the slope. Part of the Prussian artillery reserve has deployed near Bristvi and is beginning to cause casualties among the Austrian gunners. Some of the ‘overs’ also cause casualties and disruption among the grenadier battalions, as well as Wied’s and Starhemberg’s troops on the rear slope.
 Above: On the Austrian left flank, the combined Prussian cavalry divisions of Schönaich and Pennavaire finally launch their charge on Stampach. On the Austrian left, the ‘Hessen-Darmstädt’ Dragoons (D19) are overwhelmed by the combined efforts of the Leib-Carabiniers (CR 11) and the ‘Krockow’ Cuirassiers (CR 1), while on the right, the Austrian ‘Gelhay’ Cuirassiers (Ci) are repulsed by the ‘Driesen’ Cuirassiers (CR 7). However, in the centre the Austrian ‘Alt-Modena’ Cuirassiers (Ciii) comprehensively defeat the ‘Meinicke’ Dragoons (DR 3).
 Above: Finding themselves alone among a horde of angry Prussian horsemen, the ‘Alt-Modena’ Cuirassiers wisely decide to rally back behind the line of the ‘Jung-Modena’ Dragoons (D13). However, the Prussian cuirassiers show no such caution and immediately launch themselves at the second Austrian line! On the Austrian left, the ‘Sachsen-Gotha’ Dragoons (D28), already disordered by their fleeing comrades, are defeated by the Leib-Carabiniers, though on the right the ‘O’Donnell’ Cuirassiers (C14) manage to halt the Prussian rampage and send the ‘Krockow’ Cuirassiers packing!
 Above: The neat lines of cavalry have been thoroughly disordered by that brutal round of combat! The Austrians somehow manage to rally all three defeated regiments, but the Prussian ‘Meinicke’ Dragoons show no such tenacity and flee the field!
 Above: In the centre, the Prussian ‘Manteuffel’ Regiment (IR 17) kicks the last of the Karlstädter-Szluiner Grenzer out of Chotzemitz. However, the Grenzer have done their job, as Bevern’s infantry have now been divided into several disconnected parts.
 Above: It’s all kicking off again on the eastern flank! Serbelloni has now massed his entire reserve cavalry division in this sector and must attack in accordance with his orders. To make life difficult for the Austrians, the Prussians have managed to establish themselves along the far side of the stream, in a position where the Austrians can only attack three regiments abreast. On the right, Serbelloni considers sending a couple of regiments in column along a woodland road to outflank the Austrians, but that is a high-risk move that would be easily defeated by just a single regiment of hussars.
 Above: The Austrian attack is led by the ‘Burghausen’ Elite Regiment in the centre, with the ‘Birkenfeld’ Cuirassiers (C23) on the right and ‘Württemberg’ Dragoons (D38) on the left. Facing the ‘Württemberg’ Dragoons are the ‘Rochow’ Cuirassiers, who are strongly supported on both flanks and in depth, though are slightly fatigued by earlier clashes. The stream line is defended by one of Zieten’s last uncommitted regiments; the two battalions of the ‘Wartenberg’ Hussars (HR 3). Like most of Zieten’s hussar regiments, these are classed as Elite, but have the disadvantage of being freshly-painted and ‘unblooded’… The ‘Werner’ and ‘Puttkamer’ Regiments, being similarly freshly-painted, have suffered badly in this game…
 Above: A gratuitous long-shot of the battle…
 Above: Thankfully the ‘Württemberg’ Dragoons don’t have to cross the stream and their opponents are not fresh, so although although defeated, the Austrian dragoons suffer only light casualties and fall back, rallying successfully behind their supporting lines. Things go better for the Austrians along the stream though, as half of the ‘Wartenberg’ Hussars are thrown back by the ‘Birkenfeld’ Cuirassiers with heavy losses and the rest of the regiment is utterly destroyed by the ‘Burghausen’ Elite Regiment. The surviving hussars manage to rally behind their supports.
 Above: In the Krzeczor Oak Wood, Wied’s infantry come under increasing pressure from Hülsen’s assault. On the extreme right flank of the line, the single battalion of the Austrian ‘D’Arberg’ Regiment (IR 55) is coming under intense pressure from the ‘Münchow’ Fusiliers (IR 36) and ‘Finck’ Grenadiers (13/26).
 Above: On the Kzeczor Hill, Trescow attempts to press home his attack. Here the Prussian ‘Alt-Bevern’ Musketeers (IR 7) and ‘Prinz Heinrich’ Fusiliers (IR 35) come to grips with the Austrian ‘Salm-Salm’ Regiment (IR 14).
 Above: Just to the west, the heavy artillery, the two Austrian grenadier battalions and the left wing of Wied’s division have already been taking losses from two Prussian heavy batteries firing at long range (as have the Austrian battalions on the rear slope, who have been catching the ‘overs’). The crest of the hill now becomes an even more dangerous place, as three Prussian heavy batteries and several battalion guns deploy at canister range, while the ‘Hülsen’ Musketeers (IR 21) and ‘Wied’ Fusiliers (IR 41 – the Wied family got around!) close in.
 Above: At Chotzemitz, Bevern consolidates his capture of the village , swinging his left wing around to push back the remaining Grenzer. However, his infantry are taking significant losses from the Austrian heavy artillery; the 3rd Battalion of the ‘Alt-Dessau’ Musketeers (IR 3) on the left flank of the line, has already been broken up by fire.
 Above: Over on the western flank, as the Prussians re-order their lines, Stampach launches a limited counter-attack with two regiments (the rest of the division is busy rallying from the earlier clashes); the ‘Jung-Modena’ Dragoons (D13) charge head-on at the ‘Schönaich’ Cuirassiers (CR 6), while the ‘O’Donnel’ Cuirassiers (C14) charge on the right flank.
 Above: Overwhelmed by the Austrian charge, the ‘Schönaich’ Cuirassiers are routed with heavy losses. Shocked at seeing his own regiment broken, Schönaich himself attempts to rally them, but fails. His last remaining regiment, the ‘Driesen’ Cuirassiers (CR 7), still rallying from earlier combat, are unable to intervene as the ‘O’Donnel’ Cuirassiers continue their charge to smash the Leibregiment zu Pferde (CR 3) from Pennavaire’s division. Schönaich suffers a crisis of confidence at the unfolding disaster [in game terms, Schönaich’s last remaining regiment would receive an additional -1 in combat and any retreat would immediately destroy the unit].
 Above: On Przerovsky Hill, the main part of Bevern’s line closes with the Austrians, but is being pasted by Austrian guns.
 Above: Serbelloni launches his second charge across the stream. This time the ‘Kolowrat-Krakowsky’ Dragoons (D37), ‘Porporati’ Dragoons (D39) and ‘Panovsky’ Elite Regiment face off against the ‘Seydlitz’ Hussars (H8), ‘Szekely’ Hussars (H1) and ‘Zieten’ Hussars (H2). The result is a complete disaster for the Prussians as all three hussar regiments are thrown back with heavy losses! The ‘Szekely’ and ‘Zieten’ Hussars fail to rally, which means that Zieten has now lost 50% of his division. Zieten’s courage is also starting to waver, just like Schönaich on the opposite flank! The Austrians at this point, briefly consider breaking through to complete the destruction of Zieten’s division, but decide to play it safe and fall back behind their supporting line.
 Above: On Wied’s right flank the ‘D’Arberg’ Regiment (IR 55) is crushed by the Prussian infantry. Starhemberg had deployed the Hungarian ‘Haller’ Regiment (IR 31) in support, but they proved not to be enough.
 Above: To the rear, Starhemberg is pushing another infantry regiment out to the right flank, to support the cavalry battle beyond the Oak Wood.
 Above: On Krzeczor Hill, Tresckow’s Prussian infantry finally launch their charge! Despite being shredded by Austrian canister fire from the four heavy batteries and many battalion guns positioned there, the Prussians manage to close with the whitecoats, forcing the gunners t0 take shelter behind the ranks of the infantry.
 Above: In the centre, the ‘Fiorenza’ Grenadier Battalion manages to halt the charge of the ‘Prinz Heinrich’ Fusiliers (IR 35) with musketry, but on their right the 1st Battalion of the ‘Salm-Salm’ Regiment (IR 14) is thrown back by the ‘Alt-Bevern’ Regiment (IR 7), along with a large group of battalion-gunners. On the left, the ‘Soro’ Grenadier Battalion, already heavily damaged by Prussian artillery fire, is completely smashed by the ‘Hülsen’ Musketeers (IR 21) and is swept away along with two of the heavy artillery batteries!
 Above: At Chotzemitz, Bevern’s left wing attempts to push forward from the village, but is being hammered by the Austrian guns.
 Above: The Austrian artillery is also taking a heavy toll on Bevern’s right wing. The gap in the Prussian line on the right of this picture is where the 2nd Battalions of the ‘Manteuffel’ (IR 17) and ‘Fürst Moritz’ Regiments used to be, but they’ve now been broken up by canister fire.
 Above: On the western flank, the cavalry battle continues as Pennavaire launches the Leib-Carabiniers (CR 11) against the ‘Hessen-Darmstädt’ Dragoons (D19). The Austrian ‘Alt-Modena’ Cuirassiers (Ciii) attempt to intervene, but the Leib-Carabiniers have thus far won every combat and their luck holds as they defeat both Austrian regiments! Tragically for the Austrians, the routing dragoons disorder the ‘Sachsen-Gotha’ Dragoons (D28) in the second line and these too are routed by the rampaging Leib-Carabiniers. Stampach manages to rally the ‘Alt-Modena’ Cuirassiers, but the two dragoon regiments are lost.
 Above: A short time later, the Austrian ‘Gelhay’ Cuirassiers (Ci) attempt to destroy the blown and over-extended Leib-Carabiniers. However, the ‘Krockow’ Cuirassiers (CR 1) intervene and save their comrades from destruction. In the distance, the rest of Stampach’s regiments have decided to continue with their destruction of Schönaich’s division. This they succeed in doing, but it may have lost Stampach the battle!
 Above: On the opposite flank, Serbelloni launches his fourth charge! On Serbelloni’s left, the yellow-coated ‘Prinz von Preussen’ Cuirassiers (CR 2) manage to hold the line against Serbelloni’s own regiment of cuirassiers (C12), but on the right, the ‘Zieten’ Hussars (HR 2) are utterly destroyed by the ‘Kalckreuth’ Cuirassiers (C22). In the centre, the Saxon Carabiniergarde Regiment inevitably succumbs to the ‘Curse of the Paint’ as they are defeated by Prussian hussars. However, Prussian jubilation is short-lived as Zieten’s division completely collapses!
 Above: Hülsen continues his slow but steady assault on the Oak wood. With the elimination of the ‘D’Arberg’ Regiment, the ‘Starhemberg’ Regiment (IR 24) now finds itself on the right flank of Wied’s line and assaulted by the 1st Battalion of the ‘Münchow’ Fusiliers (IR 36) and the ‘Finck’ Grenadiers (13/26). Again, the support of the Hungarian ‘Haller’ Regiment (IR 31) does little to help as Wied’s flank is utterly crushed.
 Above: With Starhemberg attempting to extend the Austrian line out to the right. Hülsen responds by directing the ‘Woldow’ Grenadiers (12/39) and the 1st Battalion of the ‘Schulze’ Musketeers (IR 29) out to the left, thus extending his own line. The rest of Hülsen’s division advances into the Oak Wood and their next targets; the Hungarian ‘Haller’ Regiment (IR 31) and the Kommandierten Battalion.
 Above: Following the earlier disaster on Krzeczor Hill, the Austrians are quick to restore the situation. Although disordered by the fleeing ‘Soro’ Grenadiers, the single-battalion ‘Prinz de Ligne’ Regiment (IR 38) charges up the reverse slope and retakes the grenadiers’ position, throwing the 1st Battalion of the ‘Hülsen’ Regiment back with heavy casualties. The 2nd Battalion of the ‘Hülsen’ Regiment meanwhile, is destroyed by musketry from the ‘Fiorenza’ Grenadiers. On the right, the 2nd Battalion of the ‘Salm-Salm’ Regiment (IR 14) advances into the gap left by the routed 1st Battalion and delivers a withering volley into the Prussian ‘Alt-Bevern’ and ‘Prinz Heinrich’ Regiments.
 Above: As can clearly be seen from overhead, Tresckow’s Prussians have taken catastrophic losses [the white dots]. One battalion and all the battalion artillery has been destroyed outright and of the remainder, five battalions are only one hit away from destruction! However, Hülsen’s powerful division is steadily working over the Austrian right flank.
 Above: The same view from behind Tresckow’s division.
 Above: On the Prussian left flank, the Prussian cuirassiers and dragoons remain reasonably fresh, but only because they let the hussars do most of the fighting! However, that chicken has now come home to roost and Normann gallops his two dragoon regiments to fill the massive open space that has now appeared on their left. Normann is filled with dread at the realisation that his leading regiment is freshly-painted…
 Above: In the foreground the ‘Prinz von Preussen’ Cuirassiers (CR 2) rally following their last clash. This regiment has taken the heaviest losses of Krosigk’s four regiments, though is still good for at least one more charge.
 Above: Serbelloni’s cavalry come on again in the same old way… However, with the removal of the hussars, Serbelloni is now free to execute his original plan to feed some regiments through the wood and the town of Radowesnitz on his right, thus finally outflanking the Prussian line.
 Above: In the centre, the Prussian heavy artillery continues to make life miserable for Wied’s left flank.
 Above: However, it’s only fair, as the Austrian gunners have wrought colossal destruction on the Prussian infantry and the slaughter continues as they remove the 2nd Battalion of the ‘alt-Dessau’ Regiment (IR 3) and the remainder of the ‘Manteuffel’ Regiment (IR 17) from the Prussian order of battle.
 Above: In front of the Przerovsky Hill, some of Bevern’s infantry survive the storm of shot long enough to launch a charge on Andlau’s line! On the left of the Prussian assault, the 1st Battalion of the ‘Fürst Moritz’ Regiment (IR 22) is halted by fire from the ‘Moltke’ Regiment (IR 13), while on the right the 2nd Battalion of the ‘Kreytzen’ Fusiliers (IR 40) are destroyed by fire from the 2nd Battalion of the ‘Puebla’ Regiment (IR 26). However, in the centre, the two battalions of the ‘Kalckstein’ Regiment (IR 25) manage to press home their attack and successfully eject the 1st Battalion of the ‘Puebla’ Regiment.
 Above: This small victory provides Bevern’s Prussians with a crumb of comfort, but to get this far, they’ve had to lose six out of fifteen battalions!
 Above: However, the finest infantry in Europe had just arrived in the first line: The Leibgarde (i.e. 1st Battalion of the Garde Regiment (IR 15))! But the Whitecoats don’t seem worried and the taunt “Come and have a go if your paint has hardened enough!” reaches Frederick’s ears… “What’s that?! They’re freshly painted, you say?!” Frederick immediately horsewhips one of his aides-de-camp…
 Above: Tragically, that was where we had to leave Kolin! Twelve turns in and with events just getting VERY exciting, our mums had called us in for tea and an early bath. 🙁
 Above: The inevitable propaganda photo: The Prussian Garde du Corps squadron rides over to escort the defeated King Frederick to safety.


 The opening salvo by the horse artillery was heard by all the other columns marching toward the battle, including Finck and O’Donell. Arenberg’s column meanwhile, was already deploying between Sackwitz and Ockela, while Brentano’s corps was marching on a southern route, via Schmiedberg toward Pretzsch (from ‘B’ on the map). Gemmingen’s corps meanwhile, was on the northern route (‘A’), aiming to secure a river crossing between Buccholz and Gomlo. O’Donell meanwhile, was still someway distant, while Finck was approaching Pretzsch from the south-east (appearing between ‘C’ & ‘D’).
 The Small Scenario
 The Large Scenario
 Prussian Corps of Generalmajor von Wunsch
 Large Scenario: Additional Prussian Forces
 Austrian Corps of Feldmarschallieutenant Arenberg
 Large Scenario: Additional Forces
 Terrain Notes
 Once again, as in my
  Despite everything, it’s been a pretty good year for me on the wargaming and painting front. On the negative side of the balance-sheet, I had originally planned to do a Napoleonic demo game with my mate Paddy for our usual ‘Battlefront Wargamers UK’ group of chums (


 These were to be my last Napoleonics for the year, but I’ve got a lot more lined up for the near future; As well as the Artillerie de la Marine to finish, I’ve got Saxon light cavalry, Cossacks and even some Swedes all lined up, waiting for the brush.
 Having filled that capability-gap in the Reichsarmee, it was time to fill some gaps in the Prussian order of battle, starting with a couple of


 I also painted some Hanoverian cavalry regiments such as these, the ‘Breydenbach’ Dragoons.


 I also needed some Austrian bits and pieces for Leuthen, namely half a dozen battalion guns and some Hungarian generals. I’m still going to to need to paint yet more Austrian guns in the next fortnight for our forthcoming
  With the Kolin refight in mind, I decided to paint a new Saxon Carabiniergarde Regiment. I
  Also with Kolin in mind, there are presently 48 Prussian hussars under the brush (here are the first 12, which I finished last night).
 For reasons I can’t quite remember, at the end of the summer I suddenly decided to dig out my 28mm AWI collection. That then prompted a blessedly-brief flurry of painting and purchasing from the Perry twins, which taught me two things: 1. I really hate painting 28mm and 2. They’re SO much more expensive than when I last bought some! Anyway, I started with this Wargames Foundry Continental howitzer and crew.
 Then I did this regiment of Continentals (2nd Maryland, circa 1777) that’s been waiting in the Lead Dungeon since 2008.
 I realised that I’ve got a few gaps in my collection; I needed a battalion each of British Light Infantry (including skirmishers) and Grenadiers to finish off Cornwallis’ Elite Corps, some more British cavalry, more Continentals, more militia, more American generals and more artillery for both sides. So after three months of bloody slog, I finally managed to finish the 2nd Light Infantry Battalion and 2nd Grenadier Battalion… Did I mention that I hate painting 28mm…?
 Lastly, I painted five American generals just in time for our planned Brandywine game on 17th December (which then ended up being cancelled due to the bloody weather…). I was FINALLY then able to get back to painting my beloved 15mm and the remaining unpainted 28mm AWI (a box of plastic Continentals, a pair of British infantry battalions, the Hessian ‘Rall’ Grenadier Regiment, the 16th Light Dragoons, the Hussar Troop of the Queen’s Rangers and some artillery for both sides) went back into the Lead Dungeon and will probably remain there for another ten years…
 So to the scores on the doors for 2022:

 All this rules-wrangling at the start of the year meant that we played a few test-games of Tricorn, some of which never appeared on these


 These two armies came out of the box again in December, for another non-historical game to teach Rob the rules (below). I think these are probably my two very-favourite wargames armies.
 With Tricorn finally finished to my satisfaction, I went a bit berserk in May and organised


 The urge for 20th Century drabness soon passed, however. As mentioned above, during the late summer I suddenly developed a need to get my 28mm AWI collection out of the box. Most of the flags had faded rather badly, so I got a load of replacements from
  This time I gave them a coat of gloss varnish, followed by a matt spray, so they will hopefully stay looking as good as the day they were printed! With the troops re-flagged, a lot of them were soon on the table for a refight of the


 As mentioned earlier, we plan to do some more big AWI games in 2023, so that MIGHT prompt me to do a little more 28mm painting, especially where my collection is deficient in certain troop-types required for certain scenarios.
 The large game that followed was a refight of the


 Other articles on the blog this year included some more delves into the murky depths of my figure collection, starting with
 T
T


 Looking ahead to 2023, my plans revolve once again around SYW and Napoleonics, though this is subject to sudden and whimsical change, as always! I’ve already mentioned two planned refights, but I’ve also got my favourite Napoleonic battle,


 Well I’m on the night-shift tonight, so I’ll be seeing in 2023 with mild depression, a jar of turps* and some more Prussian hussars for our forthcoming Kolin refight.
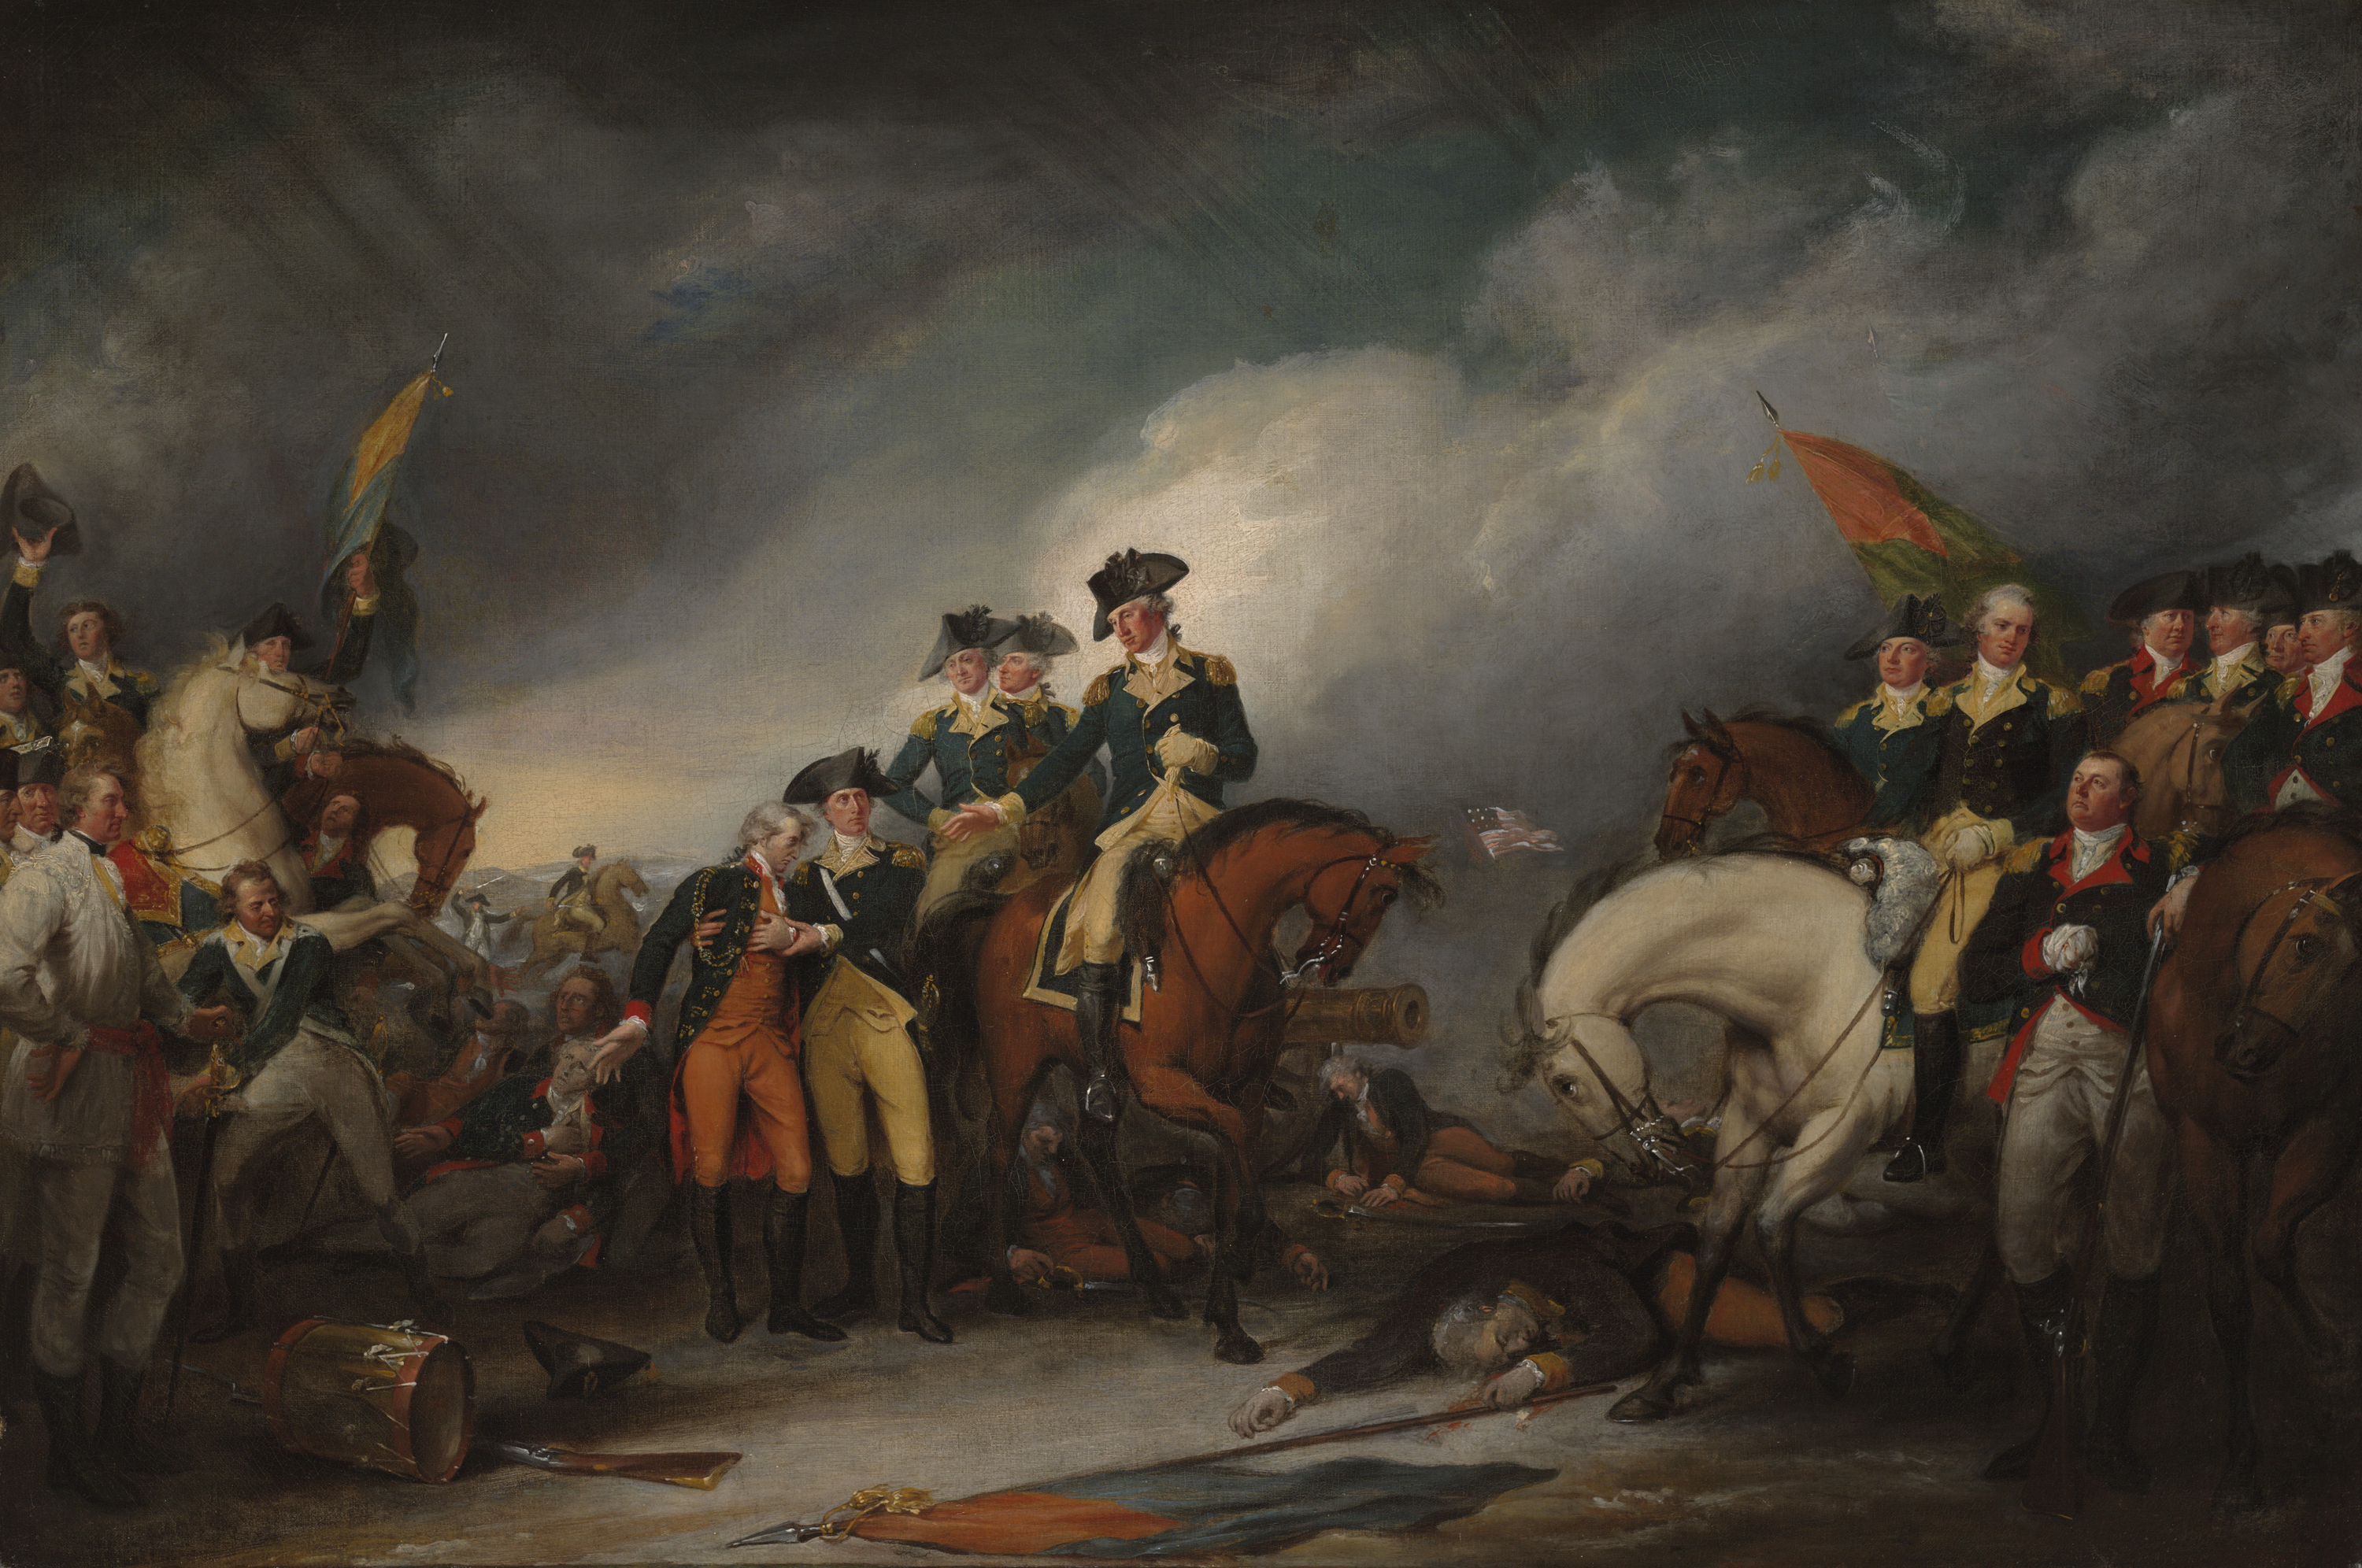
 Anyway, the dinner’s in the oven, the dog’s burying her latest Christmas toys and Mrs Fawr is just pouring me a Buck’s Fizz, so I’ve got time to sit and write the third and final article on my 28mm AWI Hessian Army (until I paint some more of course). After a few hours with the family, the dinner will probably be in the dog, my toys will be buried in the garden and Mrs Fawr will be pouring me into the car…
 Hessen-Kassel supplied a large Jäger detachment, consisting of two mounted companies and two foot companies. Brunswick, Ansbach-Bayreuth and Hesse-Hanau also sent Jäger detachments to America as part of their contingents and these were uniformed very similarly to the Hessen-Kassel Jägerkorps, so having almost no shame, I’d be perfectly happy using these figures for any of the contingents.
 The uniform of the Hessen-Kassel Jägerkorps was a dark green coat with crimson facings and yellow metal, without lace. Smallclothes were straw-coloured, though as with other Hessian troops they would often wear American ‘Trowsers’. Their hats were unlaced, though had green cockades and corner-pompoms. Belts were red leather.
 Above: A closeup of two Jäger.
 Above: Another closeup.
 Above: A Jäger officer and NCO, with a wounded Fusilier of the Erbprinz Regiment. The Erbprinz Regiment had crimson facings and turnbacks, with white buttonhole lace, white smallclothes and white metal. The fusilier cap was crimson with white metalwork.
 Above: The officer’s rank is indicated by the gold aiguillette behind his right shoulder and the silver and red sash worn around the waist. Hessian officers also typically wore a silver gorget at the throat, though Jäger officers probably didn’t wear those in the field.
 Above: The NCO’s status is shown by the gold lace edging to his cuffs.
 Above: Hessen-Kassel supplied a light artillery detachment to provide close support to its infantry battalions. They consequently had no guns heavier than the ‘Swedish’ 4-pounder. I’m not sure how many guns they had in total, but Hessian brigades in America were typically supported by a battery of four guns. The Ansbach-Bayreuth and Hessen-Hanau contingents also included light artillery detachments.
 Above: The astute will of course, have noticed that these aren’t ‘Swedish’ 4-pounders, but are in fact British 6-pounders… Guilty as charged… The reason for this is that back in 2006 I needed some Hessian guns for a game and had two spare British guns and a spare pack of SYW Prussian gunners that I’d been given. So I painted them all up for the game, fully intending at some point to get some 4-pounders and some more British artillery crewmen. So much for that plan! Anyway, these models are all by
  Above: As usual, Hessian artillery uniforms were very Prussian in style, though unlike the Prussians, the coats had lapels, so these had to be painted on (I don’t think they look too bad). Facings were crimson, metal was yellow, smallclothes were straw, belts were white and the hat was edged in white lace and decorated with three crimson & black pompoms. The correct ‘Swedish’ 4-pounders should have light blue carriages with black metalwork and brass gun-barrels.
 Right, that’s it! The meat is out of the oven and we’re off to the daughter’s place.
 At the time of starting to write this post, we should have been refighting Cornwallis’ flank-attack at the Battle of the Brandywine 1777 at the
  Above: The Musketeer Regiment Von Donop was one of seven Hessen-Kassel Musketeer Regiments to serve in North America during the course of the war. The regiment was named for its Chef (Colonel-Proprietor),
  Above: Although they were broadly modelled on the Prussian Army, the Hessians only fielded single-battalion regiments in North America. This is curious, as a major reorganisation in 1760 sought to ape Prussian two-battalion regimental organisation (
 Above: As mentioned above, the smallclothes (waistcoat and breeches) were officially straw-coloured, but regiments in America often wore long, locally-made ‘American trowsers’, which had a lap over the shoe and a strap under the instep, so they doubled as gaiters and are also often referred to as ‘gaiter-trousers’. These could be made of lightweight linen for summer wear, or of hard-wearing material such as canvas, sail-cloth or ‘ticking’ material used for making mattresses. This cloth, coming from various local sources, came in various colours and in particular the ticking was described as being striped in blue, red and brown. However, I almost lost the will to live painting the stripes on the grenadiers’ trousers (see
  Above: Each Hessian regiment/battalion followed the Prussian practice of issuing one flag to each of the five companies in a battalion, with the grenadiers carrying no flags (the exception being the Rall Grenadier Regiment, who were essentially just Musketeers in funny hats). The 1st or Leib Company would carry the regimental Leibfahne, while the other companies each carried a Kompaniefahne. In battle these would be grouped together as five flags in the centre of the regiment. For example, in the painting at the top of this article you can see the regimental colour-party of the Rall Grenadier Regiment, with the green Kompaniefahnen grouped behind the white Leibfahne. For modelling purposes this is scaled down to two flags; the Leibfahne and a single Kompaniefahne.
 Above: The Fusilier Regiment Von Lossberg was one of three Hessen-Kassel fusilier regiments to serve in North America and took its name from the regimental Chef, Lieutenant General Anton Heinrich August von Lossberg. In 1780 the regiment became the Alt-Lossberg Regiment when the former Von Mirbach Regiment adopted Lieutenant General Friedrich Wilhem von Lossberg (Anton Heinrich August’s younger brother) as its Chef and therefore became the Jung-Lossberg Regiment.
 Above: There was no organisational or tactical difference between musketeers and fusiliers. The difference was purely cosmetic, namely the Prussian-style, fusilier-pattern mitre cap.
 Above: The Von Lossberg Regiment’s uniform consisted of the usual blue coat with orange lapels, collar and cuffs, with yellow metal buttons but without lace. The orange facing colour is described as ‘scarlet’ in some sources, but uniform plates from the 1780s show it as a distinctly more orange shade than the other reds used by the Hessen-Kassel Army. The fusilier cap had a black bowl and yellow metalwork. Smallclothes were white, though the regiment here again mostly wears locally-made ‘trowsers’ in white linen. Note that the officers of fusilier regiments and grenadier battalions wore cocked hats.
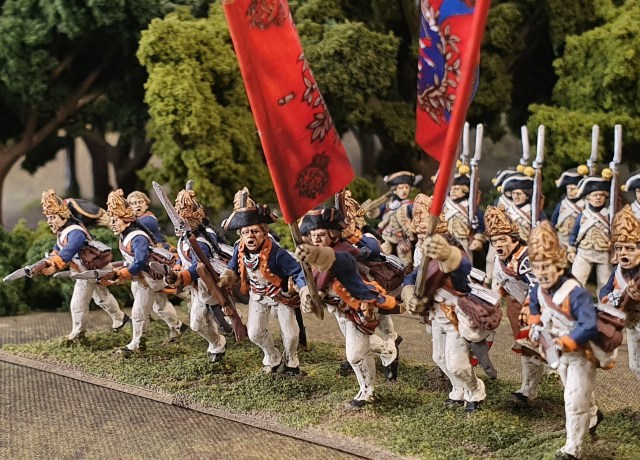 Above: The flags by GMB Designs again depict the regimental Leibfahne as being of the facing colour (as with the Von Donop Regiment’s flags, the Kompaniefahnen have blue ‘flames’ in the corners). However, there are those who again state that the Leibfahne should be white.
 Above: Sources are split over whether the tail-turnbacks were orange or the more typical poppy red. The famous set of 1780s uniform prints (below) shows orange and also shows other regiments with various shades of red (such as crimson and rose) having matching turnbacks, while those regiments with other colours such as white, yellow or black had poppy red turnbacks. I went with the orange.

 Above: Lieutenant General Wilhelm von Knyphausen came to America in 1776 as second-in-command to Lieutenant General Phillipp von Heister, the General Officer Commanding all ‘Hessian’ forces in America. However, following the Christmas 1776 débâcle at Trenton, Knyphausen was elevated to replace Heister as GOC Hessian Troops.
 Above: There was no stipulated uniform for general officers in the Hessian army of the period (nor indeed any German army within the Prussian sphere of influence), so generals would wear a version of regimental uniform; either the regiment they owned as Chef, or the regiment into which they were commissioned. Knyphausen is therefore shown wearing the regimental uniform of his own Knyphausen Fusilier Regiment; namely a blue coat with black lapels, collar and cuffs, poppy red turnbacks, yellow metal and without lace. Smallclothes were straw-coloured.
 Well it’s holiday time again and once again there’s sickness in the family, so it’s been binned. God does like his little jokes… Anyway, there are two positives to take from this:
 As my French and Austrian Napoleonics are all still sitting in the car from last time (I regard it as more of a mobile shed than a car…), I thought I’d dig out a small historical scenario for the
 Despite having been ‘liberated’ by the forces of Liberté, Fraternité & Égalité, the Italians seem to have preferred the oppression of L’Ancien Régime to the looting and depredations of the starving French soldiers. A large-scale uprising soon erupted in the French rear, centred on the city of Pavia. Napoléon wasted no time in putting down this insurrection in a most brutal fashion. Despite this and political intrigues generated by the ruling Directory in Paris, Napoléon soon managed to resume the offensive and succeeded in defeating Beaulieu once again at Borghetto (30th May). This all proved too much for Beaulieu who, with his regiments either trapped inside the fortress of Mantua or broken and fleeing north into the Tyrol, decided to resign.
 Wurmser Attempts To Relieve Mantua


 Austrian Briefing


 Terrain Notes


 Above: The view from behind the French army. Sadly, my supply of roads is somewhat limited and I really should get some more. I did however place the key roads on table (i.e. the main highway and the roads through the rough and swampy ground on the Austrian left). One other balls-up was that I left a box of buildings at home, so all I had with me was the four buildings used for the Battle of Fünfstraßen scenario! Aargh! Thankfully, that was sufficient to represent the four key frontline villages of Caldiero, Stra, Gambione and San Zeno.
 Above: The view from the Austrian left flank. In the foreground is the swampy valley of the Adige River. The brown carpet on the right shows area of rough ground. In the distance is the fortified high ground of the Colognola Heights, surrounded by steep slopes, thick with olive groves and vineyards.
 Above: This nice little set by Old Glory 15s, depicting a wounded Marshal Masséna, famously commanding from the comfort of his white phaeton at
  Above: On the Austrian left flank, Nordmann’s two Grenzer brigades squelch through the marsh, though the 9th ‘Erdödy’ Hussars take advantage of a road to work their way around what they assume to be the French right flank.
 Above: However, just ahead of them, Colonel Petit’s 62e de Ligne have just landed on the banks of the Adige (in game terms, Petit’s detachment is place on the table after the Austrians have completed their deployment). This detachment is securing the bridgehead for the remainder of Verdier’s 2nd Division to also cross. The original plan had been for Verdier to land behind the Austrian flank, but the fog led them astray and they now find themselves in front of the Austrians! However, at present the fog prevents either side from engaging the other.
 Above: On Nordmann’s right, Reuss-Plauen’s infantry (two infantry regiments and a brigade of grenadiers) are also squelching through the marsh, while the attached 3rd ‘Archduke Charles’ Uhlans keep their hooves dry on the road.
 Above: The uhlans form the left flank of a large mass of Austrian cavalry, who fill the narrow plain between the hills and the marsh. In front is O’Reilly, with the 8th ‘Kienmeyer’ Hussars and 1st ‘Kaiser’ Chevauxlegers, while to the rear is Lothringen, with the 4th ‘Levenehr’ and 5th ‘Savoy’ Dragoons.
 Above: The village of Caldiero itself has been fortified by Vogelsang’s Division; IR 62 holds the village itself, with IR 2, Hertzberg’s grenadier brigade and a 6pdr cavalry battery in support. To the rear of Caldiero, Lindenau’s Division has fortified a small hill and with two grenadier brigades (Duba’s and Hohenlöhe’s), IR 32 and a 12pdr position battery. General of Cavalry Bellegarde has established his headquarters near the battery and from there commands the central four divisions of Vogelsang, Lindenau, O’Reilly and Lothringen.
  Above: On the right flank of the main French position, near the village of Gambione, stands Duhesme’s 4th Division, consisting of Le Camus’ Brigade nearest the camera and Goullus’ Brigade. To their rear is Mermet’s Reserve Cavalry Division, comprising Lacour’s dragoon brigade and Offenstein’s cuirassier brigade.
 Above: Masséna’s centre is spearheaded by Gardanne’s 1st Division, consisting of Lanchatin’s and Compère’s brigades and the 23rd Chasseurs à Cheval. To their rear is Partouneaux’s Reserve Division, consisting of Solignac’s and Valentin’s massed grenadier brigades and the attached Italian 2nd Infantry Regiment. Behind them come Debelle’s and Maurin’s chasseur à cheval brigades of d’Espagne’s Light Cavalry Division.
 Above: On the fortified Colognola Heights, Archduke Charles has set up his headquarters among the olive trees, from where he’d hoped to observe Simbschen’s right-flanking attack. Nearby, a couple of cavalry batteries from Simbschen’s division, guarded by the 6th ‘Warasdiner St Georg’ Grenzer, sit behind their earthworks and wait for the fog to lift.
 Above: Further north along the ridge, two more of Simbschen’s regiments and another cavalry battery for a reserve for Simbschen’s attack down in the foggy valley below.
 Above: Down in the valley and clear of the olive trees, Simbschen has formed up with three infantry regiments and the 3rd ‘Archduke Ferdinand’ Hussars, ready to attack the French left flank. However, the sound of French drums can be heard approaching through the fog…
 Above: In front of Simbschen, Molitor’s French 3rd Division is advancing through the fog. Molitor has three infantry brigades; Launay’s (the largest), Herbin’s and Valory’s, plus the 29th Dragoons. Molitor plans to boldly advance up to the Austrians through the fog and then use his superior firepower to blow them out of the way, before advancing up the slope…
 Above: “Christ à vélo!” As Molitor’s troops advance, the thunder of hooves is heard as the Austrian 3rd Hussars suddenly burst out of the fog in front of Valory’s brigade! Valory’s panicked infantrymen fail to form square and are ridden down without mercy! Crazed with bloodlust, the hussars then launch a ragged charge on Herbin’s brigade. Again, Herbin’s troops fail to form square, but their musketry manages to empty a few saddles before they too are swept away, taking the supporting horse battery with them.
 Above: The battle has only just begun, yet half of Molitor’s division is already fleeing toward Verona.
 Above: An overview of the French centre. Like Molitor, Gardanne has advanced to close range through the fog, hoping to overwhelm the defenders of Caldiero with firepower prior to an assault.
 Above: On the right, Mermet’s Reserve Cavalry Division moves to the right, to counter the threat posed by Nordmann’s hussars.
 Above: At Caldiero, Compère’s brigade has deployed into brigade skirmish order, in order to increase their firepower and reduce the effectiveness of the Austrian battery to their front (in game terms, skirmish-stands are inserted as ‘spacers’ between the troop-stands and they gain a +1 fire modifier, while Austrian fire suffers a -2 cover modifier. However, this formation is unwieldy to manoeuvre and suffers a -3 combat modifier). Vogelsang meanwhile. moves his two reserve brigades forward on the flanks and effectively prevents the massing of French force against Caldiero.
 Above: On the French left flank, the Austrian 3rd Hussars have been left disordered following their rout of Molitor’s brigades, leaving them wide open to a counter-strike by the 29th Dragoons. The French dragoons soon take sweet revenge for the infantry, destroying the hussars and sweeping them from the field! However, Molitor has to make a decision; stay to fight with what he has left in the front line, or go back to rally the routing brigades and return in strength… He takes the fateful decision to go back to rally the routing troops…
 Above: Over on the Austrian left flank, Nordmann has manoeuvred the 9th Hussars past Petit’s detachment (which remains immobile on the bank of the Adige) and into position to threaten the French right and support the advance of his Grenzer and Reuss-Plauen’s infantry through the marsh. However, Lacour’s dragoon brigade from Mermet’s Reserve Cavalry Division is approaching, followed by Offenstein’s cuirassiers.
 Above: Duhesme is feeling confident as he advances his infantry to meet the Austrians. D’Espagne meanwhile, moves his chasseurs and horse artillery forward to support Duhesme’s left.
 Above: The rest of the French light cavalry and horse artillery are being sucked into what is likely to be a large cavalry battle in the centre. However, at present the fog is still sitting on the battlefield and both sides are being cautious. That will end once the fog lifts and the artillery opens fire in earnest.
 Above: Molitor’s attempt to rally his routing troops is not going well! Only Herbin’s brigade has rallied, while Valory’s brigade and the gunners refuse to obey orders! (in game terms, this repeated failure to rally was remarkable as with Molitor being rated ‘Excellent’, they only had to roll 1-8 on a D10!)
 Above: In the meantime, the rest of Molitor’s division is milling about without orders and the infantry of Launay’s brigade are being steadily whittled down by the fire of three Austrian regiments.
 Above: At Caldiero, things are not going well for Compère’s light infantry brigade, which is losing the firefight against the Caldiero garrison, a cavalry battery and Hertzberg’s grenadier brigade. However, on their right, Lanchatin’s brigade has charged the Hungarian 2nd Infantry Regiment! Following a hard, evenly-matched fight, the Hungarians are routed.
 Above: In the marshes, Reuss-Plauen’s advance has been extremely hesitant; partly due to the terrain, partly due to his remoteness from Archduke Charles and partly due to uncertainty as to French intentions on this flank.
 Above: In the centre, the great mass of Austrian cavalry waits for the fog to lift.
  Above: At last, the fog begins to lift and the emplaced Austrian batteries open up on long-range targets.
 Above: The two batteries near Archduke Charles’ headquarters are firing at extreme range, but manage to inflict a steady trickle of casualties on the French infantry between Stra and Caldiero.
 Above: At last, the Austrian cavalry, their confidence boosted by their numerical superiority, charge the French lines! The 3rd Uhlans and 4th Dragoons aim for Goullus’ brigade of Duhesme’s 4th Division, but they form square and beat the Austrian horsemen off with ease. D’Espagne’s cavalry meanwhile are deployed and ready; the horse artillery empties some saddles among the 1st Chevauxlegers, who are then beaten off by Debelle’s Chasseurs, along with the 5th Dragoons.
  Above: Near Caldiero, the Austrian 8th Hussars charge Lanchatin’s infantry, who are unable to form square, due to the proximity of Austrian infantry. However, the hussars suffer losses from French fire during their charge and are beaten off.
  Above: The Austrian cavalry assault is a failure, but they’ve suffered only light losses and fall back to lick their wounds while considering their next move. D’Espagne meanwhile, still has Maurin’s chasseurs fresh and spies an opportunity…
 Above: At Caldiero, Compère’s light infantry are suffering catastrophic losses to Austrian fire and are now almost down to 50% of their original strength! Gardanne decides to cut his losses and orders them to close up on their left flank and allow Solignac’s grenadiers to pass through.
 Above: Over on the Austrian right flank, Lacour’s dragoons launch a bold attack across the stream, against Nordmann’s 9th Hussars. The gamble pays off, as the hussars are caught while still deployed in column formation. Although not a knockout blow, the hussars are disordered and are forced back to the bank of the Adige River.
 Above: Petit meanwhile, is in trouble as skirmishing Grenzer begin to pick off his men one by one. He prays that Verdier will cross the river and reinforce him soon.
 Above: In the centre, with all the Austrian cavalry disordered following their massive charge, Maurin’s fresh chasseur brigade charges the nearest rallying unit (the 8th Hussars), hoping to destroy at least one unit and perhaps start a general rout. However, while the charge is marginally successful, only minor damage is caused to the Austrian hussars and Maurin falls back to reform. However, one significant result of this engagement is that FML O’Reilly, having been ridden over by Maurin’s chasseurs, only narrow avoids death! His division is therefore without leadership for a time while he has his wounds dressed.
 Above: Reuss-Plauen continues his cautious advance through the marsh, though is starting to suffer losses from French fire.
 Above: At the foot of the Colognola Heights, Simbschen continues his mugging of Launay’s brigade. The 29th Dragoons in the meantime, have been broken up in very short order by accurate long-range artillery fire from the heights.
 Above: Molitor meanwhile, is STILL trying to rally the rest of his division!
 Above: With the Austrian 9th Hussars already pushed back by Lacour’s dragoons, Offenstein’s cuirassiers launch their assault across the stream, again throwing back the hussars. However, with their backs to the river they have nowhere to run and are captured.
 Above: On the riverbank, Verdier finally arrives with Digonet’s strong light infantry brigade. Petit stands relieved, but his regiment is still being whittled down by fire from the Grenzer in the marsh.
 Above: On the opposite flank, Molitor suffers another disaster as Launay’s brigade is finally broken by Austrian fire.
 Above: Things aren’t looking much better at Caldiero, as Compère’s brigade continues to be whittled down, despite falling back from the stiff fire coming from the village. Lanchatin’s brigade meanwhile, despite their earlier success, have been routed by a combination of 12pdr fire from the redoubt behind Caldiero and musketry from the village garrison. Partouneaux now takes over the mission of assaulting Caldiero, but simply doesn’t have the strength for the task.
 Above: With losses escalating rapidly due to fire from Duhesme’s division, Reuss-Plauen is forced to fall back into the marsh.
 Above: However, Duhesme isn’t going to let the Austrian infantry off the hook that easily and steadily advances to maintain the perssure.
 Above: With the threat to the right flank eliminated, Mermet recalls Offenstein’s cuirassiers and moves to reinforce the centre.
 Above: In the meantime, another indecisive cavalry clash has occurred in the centre. D’Espagne’s light cavalry rally again at Gambione, having suffered only light losses.
 Above: The Austrian cavalry meanwhile, have already suffered around 25% casualties and daren’t risk another major assault.
 Above: At Caldiero the Austrians have reset their defence. The depleted IR 2 takes over garrison duties in the village itself, while IR 62 move out onto the flank.
  Above: Partouneaux meanwhile, still can’t see a way of taking the village. His veteran grenadiers are full of fighting spirit, but the village fortifications and the sheer number of Austrian defenders negate any advantage.
 Above: The French situation looks even worse from the Austrian side! The French now have absolutely nothing in reserve, while the Austrian position is massively strong, arrayed in depth and overlooked by fortified batteries and redoubts filled with grenadiers!
 Above: At long last, the remnants of Molitor’s division gets back into the fight!
  Above: Simbschen meanwhile, has ridden up to the redoubts to redirect the fire of his batteries.
 Above: On the French right flank, Verdier finally goes on the attack, but not before the Grenzer finally finish off Petit’s 62e de Ligne.
 Above: Digonet’s light infantry exact swift revenge for Petit as they rout the Grenzer. Nordmann still has one Grenzer brigade left intact, but the Austrian left flank is looking increasingly vulnerable. However, it’s the Austrian RIGHT flank that the French need to be rolling up!
 Above: Back in the centre, the Austrian IR 62 came under intense French fire as soon as it left the cover of Caldiero. The regiment was then charged by Maurin’s cavalry brigade and has now fled back behind the village. Maurin charged on into the Austrian cavalry, but was forced to fall back following another indecisive clash and is now in the unfortunate position of having to rally under the muzzles of the Austrian 12pdrs!
 Above: As Duhesme keeps the pressure on Reuss-Plauen’s retiring Austrian infantry in the marsh, Mermet’s Reserve Cavalry move to reinforce the centre and perhaps remove the Austrian cavalry threat once and for all.
 Above: In front of the Colognola Heights, Molitor’s renewed attack is stalled yet again; this time by Austrian artillery fire from the redoubts. However, he’s now close enough to deploy his artillery and take some revenge on Simbschen’s infantry.
 Above: The balance of Brun’s brigade (to whom Petit’s 52e de Ligne belonged) has finally crossed the river to reinforce Verdier. Ormancey’s cavalry brigade and a horse battery are still waiting to cross, but the horses are proving difficult to load on the barges.
 Above: Duhesme’s infantry advance into the marsh, keeping the pressure on Reuss-Plauen and inflicting heavy casualties on the whitecoats.
 Above: Nordmann has managed to rally the remnants of Siegenfeld’s Grenzer brigade, but his other Grenzer brigade is now outflanked, disordered and taking casualties from Verdier’s advancing infantry.
 Above: “D
 Above: Seeing the Austrian 1st Chevauxlegers milling about in some disorder, d’Espagne seizes the opportunity and orders Debelle’s Chasseurs to strike! The 1st Chevauxlegers are destroyed and Debelle’s charge carries them into the freshly-disordered 4th Dragoons , who are thrown back through the 5th Dragoons. Debelle’s charge sadly runs out of steam at this point, but the Austrian cavalry are left disordered and unable to respond to the French attack.
 Above: Mermet’s reserve cavalry move forward to exploit Debelle’s success in the centre.
 Above: The 4th Dragoons lick their wounds well to the rear.
 Above: At long last (over an hour late), Argentau’s Austrian Reserve Division arrives to stabilise the situation on the Austrian left.
 Above: The cavalry battle may as well be on the Moon, as far as the French infantry are concerned… Compère’s brigade has finally been destroyed by the combined weight of fire of three Austrian cavalry batteries and Hertzberg’s grenadier brigade. The 2nd Italian Regiment moves to occupy their position on the left of Partouneaux’s line. Partouneaux’s grenadiers meanwhile, are still struggling to make headway against the village and Solignac’s brigade on the left has already suffered 25% losses.
 Above: Meanwhile, Lindenau’s grenadiers sit in their trenches, get a brew on and wonder what all the noise is…
 Above: “Adjutant, take down this dispatch to the Emperor: ‘Greetings Sire! I bring news of a great victory won by your brave soldiers under my command at the village of Caldiero…'”