
As mentioned in recent posts, I’ve ALMOST completed the Reichsarmee for the Severn Years War! 🙂 When it comes to painting, I always work best with an objective game on the calendar, so on 15th April we’re going to be getting most of the Reichsarmee on the table with a refight of the Combat of Strehla. So as usual, here’s the scenario (written for Tricorn, my SYW variant of Shako rules) and a bit of historical scene-setting/guff.
 The campaigns in Saxony during the Seven Years War were very much a side-show compared to Frederick’s ‘main events’ in Bohemia, Silesia and elsewhere and as a consequence are largely given far less coverage than Frederick’s own battles. However, they provide a wealth of historical wargame scenarios ranging from small actions of the Petit Guerre to brigade-sized actions such as the Combat of Meissen, to divisional-sized actions such as the Combat of Zinna, to larger multi-divisional battles such as Pretzsch, Korbitz and Maxen and then very large battles such as Torgau and Freiberg. As a bonus, a lot of these battles also involved the colourful Reichsarmee! 🙂
As the Saxony Campaign of 1760s is not very well-known and can be very confusing with countless marches, counter-marches and intricate manoeuvres, this is a slightly long potted history, but I think it’s worth explaining where the Combat of Strehla fits into the Great Scheme of Things…

General Finck surrenders to Marshal Daun at Maxen 1759
Historical Background (The Saxony Campaign of 1760)

Frederick II
The capture of General Finck’s entire Prussian corps of 13,000 men at Maxen on 20th November 1759 was the last body-blow suffered by the Prussian King Frederick II during a terrible year that had also included catastrophic defeats at the hands of the Russians at Paltzig and Kunersdorf.
However, the situation for Frederick was not all bad. In western Germany, Prince Ferdinand of Brunswick and his British, Hanoverian, Hessian, Brunswick, Schaumburg-Lippe & Prussian alliance army had won a remarkable victory against the French and Saxons at Minden, thus diminishing the French threat to Prussia and the rest of the alliance for the time being. Ferdinand followed this up with a further victory against the army of Württemberg at Fulda.

Daun
The Russians meanwhile, despite their victory at Kunersdorf, had also suffered appalling losses and had consequently broken off their attack on Brandenburg and withdrawn into winter quarters. This decision, later referred to by Frederick as ‘The Miracle of the House of Brandenburg’, had given Frederick vital breathing space to rebuild his army and restore the situation.
So despite the loss of Finck’s corps, the situation by the end of 1759 had largely stabilised for Prussia. The situation remained quiet for the first half of 1760, as Frederick’s main army remained in Saxony, locked in a stalemate with Field Marshal Daun’s Austrian main army and Prince Michael of Pfalz-Zweibrücken’s Reichsarmee.

Fouqué
In June 1760 the armies began once again to move in earnest. Daun finally left his winter quarters and marched for Silesia, to join an assault led by the ‘up and coming’ Feldmarschallieutenant Loudon. Detecting the move, Frederick attempted to block and destroy Daun and another Austrian corps under Lacy. However, Loudon in the meantime had managed to outwit and defeat Frederick’s close friend the Baron de la Motte Fouqué at Landeshut in Silesia, killing or capturing all but 1,500 of Fouqué’s corps, including Fouqué himself who was captured with honour, having suffered three sword-cuts in a desperate last-stand action.

Lacy
As the news of Fouqué’s defeat arrived in Saxony, Daun made a renewed effort to break contact from Frederick, in order to reinforce Loudon’s success in Silesia and in accordance with his orders from Vienna. Frederick immediately followed, leaving Generallieutenant Hülsen to keep the Reichsarmee busy at Dresden. However, that still left Feldzeugmeister Lacy’s Austrian corps free to shadow and frustrate Frederick’s pursuit of Daun.
By 8th July, Frederick was near Bautzen, marching east in pursuit of Daun, with Lacy following. However, it occurred to Frederick that he suddenly had an opportunity to not only destroy Lacy’s troublesome and now isolated corps, but also to recapture Dresden. He immediately reversed his march and bore down on an unsuspecting Lacy! By some miracle, Lacy managed to escape the trap and after a gruelling forced-march, managed to find safety on the western bank of the Elbe.

Macquire
On 13th July, Frederick’s army also crossed back over to the west bank of the Elbe, crossing below (i.e. to the north of) Dresden, thus inserting themselves between the city and Zweibrücken’s Reichsarmee, which already had its hands full with Hülsen’s Prussian corps, further down the Elbe at Meissen. Frederick was aiming to assault the old half of Dresden, which lies on the western bank of the Elbe. The new half of the city (Neustadt) on the eastern bank had relatively modern fortifications, whereas the old city’s fortifications dated back to the Thirty Years War and were closely surrounded by suburbs which further reduced their defensive value. Frederick didn’t have the resources for a protracted siege, but hoped he could capture the city by surprise. However, he didn’t count on the tenacious and active defence that would soon be mounted by the city’s governor, Feldmarschallieutenant Macquire.

Dresden in the 1760s by Canaletto

Loudon
The initial attempted surprise attack on 14th July by Jäger and the ‘Courbière’ Frei-Infanterie was a failure and so Frederick was soon forced to initiate a formal siege. Within days, almost half of the old city of Dresden, one of the most beautiful cities in Europe, was on fire thanks to Prussian mortars. However, the defenders held firm and the Prussians, lacking sufficient heavy cannon to make a practicable breach, were unable to storm the city. To make matters worse for Frederick, he now received word that Daun too had reversed his march and was returning to Dresden. In addition, the Silesian fortress of Glatz was besieged by Loudon and Prince Henry had reported that the Russians were once again on the move, marching into Silesia and outnumbering Prince Henry’s corps by two-to-one! Frederick knew that he needed to end the siege of Dresden as soon as possible, break off and march to Silesia, all while trying to avoid being forced into a battle by Daun.

Pfalz-Zweibrücken
On 20th July, Daun arrived at Dresden and launched a surprise attack on Prussian entrenchments, only to find that the Prussians and their guns had gone. However, the Saxon ‘Rudnicki’ Uhlans came within a whisker of ending the war when they raided Frederick’s headquarters, almost capturing Frederick in his nightshirt!
The Prussians maintained the illusion of a siege for another week, but on 28th July word arrived in both camps that Glatz had fallen to Loudon and Breslau was now threatened. While the Austrians celebrated, Frederick managed to slip away during the stormy night of 29th-30th July, marching north to Meissen and crossing over to the east bank of the Elbe. The Prince of Pfalz-Zweibrücken’s Reichsarmee completely failed to detect or block this move. The race to Silesia was on!

Hadik
Frederick left around 12,000 troops under Generallieutenant Johann Dietrich von Hülsen’s command to once again tie down enemy forces in Saxony. However, Hülsen had his work cut out, as Daun felt confident enough to leave 25,000 Austrian and Imperial troops in Saxony, under the command of the Prince of Pfalz-Zweibrücken, aided by the capable Hungarian General der Cavallerie Andreas Hadik. Daun meanwhile marched east, pushing his troops hard to get ahead of Frederick. Lacy’s corps once again followed in Frederick’s wake.
With the main armies having once again marched out of Saxony and the remaining Austro-Imperial forces outnumbering the Prussians by two-to-one, Hadik presented Zweibrücken with a plan to go on to the offensive. Like the cities of Dresden, Torgau and Wittenberg, Hülsen’s base at Meissen straddled the Elbe and was a key crossing-point on that great river. The Reichsarmee would therefore attempt to either evict Hülsen from Meissen, or shut him up within the city while the Reichsarmee removed other Prussian garrisons such as the one at Leipzig, at leisure.
However, Hülsen detected the Reichsarmee‘s manoeuvres and managed to slip out of the closing trap during the night of 16th-17th August. Determined to remain at large on the west bank of the Elbe, he marched his corps northward along the river and on 18th August established himself at one of Prince Henry’s former fortified camps from the previous year, on high ground next to the town of Strehla. Strehla wasn’t fortified and its beautiful castle was now more ornamental than defensive, but the old camp still had a strong line of entrenchments facing south. Hülsen also occupied the ancient hill-fort of the Dürren-Berg, which commanded his right flank. There was a further fortification, this one built by the Swedes a century earlier on a low hill known as the Otten-Berg, but this was positioned too far out to be worth occupying.
On 19th August, Hülsen received news of the King’s victory four days previously, over Loudon at Liegnitz. Hülsen was so overjoyed that he immediately started planning a surprise attack on the Reichsarmee. However, reports soon arrived from Oberst von Kleist’s cavalry, informing him that the Reichsarmee were manoeuvring to attack.

Frederick at Liegnitz, 15th August 1760
The Reichsarmee were advancing in accordance with the latest Austrian doctrine (used for the first time with great effect at Hochkirch in 1758) of dispersed columns, converging to attack at a single point. The main body of the Reichsarmee, under the personal command of Zweibrücken and Hadik, would mount a frontal demonstration, fixing Hülsen in place at Strehla. The Prince of Stolberg’s Reserve Corps and Guasco’s Grenadier Corps would then mount an assault on the Dürren-Berg, while Kleefeld’s Auxiliary Corps would conduct a long march around the Prussian flank, using the cover provided by the topography and woodland, to mount a surprise attack on the Dürren-Berg from the rear. With that position taken, they would then proceed to attack the flank and rear of the main Prussian position while the main body advanced to complete the task.


Braun
However, in war ‘the enemy always gets a vote’ and having detected the Reichsarmee’s moves, Hülsen ordered his infantry commander, Generalmajor Heinrich Gottlieb von Braun, to reinforce the Dürren-Berg position and to take personal command of its defence. The gap between the Dürren-Berg and the main position would be filled by the cavalry.
The Austro-Imperial plan began to unravel almost immediately as the firebrand Italian Feldmarschallieutenant Guasco, attacking the Dürren-Berg directly from the south, became uncharacteristically cautious and was content to engage in an indecisive artillery duel from the Otten-Berg. The Prince of Stolberg’s Reserve Corps was similarly cautious, doing little except moving a few guns up onto the Liebschützer-Berg, where they too became fixated on an indecisive artillery-duel. The exception to this was the Hungarian ‘Nikolaus Esterházy’ Regiment (IR 33), who took it upon themselves to join Kleefeld’s attack on the Dürren-Berg.


Kleefeld
Kleefeld’s corps meanwhile, consisting of the excellent Imperial auxiliary ‘Blau-Würzburg’ Regiment, two battalions of Grenzer and a weak grenadier battalion, had successfully marched around to the rear of the Dürren-Berg via the village of Laas and was now attacking uphill through the woods on the north slope, as per the plan. However, as they emerged from the trees, they ran straight into a storm of musketry and canister fire from Braun’s troops, arrayed along the crest and clearly waiting for them! On Kleefeld’s right flank, the Hungarians had arrived to assist, but were also engaged in a fierce, short-range firefight and were seemingly unable to make headway.
With the attack stalling, disaster now struck in the form of five squadrons of the Prussian ‘Schorlemmer’ Dragoons! They had been sent around the southern side of the Dürren-Berg and despite being exposed to Austrian artillery fire for much of the way, rode up the southern slope and over the crest, completely surprising the Hungarians and crushing their right flank! The Hungarian regiment completely disintegrated and continued slaughter was only prevented by the personal intervention of one Captain Seeger of the general staff, who led the Swabian ‘Hohenzollern’ Cuirassiers to the rescue.

‘Green’ Kleist
Although those five squadrons of Prussian dragoons had been driven off, the rest of the ‘Schorlemmer’ Dragoons, along with ‘Green’ Kleist’s ten squadrons of hussars from his own regiment (HR 1) and four squadrons of dragoons from his freikorps (FD II), had ridden around the north side of the woods, where they encountered the cavalry of Stolberg’s Austro-Imperial Reserve Corps.
The Austro-Imperial horse had been sent beyond Laas to be in a position to cut the Prussian line of retreat. However, they suddenly found themselves sorely outnumbered by the Prussian horse and the ‘Baranyay’ Hussars (H 30) and Pfalz ‘Kurfürstin’ Dragoons were immediately driven off. The Austrian ‘Pfalz-Zweibrücken’ Chevauxlégers (Ch 39), being made of somewhat sterner stuff, attempted to make a fight of it, but were completely overwhelmed, suffering the capture of three standards and their Colonel, Prince Friedrich August von Nassau-Usingen.

Nassau-Usingen
With Kleefeld and the cavalry defeated and with Stolberg and Guasco seemingly unable or unwilling to make progress, the rest of the Reichsarmee remained in its positions while their commanders considered their next move.
In the event, Hülsen made the decision for them; the Austro-Imperial surprise attack had failed, but the day was still young and they still had massive reserves of uncommitted troops. the Prussian defenders of the Dürren-Berg were fatigued and had suffered over 1,000 casualties for the Austro-Imperials’ loss of 1,800 and at that rate, the Prussians simply could not win a battle of attrition. Hülsen therefore made the decision to make good their losses and to slip away northward, toward Torgau during the afternoon, before the Reichsarmee got its act together.
So historically, the Combat of Strehla turned out to be something of a damp squib, hence it generally being referred to as a ‘Combat’, rather than a ‘Battle’. Both sides latterly tried to claim victory and biographies of the Prince of Pfalz-Zweibrücken still refer to this as being his victory, though the Reichsarmee had completely failed in its stated aim of either destroying Hülsen’s corps or trapping it against the Elbe. Over the next few weeks and despite some setbacks, Hülsen would manage to grind the Reichsarmee down to the point of collapse in late October. This event would coincide with the return of the main armies to Saxony and would lead to the colossal Battle of Torgau on 2nd November, but that’s for another article…
 The Scenario
As mentioned above, the historical action turned out to be something of a damp squib, but if your dice-rolling is like mine, there’s still plenty of potential for it to be a great wargame/bloodbath! And you get to field the bulk of the Reichsarmee, so what’s not to like?! 🙂
Of course, not everyone has a stack of Reichsarmee figures just waiting to go, so just feel free to use Austrians, French, Russians, or whatever you have in your collection.
There is of course, nothing stopping you from doing a ‘balls out’ battle until one side or the other breaks. However, if you want to limit yourself to something a bit more ‘historical’, I suggest the following:
1. Limit the game to 12 turns (a totally arbitrary number I just pulled out of my arse. Feel free to change it).
2. The Prussian player may issue any orders to his commands at the start of the game.
3. The Austrian player may not issue Attack orders to any divisions of the Main Body at the start of the game. For all other divisions, once orders have been written and before the start of the game, roll on the Aides de Camp Table (Page 4 of the Tricorn QRS) to see if those divisions implement their orders, applying a +1 modifier to Kleefeld’s roll. Remember that new orders may not be written and transmitted until the Orders Phase at the end of Turn 2.
4. In order to claim a tactical victory, the Austro-Imperial player must break two Prussian commands, including Braun’s command, by the end of Turn 12.
5. The Prussians may claim a tactical victory if they prevent the Austro-Imperial player from claiming victory.
 Terrain Notes
The table-size for 15mm figures is 6′ x 8′, as indicated by the grid. This assumes that you use the same base-sizes as me! 🙂 I use 60mm frontage for a battalion (80mm for a large battalion), so 4-5 battalions’ frontage per foot.
It’s worth noting that all maps of the battle disagree with each other, some markedly so! I’ve gone mainly with Christopher Duffy’s map in his book ‘By Force of Arms’, as he seems to be the only one who has actually looked at a modern map with topographical contour lines. However, I’ve added the small stream that is shown at the foot of the Prussian earthworks in all older maps of the battle. While those maps are often wildly inaccurate in other respects, the contours do show a re-entrant in that location and Google Earth shows a ditch and culverts in that location, suggesting a stream that has been ‘canalised’.
Most terrain features function as per the terrain chart on Page 2 of the Tricorn QRS, but here are a few clarifications:
The hills are for the most part, gently rolling and do not provide a defender with a +1 melee modifier. The exception is the ring-contour of the Dürren-Berg, which thanks to its ancient earthworks, is steeply banked. It counts as a Linear Obstacle to cross and provides the defender with a +1 melee modifier, but no cover modifier. The ring contour is big enough for roughly eight battalions to form a circle within it.
The Built-Up Sectors (BUS) marked on the map with thick edges are prepared for defence: namely the two southernmost sectors of Strehla and the villages of Klein-Rügeln and Clanzschwitz. These BUS provide a defender with a +2 melee modifier. All other BUS have a +1 melee modifier.
The Prussian earthworks are well-built and provide the defender with a +2 melee modifier. Class as a linear obstacle to pass through (in reality there are covered gaps for units to pass through). The old Swedish earthworks on the Otten-Berg can be ignored.
In terms of combat, infantry defending the earthworks may extend their firing-arc out to 45 degrees on either side, but suffer a -1 modifier if they do so (the earthworks are well-built and designed to enable enfilade fire, so defending units can mutually support each other). Units defending the earthworks may claim flank and rear support, but attackers may only claim rear support.
It’s probably also worth reminding that units defending BUS may fire at opportunity targets in any direction as Skirmisher fire. They may also conduct volley fire simultaneously at ALL units attacking the BUS, but do so with a -1 modifier. They may not claim any support modifiers in melee, but the attackers may claim rear (not flank) support.
The Elbe is impassable to all troop-types.
The streams are very minor and class as linear obstacles, as per the QRS.
Note that no two maps of the battle agree on the layout of the road network around Strehla in 1760! One modern map even shows a bridge over the Elbe, which there most definitely wasn’t and still isn’t! 🙂 There was a small ferry and the loop of the river could be forded at times of drought, but there was no bridge. As 18th Century roads were largely irrelevant in terms of tactical combat I’ve left them off, but feel free to add them! 🙂
 Deployment
The deployment shown on the map above is only a rough approximation of where units and formations were historically positioned. The labelled units are the ones where we’re reasonably confident of their location. White indicate Austrian units, yellow indicates Imperial troops and blue indicates Prussians.
Note that at least one of the modern maps I referred to while researching this article shows Kleefeld on the Otten-Berg and Guasco attacking past Laas. This is completely at odds with all accounts of the battle, which describe Guasco deploying his artillery on the Otten-Berg and Sand-Berg and getting bogged down in an artillery duel, while Kleefeld attacks the Dürren-Berg from the rear. I’ll stick with Duffy’s version (and others), but feel free to swap Kleefeld and Guasco if you prefer.
The scenario map above should therefore only be used as a rough guide to deployment and players may therefore adjust each formation within its rough deployment area, as shown on the map below (blue boxes being Prussian formation deployment areas and black boxes being Austro-Imperial formation deployment areas).
No units may be deployed on the east bank of the Elbe, even though one of the Prussian boxes slightly overlaps the east bank!

 Prussian Corps of Generallieutenant Johann Dietrich von Hülsen
(Good – 2 Messengers)
Centre-Right (Entrenchments) (Good)
I. Bn, Infanterie-Regiment ‘Markgraf Carl’ (IR 19) (elite) [5/2]
II. Bn, Infanterie-Regiment ‘Markgraf Carl’ (IR 19) (elite) [5/2]
Grenadier-Bataillon ‘Burgsdorff’ (38/43) [5/2]
Battalion Guns [2/0]
Heavy Battery [3/0]
Heavy Battery [3/0]
Centre-Left (Entrenchments) (Good)
I. Bn, Füsilier-Regiment ‘Salmuth’ (IR 48) [4/1]
II. Bn, Füsilier-Regiment ‘Salmuth’ (IR 48) [4/1]
I. Bn, Füsilier-Regiment ‘Grant’ (IR 44) [4/1]
II. Bn, Füsilier-Regiment ‘Grant’ (IR 44) [4/1]
I. Bn, Infanterie-Regiment ‘Alt-Schenckendorff’ (IR 22) (elite) [5/2]
II. Bn, Infanterie-Regiment ‘Alt-Schenckendorff’ (IR 22) (elite) [5/2]
Battalion Guns [2/0]
Heavy Battery [3/0]
Heavy Battery [3/0]
Heavy Battery [3/0]
Right Wing (Dürren-Berg) – Generalmajor von Braun (Good)
Grenadier-Bataillon ‘Lubath’ (7/30) [5/2]
Grenadier-Bataillon ‘Beyer’ (11/14) [5/2]
IV. Stehende-Grenadier-Bataillon ‘Lossow’ (g1/g11) [5/2]
I. Bn, (ex-Saxon) Füsilier-Regiment ‘Hauss’ (IR 55) (poor) [3/0]
I. Bn, Infanterie-Regiment ‘Braunschweig-Bevern’ (IR 7) (elite) [5/2]
II. Bn, Infanterie-Regiment ‘Braunschweig-Bevern’ (IR 7) (elite) [5/2]
Battalion Guns [2/0]
Battalion Guns [2/0]
Heavy Battery [3/0]
Left Wing (Strehla & Klein-Rügeln) (Average)
Grenadier-Bataillon ‘Manstein’ (2/g2) [5/2]
Detachment, (ex-Saxon) Füsilier-Regiment ‘Hauss’ (IR 55) [Skirmishers]
II. Bn, Frei-Infanterie-Regiment ‘Wunsch’ (F 7) [4/1]
Jäger Detachment, Frei-Infanterie-Regiment ‘Wunsch’ (FJ 7) [Skirmishers]
Feldjäger Corps zu Fuss [2x Skirmishers]
3 Sqns, Frei-Husaren-Corps ‘Kleist’ (FH II) [4/1]
Battalion Guns [2/0]
Cavalry – Oberst von Kleist (Excellent)
I. Bn (5 sqns), (‘Porzellan’) Dragoner-Regiment ‘Schorlemmer’ (DR 6) [5/2 – Large Unit]
II. Bn (5 Sqns), (‘Porzellan’) Dragoner-Regiment ‘Schorlemmer’ (DR 6) [5/2 – Large Unit]
I. Bn (5 Sqns), (‘Grünne’) Husaren-Regiment ‘Kleist’ (HR 1) (elite) [5/2]
II. Bn (5 Sqns), (‘Grünne’) Husaren-Regiment ‘Kleist’ (HR 1) (elite) [5/2]
4 Sqns, Frei-Dragoner-Regiment ‘Kleist’ (FD II) [5/2]
Prussian Breakpoints
Division FMR ⅓ ½ ¾
Centre-Right Infantry 23 8 12 18
Centre-Left Infantry 40 14 20 30
Left Wing 21 7 11 16
Right Wing (Braun) 35 12 18 27
Cavalry (Kleist) 25 9 13 19
Army FMR ¼ ⅓ ½
Prussian Army 144 36 48 72
Prussian Notes
1. II. Bn, Frei-Regiment ‘Wunsch’ may alternatively be deployed as 2x Skirmishers. Note that it was an excellent unit of its type, so has MR 4/1, rather than the more usual MR 3/0 for Frei-Infanterie.
2. Count two broken skirmisher stands from the same unit (or two independent skirmisher stands in the same formation) as 3 morale points (4 morale points for II./’Wunsch’).
3. It’s impossible to fully represent the complex of angles and enfilades in well-engineered entrenchments of the period. They were designed to provide mutual support and to enfilade any avenue of approach, thereby catching any attacker in a crossfire. Therefore, infantry units deployed in the entrenchments may offset their flank-lines (i.e. increase their arc of fire to 45 degrees on either side).
4. It is often difficult or even impossible to physically place infantry models in fortifications where artillery models are already present. Therefore, any infantry unit in base-to-base contact to the rear of a battery in the entrenchments will class as defending the parapet of the entrenchments against attackers. They may therefore fire volleys and conduct melee as normal, even when the artillery has already fired from the same position (in much the same way as infantry support batteries in the normal Tricorn rules).
5. I’ve arbitrarily split the main part of Hülsen’s corps into two wings for game-play purposes. I’ve no information on the historical brigade or divisional structure. The Right Wing is weaker, as that sector had already detached battalions to reinforce the Dürren-Berg position.
6. I can’t find any information on a single cavalry commander for the Prussians, so I’ve arbitrarily placed Oberst von Kleist (‘Green Kleist’) as overall cavalry commander, as he commanded the bulk of the cavalry, namely his own hussar regiment (HR 1) and the dragoons and hussars of his own Freikorps. Alternatively, feel free to split off the two battalions of the ‘Schorlemmer’ Dragoons (DR 6) as a separate formation, under the command of their CO, Major Marschall von Bieberstein (Good).

Austro-Imperial Reichsarmee of Reichsmarschall Frederick Michael Count Palatine von Zweibrücken-Birkenfeld
(Poor – 2 Messengers)
Main Corps – Under direct command of Zweibrücken-Birkenfeld
Main Corps Infantry Left Wing (Poor)
I. Bn, Infanterie-Regiment ‘Mainz-Lamberg’ [4/1 – Large Unit]
II. Bn, Infanterie-Regiment ‘Mainz-Lamberg’ [4/1 – Large Unit]
I. Bn, Infanterie-Regiment ‘Rot-Würzburg’ [4/1 – Large Unit]
II. Bn, Infanterie-Regiment ‘Rot-Würzburg’ [4/1 – Large Unit]
I. Bn, Swabian Kreis-Infanterie-Regiment ‘Baden-Baden’ (poor) [3/0]
II. Bn, Swabian Kreis-Infanterie-Regiment ‘Baden-Baden’ (poor) [3/0]
I. Bn, Swabian Kreis-Infanterie-Regiment ‘Rodt’ (former ‘Fürstenberg’ IR) (poor) [3/0]
II. Bn, Swabian Kreis-Infanterie-Regiment ‘Rodt’ (former ‘Fürstenberg’ IR) (poor) [3/0]
I. Bn, Swabian Kreis-Füsilier-Regiment ‘Alt-Württemberg’ [4/1]
I. Bn, Kreis-Infanterie-Regiment ‘Kurbayern’ (Bavarian I. Bn, ‘Pechmann’ IR) (poor) [3/0]
II. Bn, Kreis-Infanterie-Regiment ‘Kurbayern’ (Bavarian II. Bn, ‘Pechmann’ IR) (poor) [3/0]
III. Bn, Kreis-Infanterie-Regiment ‘Kurbayern’ (Bavarian I. Bn, ‘Holnstein’ IR) (poor) [3/0]
Mainz & Würzburg Battalion Guns (Austrian) [2/0]
Swabian Battalion Guns [2/0]
Kurbayern Battalion Guns [2/0]
Main Corps Infantry Right Wing (Poor)
I. Bn, Kurrhein (Kurpfalz) Kreis-Infanterie-Regiment ‘Effern’ (poor) [3/0]
II. Bn, Kurrhein (Kurpfalz) Kreis-Infanterie-Regiment ‘Effern’ (poor) [3/0]
Kurrhein (Kurköln) Leib-Kreis-Infanterie-Regiment ‘Nothaft’ (poor) [3/0]
Kurrhein (Kurköln) Kreis-Infanterie-Regiment ‘Wildenstein’ (poor) [3/0]
I. Bn, Kurrhein Kreis-Infanterie-Regiment ‘Kurmainz’ (poor) [3/0]
II. Bn, Kurrhein Kreis-Infanterie-Regiment ‘Kurmainz’ (poor) [3/0]
III. Bn, Kurrhein Kreis-Infanterie-Regiment ‘Kurmainz’ (poor) [3/0]
IV. Bn, Kurrhein Kreis-Infanterie-Regiment ‘Kurmainz’ (poor) [3/0]
II. Bn, Kurpfalz Garde-Regiment zu Fuß [4/1]
Oberrhein Kreis-Infanterie-Regiment ‘Hessen-Darmstädt (Prinz Georg)’ [4/1]
Kurpfalz Battalion Guns [2/0]
Oberrhein Battalion Guns [2/0]
Main Corps Cavalry – Obrist von Zedtwitz (Good)
3 Sqns, Franconian Kreis-Cuirassier-Regiment ’Bayreuth’ (unreliable cuirassiers) [4/1]
3 Sqns, Kurrhein Kreis-Cuirassier-Regiment ’Kurpfalz’ (unreliable heavy horse) [4/1]
5 sqns, Austrian Cuirassier-Regiment ‘Bretlach’ (C 29) [6/2 – Large Unit]
5 Sqns, Austrian Cuirassier-Regiment ‘De Ville’ (C i) [6/2 – Large Unit]
Imperial Artillery Reserve
Reichsreserveartillerie Heavy Battery [3/0]
Reichsreserveartillerie Light Battery [3/0]
Reichsreserveartillerie Light Battery [3/0]
Prince Stolberg’s Reserve Corps
Reserve Corps Infantry – Feldmarschallieutenant von Würzburg (Poor)
I. Bn, Austrian Infanterie-Regiment ‘Macquire’ (IR 46) [4/1 – Large Unit]
I. Bn, Austrian Infanterie-Regiment ‘Luzan’ (IR 48) [4/1 – Large Unit]
Austrian Grenadier-Bataillon (33/46/48 IRs) [5/2]
I. Bn, Oberrhein Kreis-Infanterie-Regiment ‘Pfalz-Zweibrücken’ (poor) [3/0]
II. Bn, Oberrhein Kreis-Infanterie-Regiment ‘Pfalz-Zweibrücken’ (poor) [3/0]
I. Bn, Kurrhein Kreis-Infanterie-Regiment ‘Kurtrier’ (poor) [3/0]
Austrian Battalion Guns [2/0]
Kurtrier Battalion Guns [2/0]
Reserve Corps Cavalry – Obrist Prinz von Nassau-Usingen (Average)
5 Sqns, Austrian Chevauxléger-Regiment ‘Zweibrücken-Birkenfeld’ (Ch 39) [5/2 – Large Unit]
5 Sqns, Kurpfalz Leibdragoner-Regiment ‘Kurfürstin’ (poor dragoons) [4/1 – Large Unit]
5 Sqns, Austrian Husaren-Regiment ‘Baranyay’ (H 30) [4/1]
Austrian Auxiliary Corps – Generalfeldwachtmeister von Kleefeld (Good)
I. Bn, Infanterie-Regiment ‘Blau-Würzburg’ [4/1 – Large Unit]
II. Bn, Infanterie-Regiment ‘Blau-Würzburg’ [4/1 – Large Unit]
I. Bn, Hungarian Infanterie-Regiment ‘Nikolaus Esterházy’ (IR 33) [4/1 – Large Unit]
II. Bn, Hungarian Infanterie-Regiment ‘Nikolaus Esterházy’ (IR 33) [4/1 – Large Unit]
1 Bn, Grenz-Infanterie-Regiment ‘Banalisten Nr. 1’ [3/0]
1 Bn, Grenz-Infanterie-Regiment ‘Karlstädter-Szluiner’ [3/0]
Grenadier-Battaillon (Blau-Würzburg & Grenzer) (poor) [4/1]
Austrian Battalion Guns [2/0]
Grenadier & Carabinier Corps – Feldmarschallieutenant Guasco (Average)
I. Bn/ Austrian Infanterie-Regiment ‘Sachsen-Gotha’ (IR 30) [4/1 – Large Unit]
I. Bn/ Austrian Infanterie-Regiment ‘Pallavicini’ (IR 15) [4/1 – Large Unit]
II. Bn/ Austrian Infanterie-Regiment ‘Pallavicini’ (IR 15) [4/1 – Large Unit]
I. Kreis-Grenadier-Battaillon (Poor – Kurmainz, Effern & Baden-Baden IRs) [4/1]
II. Kreis-Grenadier-Battaillon (Poor – Rodt, Kurköln & Kurbayern IRs) [4/1]
III. Kreis-Grenadier-Battaillon (Hessen-Darmstädt, Pfalz Garde & Alt-Württemberg IRs) [5/2]
Austrian Grenadier-Battaillon (Mainz-Lamberg & Austrian IRs) [5/2]
4 Sqns, Swabian Kreis-Cuirassier-Regiment ‘Hohenzollern’ & 3 Austrian Elite Coys (poor cuirassiers) [5/2]
Austrian Battalion Guns [2/0]
Reichsarmee Breakpoints
Division FMR ⅓ ½ ¾
Main Corps Infantry (Left) 47 16 24 36
Main Corps Infantry (Right) 36 12 18 27
Imperial Artillery Reserve 9 – – –
Main Corps Cavalry (Zedtwitz) 20 7 10 15
Reserve Infantry (Würzburg) 26 9 13 20
Reserve Cavalry (Nassau-Usingen) 13 5 7 10
Auxiliary Corps (Kleefeld) 28 10 14 21
Grenadier Corps (Guasco) 37 13 19 28
Army FMR ¼ ⅓ ½
Reichsarmee 216 54 72 108
Reichsarmee Notes
1. Grenzer battalions may alternatively be deployed as 2x Skirmisher stands. Count two broken skirmisher stands from the same unit as 3 morale points.
2. Kleefeld’s grenadier battalion has been downgraded to MR 4/1 as it was weak and was 50% Grenzer.
3. I’ve arbitrarily numbered Guasco’s grenadier battalions for game purposes. These were temporary units and would be known by the name of the officer designated to command them on the day, but they aren’t known. There were actually six four-company grenadier battalions under Guasco’s command, but I’ve reduced this to four six-company battalions for game purposes, as the four-company battalions were less than two-thirds the strength of a regular infantry battalion.
4. The Austrian ‘Zweibrücken-Birkenfeld’ Chevauxléger Regiment (Ch 39) is a retitled Dragoon regiment (D 39) and is classed as Dragoons (MR 5/2) for movement, combat and morale purposes.
5. One Light Battery of the Imperial Artillery Reserve is grouped with Guasco’s Corps. The remaining batteries are grouped with either wing of the Main Corps, at the player’s choice. The reserve batteries do not count against formation strength, but do count against overall army strength.
6. The Hungarian ‘Nikolaus Esterházy’ Regiment (IR 33) was actually part of Würzburg’s division of the Reserve Corps, but joined Kleefeld’s attack on its colonel’s own initiative. I’ve therefore placed this regiment under Kleefeld’s command for scenario purposes.
7. The ‘Baranyay’ Hussar Regiment (H 30) was listed as being part of Kleefeld’s corps. However, at Strehla it was operating alongside Colonel Prince Frederick August of Nassau-Usingen’s Chevauxlégers, covering the flank of Kleefeld’s attack. I’ve therefore transferred them from Kleefeld to Nassau-Usingen.
8. I’ve arbitrarily split the infantry of Zweibrücken’s Main Corps into two wings for the sake of gameplay. I’ve no information on the actual brigade or divisional structure or who the sub-commanders were. Feel free to break it down into smaller formations if you prefer.


 Good news! It’s time for more Reichsarmee units! 🙂
 Above: The ‘Pfalz-Zweibrücken’ Regiment was actually titled ‘Ysenburg’ until 1757 and does sometimes appear listed as such after that date. It was also occasionally listed by the full title of its inhaber, ‘Prinz Friedrich Pfalzgraf (‘Count Palatine’) von Zweibrücken-Birkenfeld’. The regiment theoretically consisted of 18 companies (raised from 33 county contingents), organised into three battalions and a 3pdr artillery detachment (no grenadiers), for a total strength of 1,473 men. In August 1757 the regiment reported 1,346 men fit for service, but by November that had fallen to 808, despite fighting no battles (the regiment had been absent from Rossbach)!

 Above: My ‘Pfalz-Zweibrücken’ Regiment is comprised of Old Glory 15s Prussian infantry figures, with flags by Maverick Models (resized to 20mm square). Not By Appointment have also recently added a downloadable flag-sheet for the regiment.
 Above: The Circle of the Upper Rhine’s district artillery corps provided units to the Reichsreserveartillerie or Imperial Artillery Reserve (which I covered in Part 2) and may also have supplied regimental artillery to the district’s infantry regiments, though information is scarce.
 Above: The uniform of the Upper Rhine District Artillery consisted primarily of an iron grey coat with brass buttons and green collar, cuffs and tail-turnbacks. The waistcoat was green, breeches were straw and hat-lace was yellow. I’ve been unable to discover what colour they painted their gun-carriages, so I’ve arbitrarily painted them grey to match the uniform coats.
 Above: I didn’t originally plan to paint the ‘Württemberg’ Dragoons, as they were such a tiny and ineffective unit. At full strength they only had 138 men (not including officers) and performed abysmally at Rossbach, even suffering a nasty case of ‘friendly-stab’ from some Austrian hussars, losing their standards in the process! However, from 1759 they were usually brigaded with the Upper Saxon ‘Sachsen-Gotha’ Dragoons (see below), bringing their combined total strength to 360 men (plus officers), so I’m willing to give them the benefit of the doubt and field them as a (bloody awful) combined unit.


 Above: Here are the ‘Württemberg’ Dragoons as they’ll appear on the wargames table; grouped with the white-coated ‘Sachsen-Gotha’ Dragoons (detailed below). The standards of the ‘Württemberg’ Dragoons are very well-documented, being very similar to those of the ‘Hohenzollern’ Cuirassiers, though with the central armorial device rotated through 90 degrees (the white cross on black field is shown above the three leopards, whereas on the Cuirassier standards they are side-by-side). The regiment’s Leibstandarte had a white field, though I’ve opted for the yellow Eskadronstandarte. This is another design by Ad Hoc Editions, printed on my own laser-printer..
 Above: The Circle of Swabia raised a district artillery corps to provide Swabian infantry regiments with regimental artillery, as well as to reinforce the Reichsreserevartillerie. The Army of the Duchy of Württemberg is also known to have supplied units in order to beef up the district’s artillery strength.
 Above: The uniform for the Swabian District Artillery Corps was a dark blue coat with red lapels, cuffs and turnbacks, white metal buttons and blue shoulder-strap. Smallclothes were red and hat-lace was white. For once we actually know the colour of the gun-carriages and these were yellow with black ironwork, reflecting the colours of Swabia’s heraldry.
 Above: I originally covered the II. Battalion of the Pfalz Garde zu Fuss Regiment just over a year ago, in Part 4 and I won’t repeat myself here. However, I’ve since re-flagged the battalion with one of Frédéric Aubert’s lovely creations, as shown here. 🙂
 Above: As discussed above, the ‘Sachsen-Gotha’ Dragoon Regiment was a tiny unit of only two squadrons, numbering some 222 men at full strength (not including officers). It wouldn’t normally be worth bothering with, but from 1759 it tended to be grouped with the even smaller ‘Württemberg’ Dragoon Regiment (see above), so I thought I’d model the two regiments as a weak combined unit.
 Above: Uniform details for the ‘Sachsen-Gotha’ Dragoons are fairly sparse, but it is known that the regiment wore a white coat with red facings, brass buttons, yellow aiguillettes and yellow hat-lace. Sources are split over whether or not the coat had (red) lapels. I’ve gone with Frédéric’s interpretation, showing no lapels, but red cuffs, collar and shoulder-strap, red waistcoat and pale straw breeches. I’ve also followed Frédéric’s depiction of red horse-furniture with white lace edging, but I do wonder if yellow lace edging would be more in keeping with the button and hat-lace colour?
 Above: Musicians’ uniforms are unknown for the ‘Sachsen-Gotha’ Dragoons, but I’ve gone with the style of the Army of the Duchy of Saxony; namely a reverse-coloured coat with button-coloured lace. Once again, the figures are Old Glory 15s Austrian dragoons. Nothing whatsoever is known about the regiment’s standards, so I’ve used Frédéric’s hypothetical regimental standard.
 Above: Again, here are the ‘Sachsen-Gotha’ Dragoons grouped with the ‘Württemberg’ Dragoons, as they’ll appear on the wargames table.
 Above: As discussed above, the Pfalz Leib-Dragoner-Regiment ‘Kurfürstin’ was part of the standing army of Pfalz (The Palatinate), but was hired by Austria to beef up the strength of the Imperial Circle of Upper Saxony. It is sometimes incorrectly referred to in orders of battle and accounts as the ‘Kurpfalz’ Dragoon Regiment, as a ‘Kreis-Regiment’ or as a regiment of the Circle of the Kurrhein. It was none of those things.
 Above: At the start of the Seven Years War the ‘Kurfürstin’ Dragoons consisted of three squadrons, each of three companies, for a total of 468 men. In 1758, following the Austrian contract, the regiment was expanded to conform to Austrian organisation and now consisted of five squadrons, each of two companies, for a total of 800 men. As such, it was the Reichsarmee’s strongest cavalry regiment and is represented here as a ‘large’ unit of 16 figures. However, the regiment had an inauspicious start, suffering the loss of 522 men taken prisoner in their first engagement! Nevertheless, the regiment was quickly reconstituted to full strength and served at all of the Reichsarmee’s major engagements.

 Above: The guidon of the ‘Kurfürstin’ Dragoons once again comes from one of the superb plates by Frédéric Aubert’s Ad Hoc Editions. I’ve used the white Leibguidon, though I was very tempted to use the red Eskadronguidon.
 In the unlikely event that there is still someone reading this who isn’t now sick to the back teeth of all things Reichsarmee, here are some more painted units! 😀 Rest assured that they’re all finished now and it’ll soon be over (I finished painting the last Reichsarmee unit last night)…
 Above: However, before I look at the newly-painted units, here are some cavalry units I painted last year. As discussed in


 Above: The only sources for the uniforms of the ‘Kurmainz’ Regiment are a plate from the
 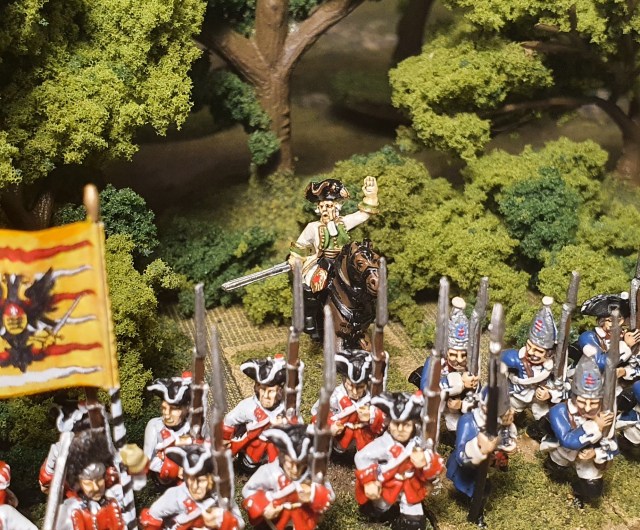 Above: To add just a little confusion, the ‘Kurmainz’ Regiment is also sometimes referred to as the ‘Wildenstein’ Regiment, due to initially having Johann Georg Baron von und zu Wildenstein as its Colonel and can also be confused with the pre-war Mainz ‘Wildenstein’ Regiment or even the Kurköln ‘Wildenstein’ Regiment, which had a different member of the Wildenstein clan as its Colonel! Wildenstein didn’t stay with the regiment for very long, as he was promoted in 1757 to Generallieutenant and placed in command of the entire Kurrhein contingent. As shown in
  Above: Pfalz or ‘The Palatinate’ possessed by far the most powerful standing army of the Kurrhein, consisting of nine infantry regiments (each of two battalions), a cuirassier regiment, a dragoon regiment and a permanent squadron of cavalry for Imperial service, plus the usual artillery corps and company of horse guards. However, Pfalz was only required to provide a single infantry regiment of two battalions, a regiment of cavalry and a small artillery contingent to the Reichsarmee. The Elector-Palatine had some other deals on the side; he had a contract to provide France with an Auxiliary Corps of ten battalions, Austria paid for the use of a single battalion of the Pfalz Garde zu Fuss and also later hired a regiment of dragoons.
 Above: As part of its contribution to the Reichsarmee, Pfalz assigned one of its regular infantry regiments, namely the

 Above: As mentioned above, the Pfalz ‘Effern’ Regiment had a detachment of battalion guns assigned from the Pfalz Artillery Corps. Curiously though, each battalion only had a single gun assigned at the start of the war (more may have been assigned later), while the battalions of the Pfalz Auxiliary Corps assigned to the French had double that number. It’s possible that Pfalz gunners were also assigned to the Reichsreserveartillerie.
 Above: The uniform worn by Pfalz artillerymen was generally dark blue in colour, including the tail-turnbacks and smallclothes. Cuffs and shoulder-straps were red and buttons were brass. Pengel & Hurt and Frédéric Aubert suggest red lapels, but I’ve gone for the plainer look. Hat-lace was yellow; Kronoskaf shows this as straight lace tape, but Frédéric shows this as scalloped and I’m inclined to agree, as the Pfalz infantry regiments had scalloped hat-lace as standard. I was able to discover absolutely nothing about the colour of Pfalz gun-carriages, so went with their main heraldic colour of light blue.

 Above: Each Kurköln infantry regiment consisted of a single battalion of six Fusilier companies, a single (detached) Grenadier company and a battalion gun detachment of two 4pdr guns, for a theoretical total of 820 men. However, the recorded strength of Leib-Regiment ‘Nothaft’ throughout the war ranged from 373 to 711 men, while the ‘Wildenstein’ Regiment varied between 585 and 714 men. They were reported as being constantly under-strength, badly-equipped and in a poor state of morale. I’ve therefore done them as ‘normal’ sized (12-figure) units for

 Above: I needed some more gunners for my Kurrhein contingent, due to several contingents (most noticeably Mainz) having no known uniform. However, Frédéric came to the rescue again, with the uniform of the ‘
 Above: According to Frédéric, the Kurtrier Artillery wore a dark blue coat with red cuffs, no lapels and dark blue shoulder-straps, dark blue tail-turnbacks and brass buttons. Smallclothes were red. Hat-lace was white, cockade was black and pompoms were red. However, I’ve just realised that the hat-lace should be scalloped and I’ve done it straight! Aargh! Back to the painting-table…
 As mentioned in recent posts, I’ve been steadily working toward completing the Reichsarmee and last week I finally had enough finished to field all the Reichsarmee units present at the
 Above: The battlefield as seen from the south (the same orientation as the map above). Although it’s not that obvious in the photos, the first contour of the larger hills is actually formed by a layer of polystyrene placed under the terrain-cloth. The second contours of the Dürren-Berg and Otten-Berg were then placed on top of the cloth. I decided to leave off the very small ring-contours of the Liebschützer-Berg, Sittel-Berg and Latten-Berg.
 Above: The view from the western edge of the battlefield, with the Austro-Imperial flanking columns in the foreground, aiming to assault the Prussian outpost on the Dürren-Berg.
 Above: The view from the eastern edge of the battlefield. This flank of the battlefield was anchored on the wide River Elbe and the large riverside town of Strehla.
 Above: Zedtwitz’s Austro-Imperial cavalry division forms the right flank of Zweibrücken’s Main Corps, comprising two Austrian and two Imperial cuirassier regiments. However, while this deployment made good sense during the approach-march, they’re now stuck facing Strehla and the entrenchments, with the Elbe blocking any attempt at a flanking move. The very first order transmitted by Zweibrücken during the game would be to order Zedwitz to move his cavalry to the centre.
 Above: Zweibrücken’s Main Corps consists of seventeen Reichsarmee battalions and five Imperial auxiliary battalions. While they do look pretty, they are mostly bloody awful! Two batteries from the Reichsreserveartillerie have deployed in front of the army, but they are heavily out-gunned by Hülsen’s Prussians, who have 36 heavy guns (six batteries in game terms)!
 Above: On Zweibrücken’s left, Guasco’s Grenadier Corps has deployed onto the Otten-Berg feature and is meant to be launching an assault on Clanzschwitz and the Dürren-Berg beyond. However, he has deployed his guns and seems content to wait while the gunners do their work.
 Above: The crest of the Otten-Berg was fortified during the previous century by Gustavus Adolphus’ Swedish Army. However, the old earthworks were not occupied by the Prussians and will play no part in this battle.
 Above: Guasco’s Grenadier Corps includes a dazzling array of colours, including as it does, grenadier companies from 24 different regiments; most in bearskin caps, but some wearing Prussian-style mitre caps. Historically these were organised into six four-company ad hoc grenadier battalions, but as these were very weak, I’ve rationalised this into four battalions for game purposes; one Austrian and three Imperial. Guasco’s Corps also includes the Austrian Pallavicini (2 bns) and Sachsen-Gotha (1 bn) Infantry Regiments, the Imperial Hohenzollern Cuirassiers (with some attached Austrian elite Carabinier and Horse Grenadier companies) and a detachment from the Reichsreserveartillerie. However, it’s just occurred to me while looking at this photo that I completely forgot to deploy the battalion of the Sachsen-Gotha Regiment on the table! 🙂
 Above: On the western edge of the battlefield, the Prince of Würzburg’s Reserve Infantry Division is deploying onto the Liebschützer-Berg feature, above the hamlet of Liebschütz. Würzburg has the Austrian Luzan and Macquire Regiments (1 bn apiece), another Austrian grenadier battalion and the Imperial Kurtrier (1 bn) and Pfalz-Zweibrücken (2 bns) Regiments. However Würzburg, like Guasco, has opted to halt his infantry while his gunners (limited to just a few battalion guns) soften up the Prussians on the Dürren-Berg.
 Above: On Würzburg’s left, Kleefeld’s Auxiliary Corps is made of sterner stuff. Kleefeld had the Imperial Blau-Würzburg Regiment (2 bns), two Grenzer battalions and a weak grenadier battalion under his command. His mission is to circumvent the Dürren-Berg position via the Laas woods and attack the Prussians from the rear.
 Above: On the extreme left flank, the Prince of Nassau-Usingen, Colonel of the Austrian Pfalz-Zweibrücken Chevauxléger Regiment, has been tasked with cutting off the Prussian lines of retreat. For this task he has his own regiment, reinforced by the Austrian Baranyay Hussars and the Pfalz Kurfürstin Dragoon Regiment.
 Above: So to the Prussian side of the battlefield: At Strehla the southern end of the town is prepared for defence and occupied by the Wunsch Frei-Infanterie. The Manstein Grenadier Battalion meanwhile, has occupied the hamlet of Klein-Rügeln, supported by battalion guns. The Wunsch Frei-Infanterie Jäger Detachment, the Prussian Feldjäger-zu-Fuss and elements of the ex-Saxon Hauss Fusiliers are deployed as picquets along the stream-bank.
 Above: The bulk of Hülsen’s Prussians (9 battalions) are dug in behind a strong line of entrenchments on the high ground just to the west of Strehla. This position was built by Prince Henry’s of Prussia’s corps during the previous year’s campaign.
 Above: The main Prussian position is very strong in heavy artillery and will be a very tough nut for the Imperial troops to crack.
 Above: Another view of the Prussian entrenchments. I must say that I’m really pleased with how the refurbished entrenchment models look! 🙂
 Above: The Prussian regular cavalry forms up to the west of the earthworks. This consists of the Kleist (or ‘Green’) Hussars (HR 1) and the Schorlemmer (or ‘Porcellain’) Dragoons (DR 6). Both regiments had ten squadrons apiece, so were very large and are represented by two tactical battalions (only two Prussian dragoon regiments had ten squadrons; most had five squadrons). Dragoon squadrons were around one-third stronger than hussar squadrons, so the dragoon battalions are large 16-figure units. However, I don’t yet have one of the two large dragoon regiments painted, so I’ve used two different regiments to represent the Schorlemmer Dragoons.
 Above: To the rear of the regular cavalry regiments are two embryonic regiments of Kleist’s new Freikorps; the Dragoons in green coats and bearskin caps and the Hussars, in their nausea-inducing uniform of orange-red and vomit-green. These are the two most recently-raised units in the army and are the most recently-painted units on the table… They’re doomed…
 Above: Out on the far Prussian right flank, Generalmajor von Braun has reinforced his detachment atop the ancient hill-fort of the Dürren-Berg with several battalions and a detachment of 12pdr heavy artillery, in response to the detected Imperial flank-march.
 Above: In front of the Dürren-Berg, the hamlet of Clanzschwitz has been occupied by the Lossow Grenadier Battalion (IV. Standing Grenadier Battalion) and prepared for defence. On the high ground behind the village, the 12pdr battery, protected by the Lubath Grenadier Battalion (GB 7/30), is positioned to engage Guasco’s Imperial Grenadier Corps on the Otten-Berg.
 Above: The view from the top of the Dürren-Berg. From right to left, the position is occupied by the two battalions of the Braunschweig-Bevern Infantry Regiment (IR 7), the Beyer Grenadier Battalion (GB 11/14) and the I. Battalion of the ex-Saxon Hauss Fusilier Regiment (IR 55). After this photo was taken, Braun pulled the 12pdr detachment up to the top of the hill (facing west) and placed the Lubath Grenadiers at right-angles on the right of the line, essentially forming three sides of a square. Braun was later to regret not pulling the Lossow Grenadiers in from Clanzschwitz…
 Above: General von Hülsen and his staff wait for the enemy to make their next move. Observing nearby is the ever-present correspondent for the Times of London, Sir Aiden Catey, who has survived numerous cavalry charges, ‘accidental’ bounce-throughs and blatant assassination attempts over the years.
 Above: In front of Sir Aiden, a Prussian field-postman accuses a cavalry Flügeladjutant of ‘looking at him in a funny way’.
 Above: In the meantime, most of the Austro-Imperial commanders on the left wing had opened their packets of orders, turned to their aides and said “Ficken das für ein spiel auf soldaten!”
 Above: As Kleefeld’s Grenzer begin to make a nuisance of themselves on the north side of the Dürren-Berg position, the 12pdr battery (in the foreground) opens up on the Hungarian Nikolaus Esterházy Regiment (IR 33). The Austrian battalion gunners return fire, cutting down some of the Prussian gunners, but the Prussians slew their heavy guns around and load canister, quickly annihilating the impertinent Austrian guns.
 Above: On the other side of the Laas Wood, the Prince of Nassau-Usingen leads the Austro-Imperial cavalry forward against the Kleist Freikorps. He orders the Baranyay Hussars to fall back to the second line and the red-coated Imperial Kurfürstin Dragoons (another freshly-painted regiment!) to take their place on the left flank.
 Above: Kleist meanwhile, has turned his regular cavalry around and they are now riding to assist the Freikorps. However, the enemy cavalry will get there first!
 Above: Nassau-Usingen wastes no time in launching his charge! His own regiment, the blue-coated Zweibrücken Chevauxlégers (ChR 39) charge the green-coated Kleist Freikorps Dragoons with the Baranyay Hussars in support. The Kurfürstin Dragoons meanwhile, hit the Kleist Freikorps Hussars.
 Above: Despite having a slight advantage, the initial clash goes badly for the Austro-Imperial cavalry and both leading regiments are beaten off, though with only light casualties. Sensing victory, the Kleist Freikorps follow through, launching a charge on the Baranyay Hussars. However, the Hungarian horsemen prove to be made of stronger stuff and having been unfazed by their retreating comrades, succeed in beating off the impetuous Freikorps cavalry, who fall back over the stream. However, with large numbers of Prussian cavalry bearing down on them, the Baranyay Hussars wisely decide to fall back to rally near Laas, where their comrades will (hopefully) be rallying.
 Above: However, disaster strikes as both Austro-Imperial dragoon regiments fail to rally from their retreat and suddenly discover that they have urgent business to attend to in the rear! Despite the loss of over two thirds of his command, Nassau-Usingen manages to keep control of the Baranyay Hussars who despite the appalling odds, prepare to charge again. On the Prussian side the Kleist Freikorps Dragoons managed to rally, but the hussars (being the most recently-painted) headed for the hills.
 Above: At Liebschützen meanwhile, new orders arrive for the Prince of Würzburg. Zweibrücken is this time taking no chances and has sent both of his ADCs!
 Above: Honour (and the rules…) demands that Nassau-Usingen has no choice but to comply with his orders and therefore leads the Baranyay Hussars once more into the fight. They are met by the Prussian Kleist Hussars who, despite some sniping from Grenzer in the woods, manage to comprehensively defeat the gallant Hungarians.
 Above: This time Nassau-Usingen is unable to prevent a rout and his entire command quits the field.
 Above: Despite the success of Kleist’s cavalry, the situation for Braun’s infantry atop the Dürren-Berg is deteriorating. On the edge of the woods, the Lubath Grenadiers are getting the worst of a firefight with the 1st Battalion of the Imperial Blau-Würzburg Regiment and Kleefeld’s grenadier battalion (formed from the grenadier companies of Blau-Würzburg and the Grenzer). Braun sent the Hauss Fusiliers across to reinforce the firefight, but they immediately suffered heavy casualties from the Grenzer, who also managed to finish off a section of Prussian battalion guns. With things starting to look dicey on the right flank, Braun orders the Beyer Grenadiers on the left flank to turn about and be prepared to stabilise the situation on the right.
 Above: Würzburg’s Reserve Infantry Division finally advances past the Hungarian Nikolaus Esterházy (on the left). The Prussian 12pdrs on the Dürren-Berg have inflicted massive casualties on the Hungarians and have knocked out another Imperial battalion gun section, but the Prussian 12pdrs have finally been silenced by the combined fire of the 1st Banal Grenzer and the remaining Austrian battalion guns. The loss of the 12pdr battery is a massive blow to Braun.
 Above: With the defeat of the Austro-Imperial cavalry, Kleist considers leading his cavalry in a wide ride around the woods, to overrun the Imperial left flank. However, this request is vetoed by Hülsen, who orders the incredulous Kleist to resume his defensive posture in the centre. While his hussars rally following their combat (all the while being sniped by Grenzer), the dragoons turn about to resume their former positions.
 Above: The reason for Hülsen’s caution soon becomes apparent; Zedwitz’s Austro-Imperial cuirassier brigade have arrived in the centre, having marched from their former position on the right flank. To add to Kleist’s problems, the Schorlemmer Dragoons are reporting that they are suffering a constant trickle of casualties from the Imperial heavy guns at Zausswitz. However, the Imperial infantry are also getting a pasting from long-range Prussian heavy artillery fire.
 Above: As Würzburg’s division advances, the jaws start to close on the Dürren-Berg.
 Above: Even though the situation is turning in their favour, Kleefeld and Würzburg still need Guasco’s Grenadier Corps to join them in crushing the Prussian position. But where are they?!
 Above: Guasco has spent all this time stationary on the Otten-Berg, observing the fall of shot as his artillery hammers the Prussian Lossow Grenadiers in Clanzschwitz. However, Guasco’s two right-hand grenadier battalions have been suffering heavy losses from long-range Prussian artillery fire. But as it happens, an ADC has just arrived at Guasco’s headquarters, demanding that the Grenadier Corps advance at once on the Dürren-Berg!
 Above: It’s entirely possible that the battle for the Dürren-Berg may well be over long before Guasco’s grenadiers arrive! The Austrians are moving into position for a massive, coordinated charge, but for now seem content to trade volleys. However, they don’t have it all their own way, as the 1st Battalion of the Hungarian Nikolaus Esterházy Regiment is broken by fire from the 1st Battalion of the Braunschweig-Bevern Regiment.
 Above: At Clanzschwitz, the Lubath Grenadiers, having suffered heavy losses from Guasco’s artillery, make a break for it and attempt to march to Braun’s aid. However, Würzburg spots the move and sends his grenadiers and remaining battalion guns to interdict their march.
 Above: At long last, Guasco’s division starts to move forward. Having driven the Prussian grenadiers out of Clanzschwitz, Guasco’s artillery switches its fire to the Dürren-Berg.
 Above: The situation for Braun’s Prussians on the Dürren-Berg is grim. On the right flank, the ex-Saxon Hauss Fusiliers, under intense pressure from the Grenzer in the woods, perhaps unsurprisingly, break and run. Rather more alarmingly, the 2nd Battalion of the Braunschweig-Bevern Regiment, ordinarily a good, solid unit, were holding their own against the Austrian Macquire Regiment to their front despite losses caused by ‘overs’ from the earlier artillery duel. However, the sudden storm of shot from Guasco’s artillery finally breaks them. The Beyer Grenadiers wheel into line on the left flank to hold the line, but the sudden loss of two battalions (on top of the previous loss of two artillery units) demoralises Braun’s command.
 Above: Another view of Die Kleine Rund-Spitze. In the background, Kleist’s cavalry are returning to their original positions, but are being battered by Imperial heavy guns and Grenzer. But where is the Imperial cavalry threat…?
 Above: Kleist curses foully in Low German, as it soon becomes apparent that the enemy cuirassiers are content to sit and wait for the artillery and Grenzer to soften up the Prussian cavalry!
 Above: As expected, the main Prussian position remains completely un-engaged. It would be suicide for a good army to mount a frontal assault on these earthworks, let alone a poor-quality one like the Reichsarmee! The Prussian heavy guns have done some damage to the Imperial lines, but nowhere near enough. In the meantime, the Manstein Grenadiers, garrisoning the outlying fortified village of Klein-Rügeln, have been taking a pasting from Imperial guns.
 Above: At last the Imperial infantry begin to move. The Imperial Right Wing has formed columns to the right (indicated by the MDF arrows) and is marching off to the flank, over the Reussen-Berg. Although they’ve attracted a lot of long-range gunnery, only one unit, the 4th Battalion of the Kurmainz Regiment, has been broken by the artillery and casualties are otherwise light.
 Above: Two excellent units lead the columns; the Hessen-Darmstädt Regiment (single-battalion regiment with Swiss-style flag) leads the 1st Line, the remained of which is formed by theKurmainz Regiment. The 2nd Battalion of the Pfalz Garde-Regiment zu Fuss (blue flag) leads the 2nd Line, followed by the two battalions of the Pfalz Effern Regiment and two single-battalion Köln regiments; Nothaft (Leib) and Wildenstein.
 Above: The Imperial Left Wing remains stationary for the time being. The 1st Line is formed from the three battalions of the Kurbayern Regiment (nearest the camera), then the 1st Battalion of the Swabian Alt-Württemberg Regiment and the two battalions of the Rot-Würzburg Regiment. The 2nd Line is formed from two battalions each of the Swabian Rodt Regiment, the Swabian Baden-Baden Regiment and the Mainz Lamberg Regiment.
 Above: Back at the Dürren-Berg, Würzburg and Kleefeld, increasingly frustrated at the dogged resistance shown by Braun’s Prussian infantry, order a general assault. On the left, the 1st Battalion of the Blau-Würzburg Regiment charge out of the woods, but are stopped dead at the wood’s edge by the fire of the Lubath Grenadiers. The pattern is repeated all along the line, as the surviving battalion of the Bevern Regiment halts the charge of the surviving Hungarian battalion and the Beyer Grenadiers throw back the Luzan Regiment. On the right of the Austrian line, the Macquire Regiment look certain to capture the last detachment of Prussian battalion guns, but they are frustrated by the Lossow Grenadiers, firing in support of the gunners.
 Above: However, Prussian jubilation is short-lived, as the supporting Austrian battalion gunners soon destroy the Lossow Grenadiers with point-blank canister fire! The vengeful Macquire Regiment soon overruns the Prussian guns and wheels left to turn the Prussian flank. A battalion of the Imperial Pfalz-Zweibrücken Regiment reinforces this success. The rest of the Austro-Imperial line charges again without success, but with their flank turned, the Prussians are now doomed.
 Above: With his position collapsing, Braun looks behind him, hoping to see salvation in the form of Kleist’s cavalry… However, Kleist has his own problems. His dragoons have suffered heavy losses from Imperial artillery fire while attempting to hold the centre, while his hussars have also suffered losses thanks to stray rounds bouncing through the dragoon lines and the ever-present Grenzer sniping from the woods. Kleist judges that Braun is doomed and that the army will now have to retreat. Hülsen will need Kleist’s cavalry to screen that retreat, so it would be folly to waste them now on a doomed charge.
 Above: However, Kleist’s assessment is correct… The Austrian and imperial infantry charge for third time and once again receive withering fire from the Prussian defenders as they climb the slopes of the Dürren-Berg. The 1st Battalion of the Blau-Würzburg Regiment this time is completely broken by the fire of the Lubath Grenadiers and they are soon followed by the 2nd Battalion of the Nikolaus Esterházy Regiment, who have dashed themselves to pieces against the indomitable 1st Battalion of the Bevern Regiment! The Italians of the Austrian Luzan Regiment are halted once again by the Beyer Grenadiers.
 Above: However, despite having destroyed the enemy to their front, the Lubath Grenadiers are surprised to find themselves suddenly attacked from the rear by the Macquire Regiment, who have charged over the crest of the Dürren-Berg! There is little quarter for the grenadiers as they are completely destroyed. The Beyer Grenadiers meanwhile, are charged in the flank by the Pfalz-Zweibrücken Regiment and are similarly annihilated. The Pfalz-Zweibrücken Regiment has the dubious honour of being judged the worst regiment in the Reichsarmee, but every dog has his day…
 Above: With the Prussian cavalry retiring, the Grenzer keep on the pressure.
 Above: “Weglaufen!” Thankfully for Kleist, ADCs arrive from Hülsen, telling him to do exactly what he’s already doing… Kleist ensures he gets his orders in writing and deposits them safely in his sabretache for future Courts-Martial…
 Above: At last, the Imperial Left Wing, plus Zedtwitz’s cuirassiers, begin to advance past Zausswitz.
 Above: The Imperial Right Wing continues its march out to the right flank. Zweibrücken has assessed that the town of Strehla is the weak-point in the Prussian line; it’s only lightly-defended and although fortified, doesn’t have anything like the concentration of artillery that the main line possesses.
 Above: The Imperial artillery meanwhile, has massively reduced the defences of Klein-Rügeln (represented by the half-timbered house forward of the main Prussian line). The garrison, consisting of the Manstein Grenadiers are on the verge of breaking and their supporting battalion guns have been silenced.
 Above: All that stands between the Imperial infantry and the town is a single battalion of the Wunsch Frei-Infanterie-Regiment and a few companies of Jäger. If they can take the town, the entire Prussian line will be severely compromised.
 Above: However, with the fall of the Dürren-Berg, Hülsen has already accepted defeat and with Kleist’s cavalry largely still intact, his army should be able to disengage and withdraw unmolested to the next defensive position at Wittenberg.
 Above: An overall view of the final situation. All-in-all a total balls-up by the Prussians… As is patently obvious, I should have been FAR more aggressive with Kleist’s cavalry and give them orders to attack on the right; either from the outset, or as soon as Hülsen could get an ADC to them, once the Austrian flanking cavalry had been defeated. Instead I allowed myself to be distracted by the Imperial cuirassier division, which to be honest, had no chance of making it through the storm of 12pdr shot that would have been heading their way, had they advanced!

 I actually painted these a few months ago, over Christmas and New Year, in preparation for our January

 Above: HR 4 had a number of other unofficial nicknames, including Bählämmer (‘Bleating Lambs’), due to their distinctive white pelisse jackets. It must therefore have come as relief to later be referred to as Wölfe im Schafspelz (‘Wolves in Sheep’s Clothing’) or simply Wölfe (‘Wolves’) thanks to their impressive fighting reputation.
 Above: The reason these are very large 24-figure units, as opposed to my usual 12 or 16 figures, is that most Prussian hussar regiments were very large, comprising ten squadrons apiece. Each hussar squadron started the war with around 115 men, though this number was increased during the war, varying by regiment. In 1759 the Puttkamer Hussars were recorded as having around 145 men per squadron. Most hussar squadrons were around the same strength, though the squadrons of HR 5 and HR 7 attached to Ferdinand of Brunswick’s Western Allied Army were around 25% stronger. Dragoon and cuirassier squadrons were routinely around 25% stronger than hussar squadrons. Tactically, these large regiments usually operated as two five-squadron battalions which would usually be grouped together, though could operate completely independently.
 Above: The uniform of HR 4 consisted of a light blue dolman jacket, decorated with mixed light blue & white lace and braid and white metal buttons. Collar and cuffs were the same colour as the dolman. Sources disagree as to whether the barrel-sash was red & white or light blue & white. Breeches were buff and were worn with light blue charivari leggings edged with mixed light blue & white lace. The pelisse was white, edged with white fur and decorated with more mixed light blue & white braid and white metal buttons. Headgear was a plain black mirliton cap, dressed with white cords and a white tassel at the end of the ‘wing’. The sabretache was white, edged light blue and with the royal ‘FR’ cypher in light blue. The carbine cross-belt was white, while the sabre-scabbard and sabretache were suspended from red leather belts. The shabraque was white, edged with light blue vandycking.
 Above: Officers of HR 4 had silver buttons and lace, as well as a silver lace ‘frame’ around the breast-braiding, silver edging to the ‘wing’ of the mirliton cap, silver cap-cords, a silver barrel-sash and silver edging to the vandycking on the shabraque. Officers also had a different pattern of sabretache, being light blue with a white or silver zig-zagged edge and a white shield bearing a black eagle, with a gold crown above. Officers also had a light blue rosette on the front of the mirliton and black fur edging to the shabraque. NCOs wore much the same uniform as the rank-and-file, though with the light blue rosette and mixed black & white cords on the mirliton and silver laced edging to the cuffs. Trumpeters had lace shoulder-wings and white lace edging to the ‘wing’ of the cap, as well as a white plume (Bleckwenn shows light blue threads mixed into the white plume).

 Above: Like most other Prussian hussar regiments, HR 6 had ten squadrons and like HR 4 was recorded in 1759 as having around 145 men per squadron. I’ve therefore represented the regiment as 24 figures, grouped tactically into two 12-figure battalions.
 Above: The uniform of HR 6 comprised a brown dolman with yellow collar, cuffs, lace and braid with brass buttons, brown charivari edged yellow and a brown pelisse with white fur edging, yellow braid and brass buttons. Breeches were buff. The headgear was a plain black mirliton cap with white cords and a white tassel at the end of the wing. Belts were same as those for HR 4. The sabretache was brown with yellow lace edging and the ‘FR’ cypher in yellow.
 Above: Officers of HR 6 had gold lace and braid in lieu of yellow, including a scalloped gold lace ‘frame’ around the breast-braid. Cap-cords were gold and the ‘wing’ was edged and tasselled in gold. Barrel-sash was silver. The officers’ pattern sabretache was brown with yellow vandycking around the edge and a central white shield with black eagle and gold crown above. Another version shows gold wreaths instead of the yellow vandycking. NCOs had the same uniform as the rank-and-file, though with gold lace around the cuffs of the pelisse, mixed black & white cap-cords and a yellow rosette on the front of the cap. Trumpeters had mixed white & yellow lace and braid, lace shoulder-wings, gold cap-cords, gold lace edging to the ‘wing’ and a yellow plume with black threads mixed in.
 Above: When Werner was promoted to Generalmajor in 1758, he adopted a tricorn hat decorated with a black cockade and edged with gold lace and white ostrich feathers. He also adopted a red shabraque with rounded corners, silver lace edging and silver ‘scalloping’. The whole ensemble is shown on the right.
 Above: After painting HR 6, I vowed I would never paint another hussar… However, I have all the breaking-strain of wet tissue-paper and as mentioned above, I’ve been painting elements of Kleist’s Freikorps for tomorrow’s Strehla game, including Kleist himself and half of the Kleist Freikorps Hussar Regiment. I’ll cover these fellas in detail in a future article, but I couldn’t resist showing them off! 🙂 They were also sometimes known as the ‘Jung-Kleist’ Hussars, to avoid confusion with the regular ‘Kleist’ Hussar Regiment (HR 1), who also happened to have Kleist as their Chef!
 Above: The Kleist Freikorps Hussars had possible the most GOPPING uniform of the Prussian Army, being a combination of orangey-red and yellow-green… They should certainly stand out on the table! Galloping alongside is ‘Green’ Kleist himself, who wears the two-tone green uniform of HR 1.
 Above: I profiled the
  Above: If you’re looking for a source of free SYW flags to print yourself,
  Above: Another Imperial auxiliary regiment to recently get a new flag is the II. Battalion of the Pfalz (i.e. the Palatinate)
  Above: This new flag comes from the superb range of uniform plates and flags designed by Frédéric Aubert of
  Above: And so to the new regiments, starting with the
  Above: After Rossbach, the Blau-Würzburg Regiment continued to serve with the Reichsarmee, consistently maintaining its reputation as a solid regiment when so many other regiments failed in their duties. In 1760 the Rot-Würzburg Regiment (along with Mainz-Lamberg) were also assigned to support the Reichsarmee and so both Würzburg regiments fought at the
 Above: The uniform of the Blau-Würzburg Regiment consisted of Austrian-style white coat and smallclothes, with dark blue lapels, cuffs, linings and shoulder-strap and no collar or lace. Buttons were white metal. Neck-stocks were red. Hats had white lace and pompoms and black cockades. Grenadiers wore bearskins with a blue bag, piped white. Officers had silver hat-lace and yellow sashes. Drummers had the same coat, though with dark blue swallows’-nests at the shoulders.
 Above: I must confess that my second ‘new’ regiment, the
  Above: Saxony was very quickly knocked out of the war by Frederick’s invasion of 1756, with the Saxon Army being conscripted en masse into the Prussian Army. However, a number of regiments remained within Saxon-ruled Poland and the King of Saxony placed a number of these under Austrian command, namely the
  Above: On campaign the Carabiniersgarde typically wore a pale straw coller (also called a collet or ledercoller), being a tight-fitting buckskin coat with short tails, very much like the style of coat worn by Austrian and especially Prussian cuirassiers. A red waistcoat was worn beneath the coller. A black-enameled cuirass edged with red cloth, was worn over the coller, being secured at the back with white straps. The coller had red cuffs, pale straw shoulder-straps and a strip of red-white-red lace down the edge of both front-seams, which then continued around the edge of the otherwise pale straw turnbacks.

 Following my recent flurry of Napoleonic units (namely the
  Above: I must confess that this first unit was painted quite a bit earlier than December! In June last year we were preparing to do our large refight of the
  Above: The subject of Austrian artillery uniform during the mis-18th Century is an insanely complicated subject, with sources being utterly at odds with each other, describing dark brown, light brown, grey, dark grey, ‘wolf grey’ and even white coats. The majority view however, now seems to be that the uniform was brown, being a much paler, greyish shade of brown than the darker, earth-brown shade used during the Napoleonic Wars and FAR paler than the dark coffee-brown shade used during the mid-19th Century. The shade was known as Rehrbraun or ‘Fawn Brown’. There is also some suggestion that the descriptor ‘Wolf Grey’ does actually mean a light, greyish-brown. I use Humbrol 29 Dark Earth, with quite a lot of white mixed in.
 The cuffs were Feuer-rot or ‘Fire Red’, being a bright shade of red. There was no collar or lace, apart from the hat-lace, which was yellow. The shoulder-strap was fawn brown, buttons were yellow metal and the neck-stock was black. Gaiters were black and the powder-flask was suspended from a yellow-black cord worn over the left shoulder, the tassel of which often looked like a fringed epaulette on the shoulder. A triangular black primer-box with a brass plate was worn on the belly and on campaign could have a white linen cover.
 Above: In January I realised that despite having painted all that artillery for the Leuthen game, I STILL didn’t have enough guns for our forthcoming Kolin refight! I therefore ordered some Austrian 3/6pdrs from Eureka and in a moment of fuckwittery, ordered some more Austrian gunners, despite still having a gigantic stash of Old Glory figures (in the meantime I’ve used my stash to provide crews for all my Reichsarmee and Schamburg-Lippe guns and I STILL have 17 figures left)! Ah well, the Eureka gunners are lovely figures.
 Above: The Austrians always painted their gun-carriages a deep yellow-ochre shade that actually seems to have been more yellow than ochre. Ironwork was painted black. The standard Liechtenstein Pattern guns had polished brass barrels.
 Above: My old Austrian army headquarters group was starting to show its age and most worryingly, the horses were starting to break at the ankles. I therefore needed to do a new staff group in time for the Kolin game. These fellas were therefore done at breakneck-speed on the day before the game. They’re all Eureka figures.
 Above: Two staff officers discuss what type of biscuits to have in the Mess during Afternoon Tea. The troops at the back are the newly-painted Pfalz ‘Effern’ Regiment; I’ll cover them in detail in a future article.
 Above: With the glue under the flock still drying, Feldmarschall Daun establishes his headquarters atop the Przerovsky Hill, during our Kolin refight. The cloaked general is an Old Glory 15s figure painted by me. The two hussar couriers are Old Glory 15s conversions painted many years ago by Gareth Beamish. The Austrian infantry are Lancashire Games figures, again painted by Gareth, with new flags by Fighting 15s,
 Above: For our Leuthen refight I needed a couple of Hungarian generals (Nádasdy and Forgách). I had some spare senior hussar officers/generals in my stash, which I think came out of the Old Glory 15s Austrian Generals pack back in the 90s, when they had 30 mounted figures per pack (nowadays you get nine figures in the pack and I think they’re a random selection from the original 30).
 As I was on a roll with the reasonably obscure
  As briefly mentioned during my discussion of my
 Above: As was the case with their grand-dads during the Seven Years War, the artillery arm of the Swedish Army wore what was quite possibly the most boring uniform of the age…
 Above: These are most definitely not the best models in the world, but they look the part with their distinctive Swedish round-hats, resplendent with yellow plumes and cockades! 🙂
 Above: There is some disagreement regarding the colour of Swedish gun-carriages. during the 18th Century they had traditionally been painted light blue with yellow fittings (whether yellow metal or painted yellow is a matter of debate), though the fittings were painted black by the time of the Napoleonic Wars.
 Above: As mentioned above, I decided to go rummaging through the AB figures Lead Dungeon for my General Stedingk. I wanted an officer in a cocked hat with a tall plume and decided to use a spare British officer figure.
 I’m happier with his entourage, however. I used two 1806 Prussian cavalry figures; an officer of hussars wearing mirliton and an officer of dragoons.
 It seems that the Mörner Hussar Regiment probably deployed to Germany wearing mirlitons, but then transitioned to shakos (or perhaps the mirlitons were retained for full dress?). Much the same thing happened in the infantry, with round-hats in many units apparently being replaced during the campaign by both French-style and Russian-style shakos.
 Above: The third figure in the group is painted as an officer of the Skånska Carabinier Regiment. Nafziger and others list this regiment as being present in 1813 (though not at Leipzig), though other source suggest it may have been converted to hussars in 1807. To be honest, I lost the will to live by this point and given the general blue & yellow scheme, he could be an officer of the Swedish general staff (for whom I’ve never found any uniform information), so what the heck… 😉
 With over 2,000 unpainted
  The new uniform was very modern in styling, being a dark green double-breasted jacket with short tails, pointed cuffs, plain shoulder-straps and closed collar, dark green long trousers, a shako with plume and cords, a curved steel sabre and scabbard suspended from a white waist-belt and white cross-belts worn over the left shoulder, supporting a black cartridge-pouch and carbine and dark green dragoon-style horse furniture with curved corners and no holster-covers. All regiments had white ‘metal’, a white full-dress plume, green cords, flounders and pompom and an orange and black cockade fixed with a white strap. Sources show both white and yellow metal chinscales. The pouch-plate and cross-belt buckles were brass.
 Officers had silver buttons, shoulder-scales, crossbelt, cords, flounders, waist-sash and shabraque-cypher. They also had a black and orange base to the plume and a silver pompom with orange centre, bearing the imperial cypher in gold. As in the rest of the army from 1812 onward, officers were probably permitted to wear white camelhair sashes, cords, etc, in order to reduce personal cost. NCOs had silver lace edging to collar and cuffs, a quartered orange/white pompom and an orange tip to the plume. Trumpeters had extensive white lace decoration on the jacket, plus a red plume.
 But which regiment to paint? During the Spring 1813 Campaign, George Nafziger mentions the ‘Lithuania Chasseur à Cheval Regiment’ serving in Lanskoi’s Hussar Division (Trubetzskoi’s Cavalry Reserve) at Lützen, being brigaded with three hussar regiments. At Bautzen the same regiment is listed with the same brigade (then commanded by Paradovsky) and the Tchernigov Regiment had also appeared as part of Pantschuild’s brigade (Prince Eugene of Württemberg’s Russian II Corps).
 Given that the ‘Lithuania Regiment’ is listed by Nafziger as being the first to fight at Lützen and also fought at Bautzen, Katzbach and Leipzig, they would be the obvious choice for painting. However, the astute will by now have noticed that there was no Lithuania Mounted Jäger Regiment! Nafziger has clearly confused ‘Livonia’/’Livland’ with ‘Lithuania’. There was no Lithuania Dragoon Regiment, so there could not therefore have been a Lithuania Mounted Jäger Regiment. There was however a Lithuania Horse Regiment, who in 1807 became the Lithuania Uhlan Regiment, but the Lithuania Uhlans are listed elsewhere in 1813 and the Livonia Mounted Jäger Regiment is completely missing from the orders of battle.


 First an apology for it being a bit quiet here this last month! I haven’t managed to do any wargaming since our
  Above: Smallwood’s Maryland Battalion was raised in January 1776 by Colonel William Smallwood as state troops. However, on 6th July of that year the regiment was attached to the Continental Army, where it was brigaded with Colonel Haslet’s Delaware Battalion. This began a long partnership between the two units, who became regarded as something of an elite corps. Both battalions were formally adopted into the Continental Army on 17th August 1776 and Smallwood’s Marylanders distinguished themselves only two weeks later during the Long Island Campaign, where they single-handedly mounted the rearguard against vastly superior numbers. However, the battalion was virtually wiped out in this heroic action and was reconstituted during September by absorbing various Maryland Independent Companies. The unit officially became the 1st Maryland Continental Regiment in January 1777.
 Above: Although it seems rather incongruous to have an American Patriot dressed in red, Smallwood’s Marylanders definitely went to war in 1776 dressed in this manner; red coats with buff facings and smallclothes. However, there is good evidence to suggest that some or all of the unit might already have been wearing hunting shirts (variously described as buff or violet) by the time of their heroic action on Long Island. Uniformity probably broke down completely following and the absorption of other units in September 1776 and following the General Order of 1779 they were largely wearing blue coats with red facings, line the 2nd Maryland Continentals shown below (and in the famous painting of the 1st Maryland Continentals at Guildford Courthouse at the top of this article). Other units also wore red coats (often from captured British stocks), with Forman’s Additional Continental Regiment in 1777 having the same combination with buff facings and smallclothes, so this unit can do double-duty.
 Above: Smallwood’s Marylanders are
  Above: The 2nd Maryland Continental Regiment had a far shorter history than the 1st Maryland Regiment, having been formed in January 1777 from various Maryland Independent Companies then serving with the Continental Army.
 Above: The 2nd Maryland Continental Regiment seems to have worn a blue coat with red facings, white tail-turnbacks, white metal buttons and white hat-lace for much of its existence. This uniform was formalised (with white smallclothes) for all Maryland, Pennsylvania, Delaware and Virginia regiments with the General Order of 1779 (with wildly varying degrees of success). I’ve thrown a couple of red turnbacks and hunting-shirts in, along with other items of headgear and unlaced hats to represent ‘vagaries of supply’. The smallclothes were recorded as russet-brown during the regiment’s early days, though buff smallclothes also appear in paintings, as do dark brown waistcoats with blue breeches. Yet another depiction of the 2nd Maryland Regiment from 1781 shows them wearing earth-brown coats and breeches with red facings, white turnbacks, white metal buttons and white waistcoats. I’ve mainly gone with the blue and brown theme, though with a few men wearing randomly-coloured hunting shirts, ‘overhauls’ and ‘American trowsers’.
 Above: The 2nd Maryland Continental Regiment is my most recently-painted American unit. I painted it last Autumn, using
  Above: Colonel John Haslet’s Delaware Battalion was raised in early 1776 and in August of that year was assigned to the Continental Army in Long Island, being brigaded with Smallwood’s Marylanders, with whom they were to have a long association. Both battalions fought well during the Battle of Long Island, though the Delawares managed to escape without the catastrophic casualties suffered by the Marylanders and were therefore still fit to fight for the rest of campaign, fighting especially well at White Plains.
 Above: The Delaware Continentals are possibly unique in the annals of the Continental Army, in that they somehow managed to maintain a reasonably consistent uniform throughout the war. In 1776 they are recorded as having a blue coat with red facings, white turnbacks and white metal buttons (gold for officers), with white smallclothes. By 1778 they seem to have added yellow hat-lace to the ensemble and seem to have remained dressed much in this manner for the rest of the war, aside from some suggestion of brown breeches. The Delawares were therefore in the fortunate position of almost matching their stipulated uniform of the General Order of 1779.
 Above: For the Delaware Continentals I used Perry Miniatures figures and painted the flag myself. As usual, I mixed in a few men dressed in hunting shirts and ‘overhauls’. This was actually the last Continental regiment I painted before my ‘Long Pause’ of 2009. The Perry ‘Ragged Continentals’ pack had just been released at the time, so I included a few of those figures.